Blog

  • Sweet Food Traditions Worth Trying at Home

    Sweet Food Traditions Worth Trying at Home

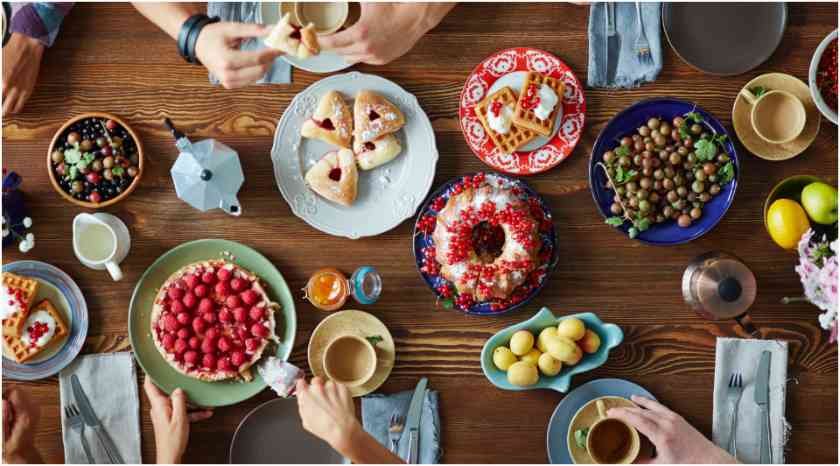
    Whenever I explore food from another culture, desserts are often what I remember most. A sweet can carry a family ritual, holiday memory, or centuries-old custom in a single bite. 

    That is why I enjoy discovering sweet food traditions worth trying at home rather than simply collecting recipes. Recreating them helps me understand why a dish matters, how people share it, and which details make it special.

    Why Traditional Sweets Make Home Baking Better

    International desserts introduce new flavors, textures, ingredients, and rituals. Cardamom, glutinous rice, phyllo, condensed milk, dates, coconut, and nuts can make familiar techniques feel different.

    Choose traditions that do not require professional equipment. Learn the story, identify the defining technique, and make a practical home version without chasing restaurant-style presentation.

    12 Global Sweet Traditions to Recreate

    12 Global Sweet Traditions to Recreate

    Swedish Fika With Cardamom Buns

    Fika is a Swedish pause for coffee, conversation, and something sweet. Fragrant cardamom buns suit the ritual perfectly. Make them ahead, warm them lightly, and serve with coffee for an easy afternoon tradition.

    Japanese Mochi for New Year

    Mochi has strong ties to Japanese New Year celebrations and symbolizes good fortune. Traditional pounding is demanding, but glutinous rice flour offers an easier home method. Try small mochi with sweet red bean filling.

    Indian Kheer for Celebrations

    Kheer is a creamy milk pudding prepared for festivals and family occasions across India. Rice, milk, cardamom, nuts, raisins, or saffron create its comforting character. Slow cooking develops the best texture.

    Turkish Baklava for Hospitality

    Baklava combines crisp phyllo, nuts, butter, and fragrant syrup. It is associated with hospitality and celebrations. Ready-made phyllo saves time, while proper syrup absorption helps preserve the crisp layers.

    French Crêpes for Candlemas

    In France, La Chandeleur is traditionally celebrated with crêpes. Their round golden shape has been linked with prosperity and the returning sun. A simple batter makes this tradition easy to recreate.

    Mexican Pan de Muerto

    Pan de muerto is associated with Día de los Muertos and remembrance of loved ones. The enriched bread is often scented with orange or orange blossom and decorated with bone-shaped dough.

    Thai Mango Sticky Rice

    Thailand’s mango sticky rice balances chewy glutinous rice, ripe mango, coconut milk, and lightly salty coconut cream. The ingredient list is short, but correctly steaming the rice makes a noticeable difference.

    Brazilian Brigadeiros for Parties

    Brigadeiros are a classic feature of Brazilian birthday celebrations. Condensed milk, cocoa, and butter cook into a soft mixture rolled into small balls. Their simple method makes them ideal for beginners.

    Chinese Tangyuan for Togetherness

    Tangyuan are glutinous rice balls enjoyed during the Lantern Festival and family occasions. Their round shape represents togetherness. Black sesame or peanut fillings make the soft dumplings especially comforting.

    British Afternoon Tea With Scones

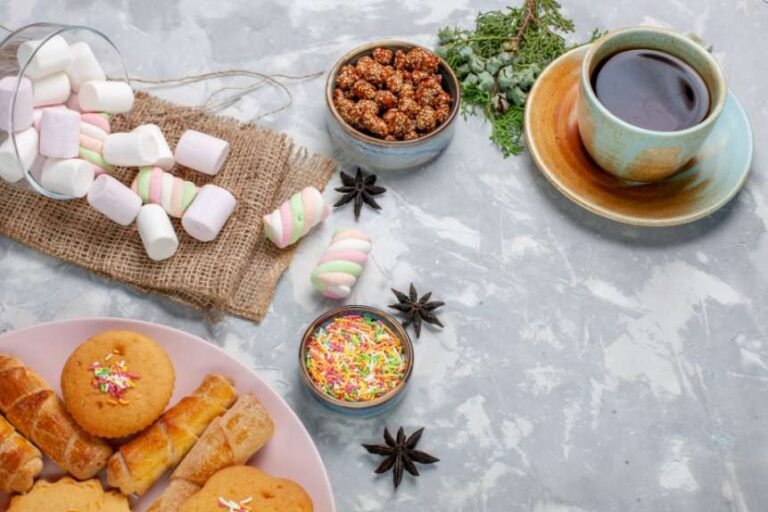
    Afternoon tea turns sweets into a leisurely social ritual. Fresh scones with jam and clotted cream are a familiar centerpiece. Focus on tender scones, properly brewed tea, and relaxed conversation.

    Italian Tiramisù for Shared Gatherings

    Tiramisù layers coffee-soaked ladyfingers, mascarpone filling, and cocoa. Chilling improves its texture, making it excellent for gatherings. Preparing one large dish also keeps serving simple.

    Middle Eastern Ma’amoul for Festive Occasions

    Ma’amoul are filled cookies enjoyed across the Middle East during important celebrations. Date paste, pistachios, or walnuts sit inside tender dough. Traditional molds create patterns, but hand shaping works too.

    How to Make Global Desserts Easier at Home

    How to Make Global Desserts Easier at Home

    Read the recipe before shopping, especially when it uses specialty ingredients. International grocers often stock glutinous rice, rose water, orange blossom water, dates, sesame, and regional flours. When one ingredient defines the dessert, substitute it only when the recipe recommends one.

    On busier days, quick dessert recipes under 30 minutes can also be useful for choosing simpler sweets that still let you explore new flavors without a long preparation process.

    For sweet food traditions worth trying at home, technique matters more than decorative perfection. Learn one defining step, whether steaming sticky rice, handling phyllo, chilling tiramisù, or slowly cooking kheer. That detail usually contributes more authentic character than complicated plating.

    Host a Global Dessert Night

    Choose three sweets from different regions and serve small portions with suitable drinks. Before tasting each one, share a short explanation of its origin or celebration. This turns dessert into an experience instead of a random collection of recipes.

    For a more relaxed, shareable setup, learning how to create a dessert grazing board can help you arrange several international sweets, fruits, and small bites in one inviting display.

    You can also build the menu around festival sweets, coffee-friendly desserts, family celebration foods, or make-ahead treats. A theme creates a clear connection between dishes and keeps planning manageable.

    Frequently Asked Questions

    1. What are the easiest sweet food traditions worth trying at home?

    Brigadeiros, crêpes, kheer, mango sticky rice, and scones are approachable because they use manageable techniques and relatively short ingredient lists.

    2. Which international desserts can be made ahead?

    Tiramisù, baklava, kheer, brigadeiros, and filled cookies work well in advance. Several improve after resting as flavors blend and textures settle.

    3. How can traditional desserts taste more authentic?

    Prioritize the defining ingredient and technique. Correct spices, syrups, rice varieties, fillings, and preparation methods usually matter more than elaborate decoration.

    4. Where can I find unusual dessert ingredients?

    International grocers, specialty shops, and larger supermarkets often carry the basics. Check cultural-food aisles before assuming an ingredient is hard to find.

    A Sweeter Way to Explore the World

    I think the most memorable desserts are the ones that come with a story. Making a traditional sweet at home gives me a reason to understand the celebration, family ritual, or everyday custom behind it instead of treating it as just another recipe.

    I would begin with one tradition that sounds delicious, learn its key technique, and share it. A homemade dessert cannot replace travel, but it can bring another culture into an ordinary afternoon.

  • Celebration Ideas at Home That Feel More Special Than Going Out

    Celebration Ideas at Home That Feel More Special Than Going Out

    There was a time when celebrating meant making reservations weeks in advance, dressing up, and hoping the restaurant lived up to the occasion. Lately, though, more people have realized that some of the most memorable moments happen much closer to home. Without noisy dining rooms, rushed service, or crowded spaces, it’s easier to focus on what really matters—good food, meaningful conversations, and spending quality time with the people you care about.

    The best part is that hosting at home doesn’t have to feel ordinary. With a little planning and a few thoughtful touches, your living room, backyard, or dining space can feel just as exciting as any venue. Whether you’re planning a birthday celebration at home, marking an anniversary, celebrating a promotion, or simply bringing friends together, creating an experience is often more memorable than booking a table.

    Why Home Celebrations Feel More Meaningful

    Why Home Celebrations Feel More Meaningful

    One of the biggest reasons people are embracing celebration ideas at home is the freedom to make every detail personal. Instead of adapting to someone else’s setting, you get to create an atmosphere that reflects your style and the occasion.

    A home celebration also encourages genuine connection. Guests aren’t distracted by long waits, loud music, or other diners sitting just a few feet away. Conversations last longer, laughter feels louder, and everyone settles in without constantly checking the time.

    There’s also something comforting about familiar surroundings. People naturally relax in a home environment, making even small gatherings feel warm and welcoming. Those little moments—sharing stories around the dinner table, playing games after dessert, or lingering over coffee—often become the memories everyone talks about long after the celebration ends.

    Set the Mood Before Guests Arrive

    Creating the right atmosphere starts long before the first guest knocks on the door. Small sensory details work together to transform an everyday space into something that feels special.

    Rethink Your Lighting

    Lighting has a bigger impact than most people realize. Instead of relying on bright overhead fixtures, layer different light sources throughout the room.

    String lights, candles, table lamps, and soft accent lighting instantly create a relaxed, inviting mood. If you’re using candles, choose unscented varieties around the dining table so they don’t compete with the aromas of your food.

    As evening settles in, softer lighting naturally encourages people to slow down, stay longer, and enjoy the experience.

    Choose a Simple Color Theme

    You don’t need elaborate decorations to make a strong impression. Picking one consistent color palette can make everything feel intentional.

    Matching napkins, fresh flowers, table runners, balloons, and candles create visual harmony without making the room feel cluttered. Neutral tones paired with one bold accent color often photograph beautifully while keeping the space elegant.

    Fresh greenery, seasonal flowers, and reusable décor can also help keep your celebration planning budget-friendly without sacrificing style.

    Appeal to More Than One Sense

    Great hosts think beyond what guests see.

    A carefully chosen playlist sets the pace for the evening, while a subtle signature candle near the entrance creates an immediate feeling that something special is happening. Comfortable seating, clean spaces, and thoughtful table styling all contribute to a guest experience that feels effortless rather than overdesigned.

    That same attention to detail matters in the kitchen too. If homemade desserts are part of the celebration, knowing how to measure flour correctly helps improve texture, consistency, and overall results, especially when baking cakes, cookies, or other treats for guests.

    These details aren’t expensive, but together they completely change how people experience your home.

    Turn Dinner Into the Main Event

    Turn Dinner Into the Main Event

    Food has always been the centerpiece of memorable gatherings, but the experience around the meal matters just as much as what’s served.

    Instead of preparing everything the traditional way, think about how dinner can become interactive.

    If you’re celebrating a milestone, hiring a private chef can create an unforgettable evening. Guests enjoy restaurant-quality dishes while you spend more time with them instead of standing in the kitchen. For smaller gatherings, you can recreate a similar feeling by carefully planning each course and presenting it with a little storytelling about the inspiration behind each dish.

    Dessert is also a great opportunity to make your gathering feel personal. If you’re baking instead of ordering, homemade cakes guests will keep talking about often become part of the celebration itself, giving everyone something to gather around before the first slice is served.

    Create Moments That Guests Will Remember

    Beautiful decorations are nice, but people rarely remember every centerpiece or balloon arrangement. What sticks with them is how the celebration made them feel. A few thoughtful activities can turn an ordinary gathering into something guests will talk about long after it’s over.

    Instead of leaving entertainment to chance, include something everyone can enjoy together. Set up a projector for a cozy movie night with gourmet popcorn, create a time capsule where guests write predictions or favorite memories, or invite a local musician for a short acoustic performance. If your group enjoys learning something new, a private mixology, sushi-making, or pottery session can become the highlight of the evening.

    Don’t overlook the little details, either. Personalized place cards, a signature mocktail, instant photo prints, or a playlist filled with meaningful songs help create a celebration that feels unique rather than copied from social media.

    Why the Best Celebrations Usually Happen Close to Home

    Why the Best Celebrations Usually Happen Close to Home

    The most meaningful celebrations aren’t defined by expensive venues or elaborate plans. They’re shaped by shared conversations, thoughtful hosting, and the feeling that everyone belongs. When you create a comfortable atmosphere, serve food made with care, and give guests opportunities to connect, home becomes more than just the location—it becomes part of the memory.

    Sometimes the simplest setting creates the biggest reason to celebrate.

    Frequently Asked Questions

    1. How can I make a home celebration feel more special?

    Focus on atmosphere, personalized details, interactive food, and activities that encourage guests to spend time together rather than simply watching an event.

    2. What are affordable celebration ideas at home?

    DIY decorations, potluck-style meals, game nights, movie nights, backyard picnics, and homemade desserts create memorable experiences without a large budget.

    3. What occasions work well for celebrating at home?

    Birthdays, anniversaries, graduations, baby showers, retirements, promotions, holiday gatherings, and even personal achievements can all be celebrated at home.

    4. How many guests are ideal for a home celebration?

    Smaller gatherings of 6–15 people often make conversations easier, reduce hosting stress, and create a more intimate experience.

  • Taste the World: Healthy Yogurt Desserts From Around the World

    Taste the World: Healthy Yogurt Desserts From Around the World

    Dessert is one of my favorite ways to explore another culture without leaving the kitchen. From saffron-scented strained yogurt in India to thick Greek yogurt drizzled with honey, traditional cuisines have transformed cultured dairy into wonderfully creamy treats for generations.

    What makes healthy yogurt desserts from around the world especially appealing to me is their versatility. Depending on the yogurt and recipe, they can provide protein, calcium, live cultures, fruit, nuts, and satisfying texture while using less heavy cream or butter than many conventional desserts. For US home cooks, most of the ingredients are also easy to find at supermarkets.

    Why Is Yogurt So Good for Healthier Desserts?

    Yogurt creates creaminess without requiring a rich custard or heavy frosting. Greek yogurt and other strained yogurts are particularly useful because removing some of the whey creates a dense texture that works well in puddings, parfaits, frozen desserts, and creamy fillings.

    Plain yogurt also lets me control sweetness instead of relying on heavily sweetened flavored varieties. Fruit, dates, honey, cardamom, cinnamon, citrus zest, nuts, and seeds can create plenty of flavor.

    However, I don’t assume that every yogurt dessert is automatically healthy. Added sugar, serving size, yogurt type, and toppings still matter. Some cooking methods may also affect live cultures, so it is better to evaluate the whole recipe than rely on the word “yogurt.”

    Which International Yogurt Desserts Are Worth Trying?

    Bhapa Doi: India’s Silky Steamed Yogurt Dessert

    Bhapa doi comes from Bengal and delivers a smooth, custard-like texture. Traditional recipes combine thick yogurt with sweetened milk before steaming or baking the mixture until set.

    Cardamom and saffron add warmth and aroma, while almonds or pistachios provide crunch. Some versions also feature mango.

    For a lighter home adaptation, I would start with thick strained yogurt or Greek yogurt and moderate the amount of sweetener. Date palm jaggery can introduce a distinctive caramel-like sweetness, although it remains an added sugar and should be treated accordingly.

    Giaourti Me Meli: Greece’s Yogurt With Honey

    Giaourti Me Meli: Greece's Yogurt With Honey

    Few desserts prove the power of simplicity better than giaourti me meli, which essentially means yogurt with honey.

    Thick Greek yogurt provides the creamy and tangy base. Honey brings sweetness, while walnuts add crunch and richness. Thyme honey is especially associated with Greek flavors, although US cooks can use whichever good-quality honey is readily available.

    I like adding berries, figs, peaches, or pomegranate when I want more fruit. Choosing unsweetened Greek yogurt also makes it easier to control the total amount of added sugar.

    Shrikhand: India’s Whipped Strained Yogurt

    Shrikhand is especially popular in Maharashtra and Gujarat and often appears during celebrations and festivals. Plain yogurt is traditionally strained until it becomes thick chakka, which is then whipped with sugar and fragrant seasonings.

    Saffron and green cardamom give shrikhand its unmistakable aroma, while pistachios and almonds add texture.

    Mango shrikhand, commonly called amrakhand, introduces ripe mango puree into the mixture. When I want a fruit-forward adaptation, ripe mango can provide plenty of flavor, allowing me to reduce rather than automatically eliminate the traditional sweetener.

    Mishti Doi: Bengal’s Sweet Fermented Yogurt

    Mishti doi differs from shrikhand because fermentation plays a central role in creating its distinctive texture and flavor. Milk is sweetened, cultured, and left to set.

    The result is creamy, gently tangy, and often characterized by caramel-like sweetness. Jaggery is commonly associated with some versions.

    For American cooks interested in traditional yogurt desserts, mishti doi is especially interesting because it demonstrates that cultured dairy can become dessert through fermentation rather than whipping or freezing. It also pairs naturally with discussions of Indian milk sweets without condensed milk, since both rely on traditional dairy techniques rather than modern shortcuts.

    Gâteau au Yaourt: France’s Everyday Yogurt Cake

    Not every yogurt dessert arrives in a bowl. France’s gâteau au yaourt is a simple home-style yogurt cake prized for its tender, moist crumb and straightforward preparation.

    Yogurt supplies moisture and mild tang, making the cake approachable even for relatively inexperienced bakers.

    I would keep the cake simple and use lemon or orange zest, berries, apples, or other fruit for extra flavor instead of covering it with heavy frosting. It remains cake, of course, but yogurt offers a clever way to create satisfying texture.

    Sweet Labneh With Fruit and Mint: A Levantine-Inspired Treat

    Sweet Labneh With Fruit and Mint: A Levantine-Inspired Treat

    Labneh starts as yogurt that has been strained until it becomes exceptionally thick, almost like soft cream cheese. It frequently appears in savory dishes throughout the Levant, but its tangy flavor also pairs naturally with sweet ingredients.

    For dessert, I like spreading labneh onto a plate and adding fresh figs, pomegranate seeds, berries, or orange segments. Mint provides freshness, while pistachios add crunch. A light drizzle of honey can balance labneh’s sharp tang.

    This combination is especially useful when you want a no-bake yogurt dessert that feels elegant without requiring complicated preparation.

    Mediterranean-Inspired Yogurt and Fruit Parfait

    A parfait gives US home cooks one of the easiest ways to experiment with Mediterranean flavors.

    Layer unsweetened Greek yogurt with berries, figs, oranges, dates, peaches, or pomegranate. Walnuts and pistachios contribute texture, while cinnamon, cardamom, or a small amount of honey can finish the dessert.

    Because you assemble it yourself, a parfait also makes portion size and added sweetness easy to control.

    Yogurt With Dates and Pistachios

    Dates and yogurt are a natural sweet-and-tangy pairing. Finely chopped dates distribute concentrated sweetness through thick yogurt, while pistachios create contrast.

    I sometimes add cardamom, cinnamon, or orange zest for extra aroma. The combination takes only minutes, making it particularly useful when I want an easy yogurt dessert without turning on the oven.

    Homemade Mediterranean-Style Frozen Yogurt

    Homemade frozen yogurt provides another easy alternative to store-bought frozen desserts.

    I prefer starting with plain Greek yogurt and adding strawberries, cherries, peaches, or mixed berries. Lemon zest brightens the flavor, while a modest amount of honey can soften the yogurt’s tang.

    Making it at home also gives you much more control over sweetness and toppings.

    Frozen Yogurt Bark: A Modern Global Favorite

    Frozen yogurt bark isn’t an ancient traditional dessert, but it has earned a place among modern yogurt dessert ideas because it is convenient and endlessly customizable.

    Spread plain Greek yogurt across a lined sheet, add berries, chia seeds, chopped nuts, or cacao nibs, then freeze it until firm. Break the frozen layer into irregular pieces before serving.

    The result is cold, crisp, colorful, and easy to store in the freezer for a quick dessert.

    Is Greek Yogurt Better Than Regular Yogurt for Desserts?

    Is Greek Yogurt Better Than Regular Yogurt for Desserts?

    It depends on what you’re making. Greek yogurt’s thick texture makes it ideal for parfaits, bark, creamy puddings, frozen yogurt, and many high-protein dessert recipes.

    Regular yogurt contains more moisture, which can work well in cakes and baked recipes. For traditional dishes, however, I recommend understanding the original preparation before making substitutions simply for convenience.

    When shopping in the US, check the Nutrition Facts label for protein and added sugars. If live cultures matter to you, also look for labeling that indicates their presence.

    How Can You Make Yogurt Desserts Healthier Without Losing Their Identity?

    I prefer small, thoughtful changes instead of completely reinventing a cultural recipe. Starting with plain yogurt, reducing excessive added sweeteners, using ripe fruit, and adding spices or citrus for flavor can make a meaningful difference.

    Nuts, chia seeds, fresh fruit, and cacao nibs can also contribute texture and flavor. Honey and dates may feel more natural than refined sugar, but they still contribute sugars, so portion size matters.

    Most importantly, a “healthy twist” should never erase what makes a traditional dessert recognizable.

    Frequently Asked Questions About International Yogurt Desserts

    1. What are the healthiest desserts to make with Greek yogurt?

    Plain Greek yogurt with fruit, yogurt parfaits, frozen yogurt bark, and lightly sweetened strained-yogurt desserts are practical options. Their overall nutritional value depends on the yogurt, added sweeteners, toppings, and serving size.

    2. Which countries are famous for traditional yogurt desserts?

    India has shrikhand, bhapa doi, and mishti doi, while Greece is well known for thick yogurt with honey. Yogurt and strained cultured dairy also appear widely across Middle Eastern, Mediterranean, Balkan, Central Asian, and European cuisines.

    3. Can I use Greek yogurt instead of heavy cream in desserts?

    Greek yogurt can replace some creamy ingredients in selected recipes, particularly dips, fillings, parfaits, and chilled desserts. It does not behave exactly like heavy cream when whipped, heated, or baked, so substitutions should match the recipe.

    4. Are yogurt desserts naturally high in protein?

    Not necessarily. Greek and strained yogurts often contain more protein than standard yogurt, but the amount varies by brand and recipe. Checking the Nutrition Facts label gives you a much more reliable answer.

    Take Your Dessert Spoon Around the World

    Exploring healthy yogurt desserts from around the world has reminded me how differently one simple ingredient can behave. Yogurt can become steamed Bengali bhapa doi, fragrant Indian shrikhand, Greek yogurt with honey, French cake, thick labneh, or crisp frozen bark.

    For US home cooks, these desserts provide an approachable way to explore global flavors with ingredients that are generally easy to buy. Start with good-quality plain yogurt, use fruit and spices creatively, respect traditional techniques, and make healthier adjustments thoughtfully. You may discover that some of the most satisfying desserts don’t need to be the richest ones.

  • Dessert Presentation Ideas to Make Treats Feel Special

    Dessert Presentation Ideas to Make Treats Feel Special

    I have learned that dessert does not need complicated decorating to look memorable. A brownie, slice of cake, cookie, pudding, or scoop of ice cream can feel more inviting when I think about color, height, texture, and serving style. These dessert presentation ideas to make treats feel special focus on easy details anyone can use without professional pastry tools.

    I prefer presentation that feels intentional rather than overdone. A clean plate, fresh berry, crisp garnish, or neat drizzle can turn something familiar into a treat that feels made for the occasion.

    Why Dessert Presentation Matters

    We often notice a dessert before we taste it. Good presentation creates anticipation, highlights the best features, and makes a simple homemade treat feel polished. The same cookies can look casual in a basket, elegant on a tiered stand, or festive when arranged by color.

    Simple Dessert Presentation Ideas Anyone Can Try

    Simple Dessert Presentation Ideas Anyone Can Try

    Choose a Plate With Contrast

    Use a plate that helps the dessert stand out. Dark chocolate cake looks striking on light dinnerware, while pale cheesecake can pop against a darker plate.

    Leave some open space around the dessert. Crowding every inch can make the plate look messy, while negative space gives the main item more visual importance.

    Add Height With Stands and Layers

    Height creates movement. Use cake stands, tiered trays, or raised platters. For individual servings, stack cookies, layer brownie pieces with cream, or serve parfaits in tall clear glasses.

    Bring in Fresh Color

    Fresh fruit quickly brightens neutral desserts. Strawberries, raspberries, blueberries, cherries, or peaches add contrast. Choose fruit that suits the flavor, and use a few carefully placed pieces rather than covering the dessert.

    Finish With Sugar, Cocoa, or Crumbs

    A light dusting of powdered sugar or cocoa can make baked goods look finished in seconds. Cookie crumbs, chopped nuts, toasted coconut, or crushed candy can also add texture. Keep the garnish controlled so it looks deliberate.

    Add a Simple Sauce Drizzle

    Chocolate sauce, caramel, fruit coulis, honey, or melted nut butter can add movement. Try thin lines, small dots, or a clean swoosh, and make sure the sauce complements the dessert.

    Dessert Plating Ideas for Cakes, Cookies, and Brownies

    Clean slices instantly make cakes look more professional. Wipe the knife between cuts, keep visible layers neat, and add one simple accent such as whipped cream, fruit, or a chocolate curl.

    Group cookies and brownies instead of scattering them. Stack, overlap, or fan them out. Parchment squares or liners can separate sticky treats and make serving easier.

    Make Store-Bought Desserts Look Special

    Make Store-Bought Desserts Look Special

    A purchased dessert can still feel personal. Remove plastic packaging, transfer the treat to an attractive plate or cake stand, and add one or two fresh finishing touches.

    If you would rather make something simple at home, easy desserts to make with pantry ingredients can be just as convenient while giving you more control over flavor and presentation. Brownies, cookies, bars, and other basic treats can look celebration-ready with neat plating and a few thoughtful garnishes.

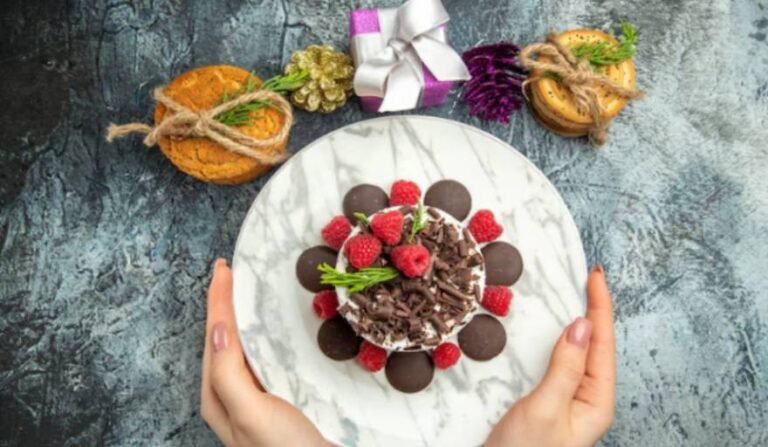
    Try berries around cheesecake, chocolate shavings over cake, whipped cream beside pie, or crushed cookies over pudding. Matching serving pieces can unify the spread.

    Easy Dessert Garnishes From Everyday Ingredients

    You do not need specialty decorations. Citrus zest brightens creamy desserts, mint adds fresh color, and chopped nuts add texture.

    Chocolate shavings, cinnamon, toasted coconut, sprinkles, jam, cookie crumbs, and whipped cream also work well. Choose a garnish that complements the dessert.

    Dessert Table Presentation for Parties

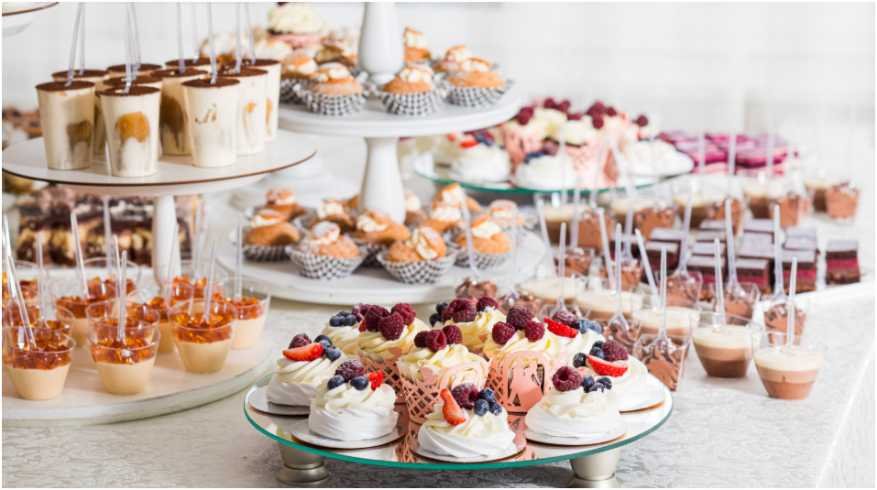
    Start with one visual direction, such as a color palette, seasonal theme, or coordinated serving pieces. Repeating a few colors makes different desserts look connected.

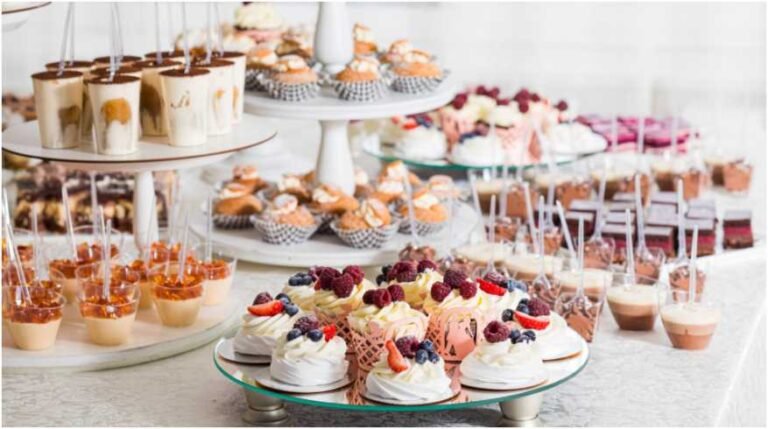
    Use the tallest cake or stand as a focal point, then arrange smaller treats around it. Vary the height so everything remains visible. Individual cups and simple flavor labels can keep the display neat and easy to serve.

    For a more polished setup, learning how to create a cafe-style dessert experience can help you coordinate plating, serving pieces, drink pairings, and atmosphere so the entire dessert spread feels intentional rather than simply arranged on a table.

    Common Dessert Presentation Mistakes

    Common Dessert Presentation Mistakes

    Too many garnishes can make a dessert look cluttered. Choose one main decorative element and one supporting detail instead of combining fruit, sauce, herbs, sprinkles, nuts, and sugar at once.

    Check the edges, too. Frosting smears, crumbs, or fingerprints can ruin a polished look. Avoid oversized or unstable decorations that make dessert difficult to eat.

    Quick Dessert Presentation Checklist

    Before serving, check for a clear focal point, color contrast, texture, and a tidy plate or platter. If it feels flat, add one improvement such as height, fresh color, or a simple garnish.

    Frequently Asked Questions

    1. What are easy dessert presentation ideas to make treats feel special?

    Use contrasting plates, fresh fruit, powdered sugar, sauce drizzles, simple garnishes, stacked arrangements, and varied heights to make everyday desserts look polished.

    2. How can I make a basic cake look elegant?

    Place it on a clean cake stand, keep the edges neat, add one restrained garnish, and avoid clutter around the cake.

    3. How do I present cookies for a party?

    Arrange cookies in overlapping rows, neat stacks, or tiered groups, then use parchment or small liners to make serving easier.

    4. What Is the Easiest Way to Plate Dessert Beautifully?

    Use a clean contrasting plate, position the dessert carefully, add one garnish or sauce accent, and leave enough open space around it.

    A Sweet Finish Worth Remembering

    I think the most appealing desserts are not always the most complicated. When I focus on clean presentation, balanced color, height, and one thoughtful finishing touch, even an everyday treat can feel worth celebrating.

    I also try not to overdecorate. The dessert should remain the star. With a few simple serving tricks and familiar kitchen ingredients, I can create a polished presentation without turning dessert into a stressful decorating project.

  • Quick Dessert Recipes Under 30 Minutes: 8 Easy Treats

    Quick Dessert Recipes Under 30 Minutes: 8 Easy Treats

    Some nights, dessert needs to happen before patience runs out. That is why I keep a collection of quick dessert recipes under 30 minutes that use familiar ingredients, basic equipment, and very little cleanup.

    I have found that the best fast desserts are not complicated recipes made faster. They are designed for speed from the beginning. Mug cakes use a microwave, parfaits skip cooking, and skillet desserts replace long oven times with direct heat.

    Why Fast Desserts Need A Simple Formula

    A speedy dessert still needs balance. For me, the easiest approach is combining something soft or creamy with texture and one noticeable flavor.

    That simple idea keeps quick dessert recipes under 30 minutes from tasting like emergency substitutes for “real” desserts.

    My 3-Part Quick Dessert Formula

    I use three building blocks:

    A soft base such as whipped cream, yogurt, fruit, cake, pudding, or ice cream.

    Something crunchy such as cookies, nuts, oats, cereal, or crisp tortillas.

    One strong flavor such as chocolate, lemon, cinnamon, peanut butter, berries, or caramel.

    Greek yogurt, graham crackers, and berries become an instant parfait. Ice cream, warm bananas, and cinnamon become a restaurant-style sundae.

    It is an easy formula to remember when I want dessert without following a full recipe.

    Quick Dessert Recipes Under 30 Minutes

    These ideas include microwave, stovetop, and no-bake methods, giving you options even when the oven is unavailable.

    1. 5-Minute Chocolate Mug Cake

    5-Minute Chocolate Mug Cake

    Mix 4 tablespoons all-purpose flour, 2 tablespoons sugar, 1 tablespoon cocoa powder, and ½ teaspoon baking powder in a microwave-safe mug.

    Stir in 3 tablespoons milk and 1 tablespoon melted butter. Add a tablespoon of chocolate chips.

    Microwave for about 60 to 70 seconds. Rest for one minute before eating.

    The center should appear cooked rather than wet. The FDA explains that flour is a raw food that may contain harmful bacteria, so uncooked cake batter should not be tasted.

    Among quick dessert recipes under 30 minutes, this is my pick when only one serving is needed.

    2. 10-Minute Berry And Cream Parfait

    10-Minute Berry And Cream Parfait

    Whip 1 cup cold heavy cream with 2 tablespoons powdered sugar. Greek yogurt works well if you want an even faster version.

    Layer crushed graham crackers, cream, and fresh berries in small glasses. Repeat once and serve.

    I like parfaits for last-minute guests because the individual layers make a simple recipe look much more deliberate.

    3. 15-Minute Chocolate-Dipped Strawberries

    15-Minute Chocolate-Dipped Strawberries

    Melt 1 cup chocolate chips in short microwave intervals, stirring between each one.

    Dip completely dry strawberries into the melted chocolate and place them on parchment. Refrigerate for about 10 minutes.

    Add chopped nuts, cookie crumbs, or a little flaky salt if desired.

    Dry strawberries work best because moisture can interfere with the melted chocolate and its coating.

    4. 20-Minute Skillet Apple Crisp

    20-Minute Skillet Apple Crisp

    Slice two peeled apples and toss them with cinnamon and 1 tablespoon brown sugar.

    Cook them with 1 tablespoon butter in a skillet for about five minutes.

    Mix ½ cup rolled oats, 2 tablespoons flour, 3 tablespoons brown sugar, cinnamon, and 3 tablespoons melted butter. Scatter the mixture over the apples.

    Cover and cook over low heat for another five to eight minutes. Serve warm, preferably with vanilla ice cream.

    This is one of my favorite quick dessert recipes under 30 minutes when I want something warm without preheating an oven.

    5. 20-Minute No-Bake Peanut Butter Chocolate Cookies

    Add ½ cup butter, 2 cups sugar, ½ cup milk, and 4 tablespoons cocoa powder to a saucepan.

    Bring the mixture to a rolling boil for one minute. Remove it from the heat.

    Stir in ½ cup smooth peanut butter, 1 teaspoon vanilla, and 3 cups quick-cooking oats.

    Drop spoonfuls onto parchment paper and allow them to set for about 15 minutes.

    These cookies are especially convenient when the oven is occupied with dinner.

    6. 10-Minute Cinnamon Sugar Tortilla Crisps

    10-Minute Cinnamon Sugar Tortilla Crisps

    Brush two flour tortillas lightly with melted butter. Sprinkle with cinnamon sugar and cut into wedges.

    Cook the pieces in a skillet until crisp on both sides. An air fryer also works.

    Serve them with berries, chocolate sauce, yogurt, or ice cream.

    The combination of crisp texture and sweet cinnamon makes this one of the simplest quick dessert recipes under 30 minutes using pantry ingredients.

    7. 15-Minute Banana Caramel Sundaes

    Slice two bananas and cook them in 1 tablespoon butter for about two minutes.

    Add 2 tablespoons brown sugar and a pinch of cinnamon. Cook until the sugar becomes glossy and coats the bananas.

    Spoon the warm fruit over vanilla ice cream. Finish with chopped pecans, peanuts, or crushed cookies.

    I love the temperature contrast here. Warm caramelized fruit makes basic ice cream feel far more special.

    8. 10-Minute Lemon Cheesecake Cups

    10-Minute Lemon Cheesecake Cups

    Beat 4 ounces softened cream cheese with 2 tablespoons powdered sugar, 1 teaspoon lemon zest, and 1 tablespoon lemon juice.

    Fold in ½ cup whipped cream or whipped topping.

    Spoon crushed graham crackers into serving glasses and add the cheesecake mixture. Finish with berries or extra lemon zest.

    If no-cook treats suit your schedule, easy no bake desserts with few ingredients is a natural next collection to explore.

    How I Make Fast Desserts Taste Better

    The difference between a rushed sweet and a satisfying dessert often comes down to the finishing details.

    Add Texture

    Soft desserts benefit from crunch. Rich desserts usually improve with something fresh.

    I add cookie crumbs to parfaits, nuts to ice cream, or berries to creamy desserts. One contrasting texture is usually enough.

    That small adjustment improves many quick dessert recipes under 30 minutes without adding meaningful preparation time.

    Pick One Strong Flavor

    Trying to add chocolate, caramel, fruit, nuts, and spices to the same dessert can make it confusing.

    Instead, I choose one dominant flavor.

    Chocolate can lead a mug cake. Lemon can define cheesecake cups. Cinnamon works beautifully with apples or bananas.

    Keeping the flavor focused also reduces the ingredient list.

    Keep Food Safety In Mind

    Fast preparation should never mean skipping basic food safety.

    As noted above, the FDA advises against tasting uncooked flour, dough, or batter because cooking is needed to reduce risks from harmful bacteria.

    Desserts containing whipped cream, cream cheese, or other perishable ingredients also need proper refrigeration. USDA guidance recommends refrigerating perishable foods within two hours, or within one hour when temperatures exceed 90°F.

    Choosing The Right Quick Dessert

    I choose the recipe based on both time and the type of craving.

    For something chocolatey in five minutes, the mug cake wins. For a fresh dessert, I choose a berry parfait or chocolate strawberries.

    The apple crisp and banana sundae work better when I want something warm. No-bake cookies are ideal when several people need dessert.

    Ingredient flexibility matters too. The most useful quick dessert recipes under 30 minutes rely on ingredients that perform several jobs. Berries add color, sweetness, freshness, and acidity. Graham crackers add both structure and crunch.

    Keeping a few flexible ingredients around makes spontaneous desserts much easier.

    Frequently Asked Questions

    1. What Dessert Can I Make In 10 Minutes?

    Try a chocolate mug cake, berry parfait, lemon cheesecake cup, cinnamon tortilla crisps, or chocolate-dipped fruit.

    2. What Easy Desserts Use Pantry Ingredients?

    Mug cakes, no-bake oatmeal cookies, skillet fruit, cinnamon crisps, and simple chocolate treats work well with common pantry staples.

    3. Can I Make Quick Desserts Without An Oven?

    Yes. Many quick dessert recipes under 30 minutes use a microwave, skillet, refrigerator, air fryer, or no cooking method at all.

    4. What Fast Dessert Works For Unexpected Guests?

    Parfaits work especially well because cream or yogurt, fruit, cookies, and toppings can be layered in individual glasses within minutes.

    Sweet Tooth Solved, Clock Still Winning

    I do not think a satisfying dessert needs an afternoon filled with mixing bowls and timers. The right cooking method, a few flexible ingredients, and one strong flavor can produce something genuinely enjoyable in minutes.

    Start with the recipe that matches the time you actually have. Once that feels easy, use my three-part formula to create your own quick dessert recipes under 30 minutes from ingredients already sitting in your kitchen.

  • How to Turn Homemade Desserts Into Thoughtful Gifts

    How to Turn Homemade Desserts Into Thoughtful Gifts

    I have always believed homemade desserts feel more personal than an ordinary store-bought present. When I think about how to turn homemade desserts into thoughtful gifts, I focus on the person receiving them first.

    You do not need expensive packaging or professional decorating skills. Cookies, brownies, truffles, or loaf cake can become memorable when chosen, packed neatly, and finished with a small personal detail.

    Why Homemade Desserts Make Meaningful Gifts

    Homemade desserts show time, care, and attention. Choosing someone’s favorite chocolate, spice, fruit, or texture makes the gift feel intentional instead of generic.

    They are flexible too. Biscotti can become a simple thank-you gift, while a mixed dessert box can suit birthdays, family visits, or festive occasions.

    Choose a Dessert the Recipient Will Love

    Start with taste. Chocolate lovers may enjoy brownies, truffles, or fudge. Someone who prefers lighter flavors may appreciate lemon bars, shortbread, fruit cookies, or a citrus loaf.

     For recipients who enjoy traditional or culturally meaningful sweets, a Filipino cassava cake recipe with condensed milk can make the gift feel especially personal and memorable.

    Match the Treat to Their Lifestyle

    Think about how the recipient will eat and store the dessert. Individually portioned cookies suit coworkers or busy friends, while a loaf cake or assorted box may be better for a family.

    Tea and coffee lovers may appreciate biscotti or shortbread. If the recipient has dietary restrictions, choose an appropriate recipe and identify important ingredients or allergens.

    Pick Desserts That Travel Well

    Pick Desserts That Travel Well

    Giftable desserts should stay attractive after they leave your kitchen. Delicate frostings, cream-filled pastries, and frozen treats can be difficult to carry, especially when they will not be eaten immediately.

    Cookies, Bars, and Biscotti

    Cookies are easy to batch and arrange in tins or boxes. Biscotti are sturdy enough for transport, while brownies and blondies can be cut into neat portions and layered with parchment.

    Fudge, Bark, and Truffles

    Small confections look elegant without requiring a large container. Place truffles in mini paper cups, arrange fudge in a tin, or seal chocolate bark inside a food-safe bag.

    Loaf Cakes

    Banana bread, lemon loaf, and pound cake are sturdy and easy to slice. Wrap the cooled loaf before placing it in a bakery box or reusable container.

    Make the Packaging Part of the Gift

    Good packaging protects the dessert first and decorates it second. Use rigid boxes for bars and cakes, tins for cookies, jars for candies, and food-safe bags for brittle or biscotti.

    Thoughtful dessert presentation ideas to make treats feel special can also help simple homemade bakes look more polished without requiring expensive supplies or professional decorating skills.

    Parchment paper creates a clean layer between food and container. Finish with ribbon, twine, a label, or a gift tag. Simple details usually look more polished than excessive decoration.

    Add Personal Touches

    A handwritten note is one of the easiest ways to make an edible gift feel personal. Mention why you chose the dessert, share a short memory, or add a warm message for the occasion.

    You can also include a recipe card, storage note, or serving suggestion. Pairing the dessert with tea or coffee can make the gift feel more complete. For family members, a familiar family recipe can add extra meaning.

    Keep Dessert Gifts Fresh

    Keep Dessert Gifts Fresh

    Let baked goods cool completely before wrapping them. Packaging warm desserts traps moisture and can make cookies soft, toppings sticky, or cakes soggy.

    Choose airtight containers for treats that dry out quickly. If a dessert needs refrigeration, tell the recipient. A small “best enjoyed by” label can also help maintain quality. When appropriate, note common allergens such as nuts, dairy, eggs, wheat, or soy.

    Match the Gift to the Occasion

    A casual thank-you may need only a small cookie bag and handwritten tag. A birthday gift can be an assorted dessert box with several favorite flavors.

    Host gifts should be easy to store and serve later, making cookies, loaf cakes, biscotti, or candy practical choices. For festive gifting, batch-friendly shortbread, bark, fudge, and spiced cookies save time while still looking special.

    Frequently Asked Questions

    1. What desserts are best for homemade gifts?

    Cookies, brownies, biscotti, fudge, chocolate bark, truffles, and sturdy loaf cakes work well because they portion easily, travel neatly, and stay attractive after packaging.

    2. How can I make homemade desserts look gift-worthy?

    Use clean food-safe packaging, parchment paper, ribbon, labels, or a handwritten tag. Matching the wrapping to the occasion adds personality without requiring expensive supplies.

    3. How far ahead can dessert gifts be prepared?

    Timing depends on the recipe, but many cookies, brownies, candies, and loaf cakes can be made one to several days ahead when stored properly.

    4. What matters most when learning how to turn homemade desserts into thoughtful gifts?

    Focus on the recipient’s preferences, choose a dessert that travels well, package it securely, add a personal detail, and include storage or allergen information when useful.

    A Sweeter Way to Show You Care

    For me, the best part of how to turn homemade desserts into thoughtful gifts is that the value comes from intention rather than price. A favorite cookie in a simple box can feel more meaningful than an elaborate purchased present when it reflects the recipient’s tastes.

    I would focus on five things every time: the recipient, the dessert, freshness, packaging, and the personal touch. Get those details right, and even a simple batch of brownies or shortbread can become a gift people remember.

  • How to Create a Cafe-Style Dessert Experience at Home

    How to Create a Cafe-Style Dessert Experience at Home

    When I want dessert to feel memorable, I rarely rely on the recipe alone. I think about the plate, the drink beside it, the lighting, and how the dessert reaches the table. Learning how to create a cafe-style dessert experience is really about turning a simple sweet into a small occasion.

    You do not need professional pastry training or expensive equipment. A few thoughtful choices can make cakes, pastries, mousses, brownies, or ice cream feel polished. The secret is combining flavor, texture, presentation, drink pairing, and atmosphere without making the process stressful.

    What Makes a Dessert Feel Cafe-Style?

    Cafe-style desserts look deliberate. Portions are neat, garnishes are controlled, and plates are not crowded. Instead of serving a large slice straight from the pan, add whipped cream, fresh fruit, a light sauce, or one crisp garnish.

    Texture matters too. A creamy dessert becomes more interesting beside something crunchy, while dense chocolate cake can feel lighter with berries.

    Choose Simple Desserts With Strong Visual Appeal

    Choose Simple Desserts With Strong Visual Appeal

    Select desserts that portion cleanly and hold their shape. Individual cups, mini cakes, tarts, brownies, cheesecakes, cookies, and ice cream desserts are reliable choices.

    Serve Individual Dessert Cups

    Mousse, pudding, tiramisu, panna cotta, and parfaits look polished in clear glasses or small bowls. They can also be prepared ahead, making them ideal for relaxed entertaining.

    Add Bakery-Style Cakes and Pastries

    Scones, coffee cake, muffins, tea cakes,loaf cakes and croissants naturally suggest a cozy café. Slice them neatly and serve smaller portions on individual plates.

    Choose One Showpiece

    Give the menu a focal point with one standout dessert, such as a chocolate tart, berry cheesecake, layered cake, or affogato. Keep the remaining options simple so the display feels curated instead of crowded.

    Master Cafe-Style Dessert Plating

    Professional-looking plating starts with restraint. Choose a plate with enough empty space around the dessert, then add only a few supporting elements.

    Build Contrast With Texture

    Pair mousse with a crisp cookie, cheesecake with toasted nuts, brownies with whipped cream, or dense cake with fresh fruit. Contrasting textures improve both appearance and the eating experience.

    Use Garnishes With Purpose

    Caramel, berry sauce, chocolate, cocoa, chopped nuts, fresh berries, mint, and citrus zest can make a plate more appealing. Use only elements that match the dessert.

    Leave Negative Space

    Empty space makes food look more refined. A clean plate with three purposeful elements usually appears more sophisticated than one covered with sauces, crumbs, and unrelated garnishes. For extra polish, chill serving glasses beforehand, wipe plate rims before serving, and place drinks beside desserts only when both are ready to enjoy.

    Pair Desserts With Coffee and Tea

    Pair Desserts With Coffee and Tea

    Drink pairing makes the experience feel complete. Rich chocolate desserts work well with espresso, cappuccino, or strong coffee. Fruit tarts and lighter cakes pair naturally with tea. Chai suits warmly spiced desserts, while matcha complements vanilla, white chocolate, and citrus flavors.

    Create a Cozy Cafe Atmosphere

    Use small plates, dessert forks, mugs, glasses, cloth napkins, and a simple serving tray. Warm lighting creates an inviting mood, while an uncluttered table keeps attention on the desserts.

    Soft jazz, acoustic music, or instrumental playlists can add café energy without overwhelming conversation. If you offer several desserts, arrange them on a cake stand or board so guests can see their choices.

    For an even more relaxed setup, sweet treats for a cozy movie night can inspire easy dessert combinations that pair naturally with soft lighting, comfortable seating, and warm drinks.

    Brownie bites, chocolate-covered snacks, cookies, and other handheld sweets work especially well when you want the café experience to feel casual and inviting.

    Prepare Cafe Desserts Ahead of Time

    Cheesecake, mousse, panna cotta, tiramisu, brownies, loaf cakes, cookies, and many tarts can be made earlier, reducing last-minute work.

    When you do not have much prep time, quick dessert recipes under 30 minutes can still help you build a polished café-style menu. Simple brownies, dessert cups, fruit-based treats, and fast chocolate options make it easier to serve something fresh without turning the evening into a long baking project.

    Keep garnishes separate until serving so crisp elements stay fresh. Store sauces in small containers and organize coffee, tea, cups, spoons, and napkins before guests arrive.

    Build a Balanced Cafe-Style Dessert Menu

    Build a Balanced Cafe-Style Dessert Menu

    Three choices are often enough. Aim for one rich dessert, one lighter option, and one baked treat.

    Try chocolate mousse with espresso, lemon loaf with tea, and almond croissants with coffee. Another menu could combine berry cheesecake cups, shortbread cookies, and affogato. Focus on variety in flavor, texture, and temperature rather than quantity.

    Frequently Asked Questions

    1. How can I learn how to create a cafe-style dessert experience at home?

    Start with easy-to-portion desserts, coordinated plates, restrained garnishes, suitable coffee or tea pairings, and a comfortable atmosphere.

    2. What desserts work best for a home café?

    Mousse cups, cheesecake, brownies, loaf cakes, tarts, pastries, cookies, affogato, and panna cotta are attractive and easy to portion.

    3. How can I make homemade desserts look professional?

    Use smaller portions, clean plate edges, negative space, one sauce, and one contrasting garnish or texture.

    4. Do I need special café equipment?

    No. Basic plates, glasses, spoons, a serving tray, simple garnishes, and thoughtfully chosen drinks are enough.

    Make Every Sweet Course Feel Special

    When I plan dessert this way, I find people remember the experience as much as the food. Familiar cake or mousse feels special when it arrives neatly plated with a complementary drink and relaxed atmosphere.

    My favorite approach is simple: choose desserts that serve cleanly, add texture, pair flavors thoughtfully, prepare ahead, and keep the setting comfortable. Small details create the café feeling. The goal is not restaurant perfection, but a sweet course that encourages everyone to slow down and enjoy the moment.

  • How to Measure Flour Correctly Every Time (Easy Tips)

    How to Measure Flour Correctly Every Time (Easy Tips)

    Mastering dry ingredient measurements saves your baked goods from total ruin. Ditching inaccurate habits is the single fastest way to achieve professional results at home without changing your recipes.

    Baking feels like magic until a batch of cookies turns into hard rocks because of a sneaky measurement error. Learning how to measure flour correctly completely transforms your everyday home baking. Diving straight into the bag with a measuring cup packs down the delicate grains, secretly adding up to fifty percent more flour than intended.

    Knowing How to Measure Flour Saves Your Bakes

    Scooping directly from the bag creates tightly packed mounds of flour that ruin your ratios. Learning how to measure flour correctly keeps your cakes light, your cookies chewy, and your dough soft. Extra dry ingredients turn tender treats into dry bricks fast, so fixing this one quick step keeps your kitchen wins consistent every single time.

    Heavy and Dense Textures

    Scooping directly from the bag creates tightly packed mounds of flour. Extra weight turns light, airy cakes into dense bricks that fail to rise properly in the oven.

    Excess flour alters the balance of moisture in your bowl. Your leavening agents struggle to lift the heavy dough, leaving you with flat and tough baked goods.

    Dry and Crumbly Treats

    Excess dry ingredients absorb all the wet butter, milk, and eggs in your batter. Dough quickly loses its moisture, causing soft cookie dough to bake into dry, crumbly pucks.

    When the liquid ratio drops, gluten becomes tough and rubbery. Taking time to measure accurately keeps the crumb soft, tender, and perfectly moist every time.

    Unpleasant Pale Appearance

    Over-measuring alters the delicate ratio of sugar and fat required for proper bakes. Your crusts remain pale and doughy instead of developing a rich golden-brown finish.

    Proper ratios allow natural sugars to caramelize against the heat of the oven. Accurate weight guarantees that beautiful bakery-style color on every loaf and pastry.

    Simple Tools You Need in the Kitchen

    Setting up your workspace with proper equipment guarantees success every single time. Investing in basic kitchen tools keeps your measurements accurate and your counters clean.

    Digital Kitchen Scale

    Digital Kitchen Scale

    Digital scales provide unmatched precision for every type of baking project. Weighing ingredients in grams eliminates all environmental variables like humidity or settled storage bags. You can check out trusted tools like the Escali Digital Kitchen Scale or the OXO Good Grips Scale to upgrade your setup.

    Using a digital scale also cuts down on dirty dishes in your sink. You simply pour ingredients into a single bowl while hitting the zero button between steps.

    Nesting Dry Measuring Cups

    Flat-topped dry measuring cups allow you to sweep away excess flour easily. Avoid using liquid measuring spouts for dry powders because they lead to uneven fills every time.

    Durable stainless steel sets from brands like Simply Organic or Farberware provide exact rims. Sharp, flat edges make it effortless to level off ingredients cleanly.

    Metal Spoon and Butter Knife

    A simple dining spoon gently transfers loose flour into your measuring cup. Filling the cup gradually prevents air pockets from forming without packing the grains down.

    The flat, straight back of a standard butter knife easily levels the top rim. Avoid using curved knives so you do not accidentally gouge out the center.

    Step-by-Step Guide: How to Measure Flour Correctly

    Achieving perfectly weighed ingredients takes only a few extra seconds of effort. Following a consistent routine guarantees your baked treats turn out soft and delicious.

    Fluffing Up the Container

    Flour naturally settles and compacts while sitting inside your pantry or storage canister. Take a fork or a wire whisk and gently fluff the flour inside the bag to break up dense pockets. This simple aeration step restores light volume back to the dry grains before you start measuring.

    Aerating the flour introduces air pockets that prevent heavy clumping in your cup. Skipping this quick step means you will still end up with packed ingredients.

    Spooning into the Cup

    Spooning into the Cup

    Gently scoop small spoonfuls of the fluffed flour directly into your dry measuring cup. Fill the cup gradually until a rounded mound forms over the top rim. Never shake, tap, or pack the cup while filling, as tapping settles the grains right back down into a dense pack.

    Let the flour fall loosely into the measuring container without forcing it down. Shaking the cup settles the powder, defeating the purpose of fluffing it first.

    Leveling Across the Rim

    Hold your measuring cup over the flour container or a scrap piece of parchment paper. Take the flat edge of a butter knife or a straight bench scraper and sweep across the top rim in one smooth motion. The knife pushes away the excess mound, leaving a perfectly flat surface.

    Sweeping the knife smoothly removes only the excess flour sitting above the cup edge. You are left with an exact volume measurement without any packed weight.

    Weighing Ingredients with a Kitchen Scale

    Using a scale is the absolute gold standard for accuracy in home baking. Eliminating guesswork saves time and yields identical results every time you bake.

    Setting Up the Scale

    Place your digital scale on a flat, level kitchen counter away from vibrations. Set your empty mixing bowl directly onto the scale platform before turning the power on. Press the tare or zero button so the digital display reads zero grams.

    Zeroing out the weight of the container ensures you only measure the added ingredient. This simple habit keeps your baker percentages spot on every single time.

    Pouring the Ingredients

    Gently spoon your flour directly into the bowl until the display reaches your target number. If you pour too much, simply scoop a small amount back out with your spoon. This method keeps your workspace clean and prevents messy spills across your counter.

    Watching the digital numbers rise allows you to hit exact target amounts effortlessly. You never have to worry about whether your cup was packed too tightly.

    Sifting Secrets Every Home Baker Must Know

    Understanding recipe phrasing prevents costly measurement mix-ups in delicate batters. Small grammatical differences in an ingredient list completely alter the total weight.

    Sifting Secrets Every Home Baker Must Know

    “1 Cup Flour, Sifted” Explained

    This phrasing means you must measure out one cup of flour first using the spoon-and-level method. Once measured, pass that flour through a fine-mesh sifter or sifting tool directly into your mixing bowl.

    Measuring first ensures you start with the standard base volume required for the recipe. Sifting afterward simply breaks up lumps and incorporates air for lighter batters.

    “1 Cup Sifted Flour” Explained

    This instruction tells you to sift a generous amount of flour into a clean bowl first. Afterward, gently spoon that airy, sifted flour into your measuring cup and level it off.

    Sifting first removes all density, yielding a significantly lighter total weight per cup. Pay close attention to word placement to avoid altering your recipe ratios.

    Flour Weights by Specific Variety

    Different flours possess unique grain densities and weights per single cup volume. Keeping a handy conversion reference ensures seamless substitutions across various baking recipes.

    All-Purpose and Bread Flour

    Standard all-purpose flour weighs approximately 120 to 125 grams per cup when fluffed. High-protein bread flour weighs virtually the same, averaging 125 to 130 grams per cup.

    These mid-weight flours form the sturdy structure for everyday loaves, cookies, and quick breads. Keeping these target weights in mind helps you troubleshoot dense doughs.

    Cake Flour and Whole Wheat

    Customized cake ideas require flour is significantly lighter, weighing roughly 113 to 115 grams per cup. Whole wheat flour contains heavy bran particles, weighing around 120 to 128 grams per cup.

    Low-protein cake flour yields soft textures, while whole wheat adds dense, nutty structure. Never swap them in equal volume without adjusting your overall weights.

    Specialty Gluten-Free and Almond Flours

    Gluten-free 1-to-1 baking blends generally weigh about 140 grams per cup due to heavy starches. Dense nut-based meals like almond flour weigh close to 112 grams per cup when lightly packed.

    Alternative flours absorb liquids at vastly different rates than standard wheat flour. Weighing these specialty blends prevents dry, gummy, or crumbly baked goods.

    Frequently Asked Questions

    1. What is the proper way to measure flour?

    The proper way to measure flour is by using a digital kitchen scale for exact weight. If using cups, fluff the flour, spoon it gently into the dry cup, and level the top off with a knife.

    2. How much is 1 cup of flour?

    One cup of standard all-purpose flour weighs approximately 120 to 125 grams or 4.25 ounces. Volume measurements vary greatly based on how tightly the flour is packed into the cup.

    3. What is the correct method for measuring flour?

    The correct manual method for measuring flour is the spoon-and-level technique. Always fluff the flour first, gently spoon it into your dry cup until overflowing, and sweep the excess off flat.

    4. What is the correct way to measure 1/2 cup flour?

    To measure a half cup of flour correctly, fluff your container first with a fork. Gently spoon the flour into a half-cup dry measuring cup and scrape the top level with a butter knife.

    Flour Power Victory!

    Mastering how to measure flour correctly turns frustrating baking failures into reliable kitchen victories every day. Ditching the direct scoop method for a simple digital scale or the spoon-and-level technique keeps your dough tender, light, and delicious. Swap out your old habits today, grab a butter knife, and watch your favorite homemade treats rise to pure perfection!

  • How to Create a Dessert Grazing Board Guests Will Love

    How to Create a Dessert Grazing Board Guests Will Love

    I love desserts that look impressive without requiring hours in the kitchen. That is why learning how to create a dessert grazing board has transformed the way I serve sweets at birthdays, family gatherings, showers, holidays, and casual celebrations. Instead of choosing one dessert, I can offer something for every guest while creating an eye-catching centerpiece.

    The secret is not buying the most expensive treats. A memorable board comes from combining different flavors, colors, shapes, and textures in a thoughtful arrangement. With the right plan, homemade and store-bought items can look equally inviting.

    What Is a Dessert Grazing Board?

    A dessert grazing board is a shareable arrangement of bite-sized sweets, fruit, dips, and complementary snacks. It may also be called a dessert charcuterie board, sweet grazing platter, or dessert platter.

    Unlike a traditional plated dessert, it allows guests to choose their favorite combinations and return for more whenever they like. It is interactive, flexible, and suitable for both small gatherings and larger parties.

    What to Put on a Dessert Grazing Board

    What to Put on a Dessert Grazing Board

    A successful board needs variety, but it does not need dozens of different foods. Choose two or three items from several categories to create balance.

    You can also borrow ideas from easy coffee and dessert pairings to try at home when selecting treats, especially if you plan to serve the board with espresso, cold brew, or a medium-roast coffee.

    Baked Treats

    Use desserts that are easy to pick up and eat in one or two bites. Brownie squares, mini cupcakes, macarons, cookies, doughnut holes, cake bites, and shortbread are practical options.

    Cut larger baked goods into smaller portions before arranging them. Bite-sized pieces are easier to serve and allow guests to sample several flavors.

    Chocolate and Candy

    Chocolate provides richness and helps fill smaller spaces. Add truffles, chocolate squares, coated pretzels, chocolate-covered fruit, caramels, or small candies.

    Choose a limited color palette if the board is being prepared for a themed event. Repeating two or three colors makes the display look coordinated rather than cluttered.

    Fresh Fruit

    Fruit adds freshness, natural sweetness, and bright color. Strawberries, raspberries, blueberries, grapes, cherries, and clementine segments work particularly well.

    Wash fruit in advance and dry it thoroughly. Excess moisture can soften cookies and make chocolate look untidy. Apples and pears should be sliced shortly before serving or treated with lemon water to slow browning.

    Sweet-and-Salty Additions

    A little salt prevents the selection from tasting overwhelmingly sweet. Pretzels, popcorn, salted nuts, crackers, and chocolate-coated potato chips introduce contrast and crunch.

    Dips and Spreads

    Chocolate ganache, caramel sauce, fruit dip, whipped cream, nut butter, and sweetened yogurt make the board more interactive. Place dips in small, stable bowls with individual spoons.

    Consider allergies before using nuts or nut-based spreads. Keep allergen-friendly choices separate and label them clearly.

    How Much Dessert Should You Prepare?

    For a board served after a full meal, allow approximately four to six small pieces per guest. If it is the main refreshment, prepare six to eight pieces per person.

    For a board served after a full meal, allow approximately four to six small pieces per guest. If it is the main refreshment, prepare six to eight pieces per person. For smaller gatherings, easy small batch dessert recipes can help you make just enough brownies, cookies, or mini treats without creating excessive leftovers.

    A small platter usually serves four to six people. A medium board can accommodate eight to twelve, while a large board may serve sixteen or more. Keep extra treats in sealed containers and refill the display when needed instead of overcrowding it initially.

    How to Create a Dessert Grazing Board Step by Step

    How to Create a Dessert Grazing Board Step by Step

    1. Choose the Board

    Select a clean, food-safe board, platter, baking tray, or shallow serving dish. It should provide enough room for clusters without being so large that the finished arrangement looks empty. Line porous or decorative surfaces with parchment paper.

    2. Decide on a Theme

    Choose an occasion, flavor, or color theme before shopping. Chocolate and berries create an elegant board, while colorful candies and mini cupcakes suit a birthday. A simple theme prevents unnecessary purchases.

    3. Position the Bowls

    Place bowls of dip and small candies first. Position them away from the edge so they cannot be knocked over. Using an odd number of anchor points often creates a naturally balanced appearance.

    4. Add the Largest Desserts

    Arrange cupcakes, brownies, large cookies, or cake pieces around the bowls. Spread similar items across the board instead of placing everything in one area.

    5. Create Height and Movement

    Stack cookies, overlap brownies, and place fruit in gentle curves. Small piles and flowing lines create dimension. Keep foods in visible groups so guests can recognize what they are taking.

    6. Fill the Remaining Spaces

    Add berries, chocolates, popcorn, candies, and pretzels to smaller gaps. Distribute colors and textures evenly. The board should look abundant, but guests must still be able to pick up items without disturbing the entire arrangement.

    7. Add the Finishing Touches

    Add serving tongs, spoons, napkins, and small plates. Mint leaves can provide fresh color. If using flowers, select food-safe varieties and prevent untreated stems from touching the food.

    Make-Ahead and Storage Tips

    Make-Ahead and Storage Tips

    Bake or purchase the desserts a day in advance and store each type separately. Dips can usually be prepared ahead and refrigerated in covered containers.

    The board may be partially assembled several hours before serving. Cover and refrigerate fruit, dairy-based dips, and other perishable foods. Add cookies, crackers, pretzels, and popcorn shortly before guests arrive because refrigeration and fruit moisture can make them soft.

    After the gathering, separate dry treats from fruit and dips. Store crunchy items in airtight containers at room temperature and refrigerate perishable leftovers promptly.

    Mistakes That Can Spoil the Board

    Avoid using too many foods with the same color or texture. A board filled only with brown cookies and chocolate may taste delicious but look visually flat.

    Do not place juicy fruit directly beside crisp baked goods. Avoid oversized portions, unstable bowls, inaccessible foods, and decorations that are not safe around food. Most importantly, ask about dietary restrictions before finalizing the menu.

    Frequently Asked Questions

    1. How to create a dessert grazing board on a budget?

    Choose one homemade baked item, seasonal fruit, popcorn, pretzels, and a few candies. Use smaller quantities arranged in generous-looking clusters. A baking tray or everyday platter can replace an expensive wooden board.

    2. Can I assemble the board the night before?

    You can prepare the ingredients and position covered bowls, but complete the final arrangement closer to serving. Add dry and crunchy foods last to protect their texture.

    3. What can I use instead of a wooden board?

    A serving platter, baking sheet, marble slab, shallow tray, or parchment-lined table section can work. The surface must be stable, clean, and suitable for food contact.

    4. How do I accommodate dietary restrictions?

    Include clearly labeled vegan, gluten-free, or nut-free selections. Use separate bowls and utensils, and check packaged-food labels for cross-contact warnings.

    A Sweet Final Thought

    I find that the best dessert boards feel generous, colorful, and relaxed rather than perfectly arranged. I start with a simple theme, use treats my guests genuinely enjoy, and build the display from large items to small fillers. 

    When flavor, texture, presentation, and food safety receive equal attention, even an affordable selection can become the centerpiece everyone remembers.

  • How to Tell If Eggs Are Good: 5 Easy Kitchen Tests

    How to Tell If Eggs Are Good: 5 Easy Kitchen Tests

    A forgotten carton can quickly become a breakfast mystery. I have paused before cracking an egg and wondered how to tell if eggs are good without wasting food or ruining a recipe. Fortunately, a few checks can help you judge freshness, spot spoilage, and cook with confidence.

    Key Takeaways

    1. Check carton dates and shell condition first.
    2. Use cold water to estimate freshness.
    3. Smell questionable eggs after cracking.
    4. Watery whites often mean age, not spoilage.
    5. Store eggs cold in their original carton.

    How to Tell If Eggs Are Good Step by Step

    The easiest method for how to tell if eggs are good is to check them in a simple order. Start with the carton, inspect the shell, try the water test if needed, then crack a doubtful egg into a separate bowl before adding it to your recipe.

    Check the Carton Date

    Look for a sell-by, best-by, expiration, or pack date. A passed date does not automatically mean spoilage. The USDA says raw shell eggs can generally stay refrigerated for three to five weeks when stored correctly.

    Inspect the Shell

    A good shell should be intact. Avoid eggs with leaking cracks, sticky residue, visible mold, or an unusually slimy surface. These signs may point to contamination or poor storage.

    The FDA recommends buying refrigerated eggs with clean, uncracked shells and keeping them cold.

    Try the Cold Water Test

    Try the Cold Water Test

    Fill a bowl with cold water and gently lower the egg inside. A fresh egg usually sinks and lies flat. An older egg may tilt or stand upright because its air cell grows over time.

    A floating egg is very old, but floating alone does not prove spoilage. Crack it separately and check its smell and appearance. If its storage history is uncertain, discarding it is safer.

    The Water Float Test Explained

    The float test is popular because it is quick and needs only a bowl of water. It estimates age because eggs gradually lose moisture through shell pores while the air pocket inside becomes larger.

    Sinks and Lies Flat

    An egg that sinks and rests flat is usually very fresh. It is excellent for frying, poaching, or scrambling because the yolk tends to stay rounded and the white looks firmer.

    Stands Upright on the Bottom

    An egg that sinks but stands on one end is older. Its larger air pocket makes one side more buoyant, but it may still be suitable for cooking when properly refrigerated.

    These eggs work well for cakes, muffins, cookies, and scrambled eggs, where perfect shape matters less.

    They can also be practical for single serving dessert recipes for one, where only one or two eggs may be needed and appearance is less important than freshness and proper storage.

    Floats to the Surface

    A floating egg has a large air cell and is significantly older. Many kitchen tips call floating proof that an egg is bad, but the float test mainly measures age.

    Crack it into a separate bowl. A rotten smell, unusual color, mold, or uncertain storage is reason to discard it. Throwing away a floating egg is also reasonable if you prefer a cautious approach.

    Other Ways to Check Eggs

    Other Ways to Check Eggs

    Water gives you an age clue, but your nose, ears, and eyes provide useful extra information. Combining several checks is more reliable than trusting one kitchen trick.

    Use the Sniff Test

    Crack the egg onto a clean plate or into a small bowl and smell it before mixing it with other ingredients. A spoiled egg often gives off a strong, unpleasant sulfur-like or rotten odor.

    A good egg should not smell foul. If the odor seems wrong, discard it and wash the bowl, utensils, counter, and your hands with hot, soapy water.

    Try the Shake Test

    Hold the egg near your ear and shake it gently. A fresh egg usually makes little noticeable sound because the white is thicker and the contents move less inside.

    Obvious sloshing can suggest an older egg, but it cannot confirm safety. Use this test only with the shell, date, smell, and storage checks.

    Do the Look Test

    A freshly cracked egg usually has a plump, rounded yolk and thicker white. As it ages, the yolk flattens and the white spreads more widely.

    A watery white alone does not mean spoilage. Discard eggs with unusual pink, greenish, black, or iridescent discoloration, visible mold, or anything clearly abnormal.

    Keep Eggs Fresh for Longer

    Keep Eggs Fresh for Longer

    Good storage reduces guesswork. A few simple refrigerator habits help protect both egg quality and food safety.

    Use a Cold Fridge Shelf

    Keep eggs at 40°F or below on an interior refrigerator shelf rather than the door, where temperatures change more often.

    Refrigerator organization also matters for produce, and knowing how to keep bananas fresh longer can help you store ripe fruit at the right stage without creating unnecessary food waste.

    Return eggs to the refrigerator promptly. Refrigerated eggs should not remain at room temperature for more than two hours.

    Keep the Original Carton

    The carton protects shells, limits moisture loss, and keeps package dates nearby. It can also reduce exposure to strong refrigerator odors.

    Avoid transferring eggs to an uncovered decorative holder if longer storage is your goal.

    Skip Washing Store-Bought Eggs

    Commercial eggs sold in the United States are already washed during processing. Washing them again at home is unnecessary and can encourage water to move through shell pores.

    Focus on clean hands, utensils, refrigeration, and safe cooking. Cook eggs until yolks and whites are firm unless you use pasteurized eggs for raw or lightly cooked recipes.

    Frequently Asked Questions

    1. How to Tell If Eggs Are Good Without Cracking Them?

    Check the carton date, shell condition, and cold-water float test. A sinking egg is generally fresher, while an upright or floating egg is older. Proper refrigeration still matters because these checks cannot guarantee safety.

    2. Can You Eat an Egg That Floats?

    A floating egg is old because its air cell has grown, but floating alone does not prove spoilage. Crack it separately, inspect it, smell it, and discard it if anything seems questionable.

    3. What Does a Bad Egg Smell Like?

    A spoiled egg usually has a strong rotten or sulfur-like odor after cracking. Do not taste a questionable egg. Throw it away and clean any surface, bowl, or utensil it touched.

    4. How Long Do Eggs Last in the Refrigerator?

    Raw shell eggs generally keep three to five weeks in a refrigerator at 40°F or below. For better quality, leave them in their original carton on an interior shelf.

    Crack With Confidence

    Knowing how to tell if eggs are good becomes simple once you stop relying on one trick. Check the date, inspect the shell, use the float test as an age clue, then trust smell and appearance before cooking. With steady refrigeration, clean handling, and sensible judgment, you can waste fewer eggs and feel more confident every time you cook. That routine makes cooking easier, safer, and less wasteful while helping each egg find its use.