
Category: Kitchen Tips

  • How to Fix Dry Cookie Dough To Save the Batch

    How to Fix Dry Cookie Dough To Save the Batch

    A crumbly bowl of dough can turn fun baking into a kitchen emergency. Learning how to fix dry cookie dough helps save the batch before extra flour, cold butter, or lost moisture ruins the texture. Diagnose the cause first, then make small changes.

    Most dry cookie dough can be saved. Resting it, warming it, or adding a teaspoon of liquid often restores the right consistency. Aim for dough that holds together when pressed without becoming sticky or greasy.

    Key Takeaways

    • Rest cookie dough for 10 minutes before changing it.
    • Warm refrigerated dough for about 15 minutes.
    • Add milk, water, or melted butter one teaspoon at a time.
    • Check flour measurements before adding ingredients.
    • Bake one test cookie before finishing the batch.

    Quick Fixing Your Dry Cookie Dough

    Knowing how to fix dry cookie dough is handy because crumbly dough does not always mean a failed recipe. It may simply need time, warmth, or a small moisture adjustment.

    It also helps prevent hard, dense cookies. Recognizing cold dough versus genuinely dry dough lets you fix the real problem without creating a sticky mess.

    How to Fix Dry Cookie Dough Step by Step

    Start with the gentlest solution. Dough can look dry even when its balance is correct, especially just after mixing or refrigeration.

    Let the Dough Rest

    Cover the bowl and let the dough sit for 10 minutes. Flour continues absorbing moisture from butter, eggs, and other wet & dry ingredients in home baking. After resting, press a small amount between your fingers.

    If it holds together, stop there. Adding unnecessary liquid can make cookies spread too much or develop greasy edges during baking.

    Warm Cold Dough

    Refrigerated dough often feels dry because chilled butter becomes firm. Leave it on the counter for 15 minutes, then test a small portion.

    Avoid microwaving the bowl. Uneven heating can melt some butter while other areas remain cold, causing inconsistent spreading in the oven.

    Add Moisture Slowly

    If the dough still crumbles, add milk, water, or melted butter one teaspoon at a time. Mix gently after each addition and stop once the dough holds together.

    For rich dough, half a beaten egg or one room-temperature yolk may help when extra fat and moisture are needed. Eggs also affect structure and spread.

    Why Cookie Dough Turns Dry

    Dry dough usually comes from an imbalance of flour, fat, and moisture. Finding the cause helps you choose a targeted fix.

    Why Cookie Dough Turns Dry

    Too Much Flour

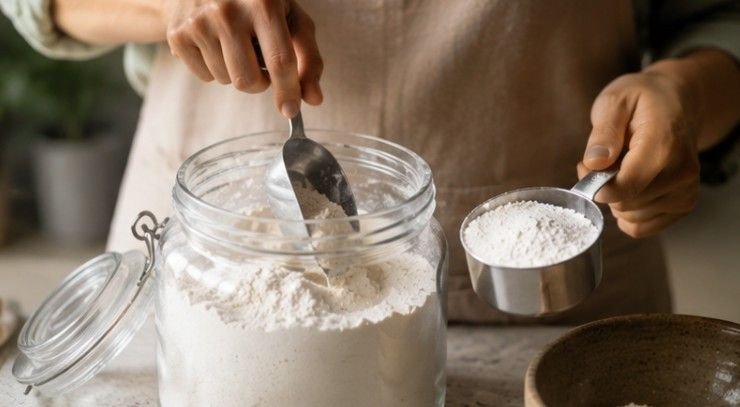
    Excess flour is a common cause of crumbly cookie dough. Scooping directly from a bag can pack flour into the cup, giving you more than the recipe intended.

    For accuracy, weigh flour or spoon it gently into a measuring cup and level the top. King Arthur Baking recommends weighing flour whenever possible because measurement differences can noticeably affect baking results.

    Overmixing the Dough

    Mixing too long after adding flour encourages gluten development. This can make dough tighter and produce cookies that are firmer or tougher than intended.

    Mix only until the flour disappears. Fold chocolate chips, nuts, or other additions in with a spatula rather than continuing to beat the dough.

    Browning Butter Too Long

    Brown butter tastes nutty, but heating evaporates water. Cooking it too long can leave dough drier than expected.

    Use recipes designed for browned butter. Some formulas replace lost moisture with measured milk or water.

    Choose the Right Rescue Ingredient

    The best addition depends on the cause. Matching the ingredient to the problem gives you better control over texture and spread.

    Choose the Right Rescue Ingredient

    Milk or Water

    Milk adds moisture plus small amounts of fat and protein. Water adds hydration with little flavor change, making either useful for minor dryness.

    Start with one teaspoon, mix gently, and reassess. Large additions are difficult to reverse once cookie dough becomes sticky.

    Melted Butter

    Melted butter is useful when the dough lacks fat, not simply whenever it looks crumbly. It can improve tenderness and help dry crumbs bind.

    Add only a teaspoon at a time. Too much butter can create flat cookies with greasy bottoms, especially in recipes with reduced sugar bakes.

    Egg Yolk

    Egg yolk contributes moisture, fat, and emulsifiers, so it can help rich dough when an egg component was accidentally omitted or clearly needed.

    Do not add a whole egg casually. Excess egg can make cookies cakey, puffy, or too soft instead of merely correcting dryness.

    Test One Cookie First

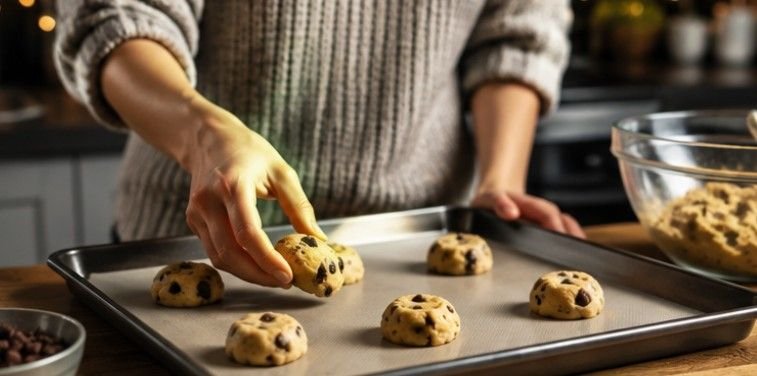
    A test cookie can reveal more than guessing from the bowl. Once the dough feels workable, bake one portion at the recipe’s stated temperature and time.

    Let it cool briefly, then check its spread, center, and edges. If it remains unusually thick and dry, the dough may need another tiny adjustment.

    If it spreads too far, stop adding liquid or fat. Chill the dough briefly if needed before testing again.

    Prevent Dry Cookie Dough

    Good measuring, temperature control, and storage make cookie dough more predictable and reduce the need for last-minute fixes.

    Prevent Dry Cookie Dough

    Measure Flour Correctly

    A kitchen scale gives the most consistent results. Without one, loosen the flour, spoon it into the cup, and level the top without packing.

    Watch Ingredient Temperature

    Softened butter should be pliable, not melted or oily. Chilled cookie dough should also have time to soften before you decide it is too dry.

    Temperature affects mixing and oven spread, so treat those instructions as part of the recipe rather than optional suggestions.

    Store Dough Airtight

    Cookie dough can lose moisture when exposed to refrigerator air. Cover the bowl tightly or transfer the dough to an airtight container before chilling.

    For longer storage, portion and freeze dough properly. Good storage prevents a dry crust and preserves the intended moisture balance.

    Frequently Asked Questions

    1. How Do You Rehydrate Cookie Dough?

    Let the dough rest for 10 minutes first. If it remains crumbly, add milk, water, or melted butter one teaspoon at a time, mixing gently until it holds together without becoming sticky.

    2. How Do You Fix Dough That Is Too Dry?

    Check whether the dough is cold, overfloured, or missing an ingredient. Then add a suitable liquid or fat gradually, allowing each teaspoon to blend before deciding whether more is necessary.

    3. Can You Make Dry Cookies Soft Again?

    Yes. Store dry cookies in an airtight container with a slice of bread for several hours. They can absorb some moisture, although severely overbaked cookies may not become completely soft again.

    4. What Is the Best Way to Learn How to Fix Dry Cookie Dough?

    The safest way to learn how to fix dry cookie dough is to check temperature first, rest the dough, review the recipe, then add moisture gradually so you do not overcorrect the batch.

    Turn Crumbs Into Cookies

    Learning how to fix dry cookie dough gives you a simple way to rescue a batch without waste.  Now you can make ahead desserts for a party. Start by resting or warming the dough, then correct moisture one teaspoon at a time. I get the best results from small adjustments, accurate measuring, and one test cookie before baking the tray. With that routine, crumbly dough becomes an easy kitchen problem instead of a baking disaster.

  • How to Measure Flour Correctly Every Time (Easy Tips)

    How to Measure Flour Correctly Every Time (Easy Tips)

    Mastering dry ingredient measurements saves your baked goods from total ruin. Ditching inaccurate habits is the single fastest way to achieve professional results at home without changing your recipes.

    Baking feels like magic until a batch of cookies turns into hard rocks because of a sneaky measurement error. Learning how to measure flour correctly completely transforms your everyday home baking. Diving straight into the bag with a measuring cup packs down the delicate grains, secretly adding up to fifty percent more flour than intended.

    Knowing How to Measure Flour Saves Your Bakes

    Scooping directly from the bag creates tightly packed mounds of flour that ruin your ratios. Learning how to measure flour correctly keeps your cakes light, your cookies chewy, and your dough soft. Extra dry ingredients turn tender treats into dry bricks fast, so fixing this one quick step keeps your kitchen wins consistent every single time.

    Heavy and Dense Textures

    Scooping directly from the bag creates tightly packed mounds of flour. Extra weight turns light, airy cakes into dense bricks that fail to rise properly in the oven.

    Excess flour alters the balance of moisture in your bowl. Your leavening agents struggle to lift the heavy dough, leaving you with flat and tough baked goods.

    Dry and Crumbly Treats

    Excess dry ingredients absorb all the wet butter, milk, and eggs in your batter. Dough quickly loses its moisture, causing soft cookie dough to bake into dry, crumbly pucks.

    When the liquid ratio drops, gluten becomes tough and rubbery. Taking time to measure accurately keeps the crumb soft, tender, and perfectly moist every time.

    Unpleasant Pale Appearance

    Over-measuring alters the delicate ratio of sugar and fat required for proper bakes. Your crusts remain pale and doughy instead of developing a rich golden-brown finish.

    Proper ratios allow natural sugars to caramelize against the heat of the oven. Accurate weight guarantees that beautiful bakery-style color on every loaf and pastry.

    Simple Tools You Need in the Kitchen

    Setting up your workspace with proper equipment guarantees success every single time. Investing in basic kitchen tools keeps your measurements accurate and your counters clean.

    Digital Kitchen Scale

    Digital Kitchen Scale

    Digital scales provide unmatched precision for every type of baking project. Weighing ingredients in grams eliminates all environmental variables like humidity or settled storage bags. You can check out trusted tools like the Escali Digital Kitchen Scale or the OXO Good Grips Scale to upgrade your setup.

    Using a digital scale also cuts down on dirty dishes in your sink. You simply pour ingredients into a single bowl while hitting the zero button between steps.

    Nesting Dry Measuring Cups

    Flat-topped dry measuring cups allow you to sweep away excess flour easily. Avoid using liquid measuring spouts for dry powders because they lead to uneven fills every time.

    Durable stainless steel sets from brands like Simply Organic or Farberware provide exact rims. Sharp, flat edges make it effortless to level off ingredients cleanly.

    Metal Spoon and Butter Knife

    A simple dining spoon gently transfers loose flour into your measuring cup. Filling the cup gradually prevents air pockets from forming without packing the grains down.

    The flat, straight back of a standard butter knife easily levels the top rim. Avoid using curved knives so you do not accidentally gouge out the center.

    Step-by-Step Guide: How to Measure Flour Correctly

    Achieving perfectly weighed ingredients takes only a few extra seconds of effort. Following a consistent routine guarantees your baked treats turn out soft and delicious.

    Fluffing Up the Container

    Flour naturally settles and compacts while sitting inside your pantry or storage canister. Take a fork or a wire whisk and gently fluff the flour inside the bag to break up dense pockets. This simple aeration step restores light volume back to the dry grains before you start measuring.

    Aerating the flour introduces air pockets that prevent heavy clumping in your cup. Skipping this quick step means you will still end up with packed ingredients.

    Spooning into the Cup

    Spooning into the Cup

    Gently scoop small spoonfuls of the fluffed flour directly into your dry measuring cup. Fill the cup gradually until a rounded mound forms over the top rim. Never shake, tap, or pack the cup while filling, as tapping settles the grains right back down into a dense pack.

    Let the flour fall loosely into the measuring container without forcing it down. Shaking the cup settles the powder, defeating the purpose of fluffing it first.

    Leveling Across the Rim

    Hold your measuring cup over the flour container or a scrap piece of parchment paper. Take the flat edge of a butter knife or a straight bench scraper and sweep across the top rim in one smooth motion. The knife pushes away the excess mound, leaving a perfectly flat surface.

    Sweeping the knife smoothly removes only the excess flour sitting above the cup edge. You are left with an exact volume measurement without any packed weight.

    Weighing Ingredients with a Kitchen Scale

    Using a scale is the absolute gold standard for accuracy in home baking. Eliminating guesswork saves time and yields identical results every time you bake.

    Setting Up the Scale

    Place your digital scale on a flat, level kitchen counter away from vibrations. Set your empty mixing bowl directly onto the scale platform before turning the power on. Press the tare or zero button so the digital display reads zero grams.

    Zeroing out the weight of the container ensures you only measure the added ingredient. This simple habit keeps your baker percentages spot on every single time.

    Pouring the Ingredients

    Gently spoon your flour directly into the bowl until the display reaches your target number. If you pour too much, simply scoop a small amount back out with your spoon. This method keeps your workspace clean and prevents messy spills across your counter.

    Watching the digital numbers rise allows you to hit exact target amounts effortlessly. You never have to worry about whether your cup was packed too tightly.

    Sifting Secrets Every Home Baker Must Know

    Understanding recipe phrasing prevents costly measurement mix-ups in delicate batters. Small grammatical differences in an ingredient list completely alter the total weight.

    Sifting Secrets Every Home Baker Must Know

    “1 Cup Flour, Sifted” Explained

    This phrasing means you must measure out one cup of flour first using the spoon-and-level method. Once measured, pass that flour through a fine-mesh sifter or sifting tool directly into your mixing bowl.

    Measuring first ensures you start with the standard base volume required for the recipe. Sifting afterward simply breaks up lumps and incorporates air for lighter batters.

    “1 Cup Sifted Flour” Explained

    This instruction tells you to sift a generous amount of flour into a clean bowl first. Afterward, gently spoon that airy, sifted flour into your measuring cup and level it off.

    Sifting first removes all density, yielding a significantly lighter total weight per cup. Pay close attention to word placement to avoid altering your recipe ratios.

    Flour Weights by Specific Variety

    Different flours possess unique grain densities and weights per single cup volume. Keeping a handy conversion reference ensures seamless substitutions across various baking recipes.

    All-Purpose and Bread Flour

    Standard all-purpose flour weighs approximately 120 to 125 grams per cup when fluffed. High-protein bread flour weighs virtually the same, averaging 125 to 130 grams per cup.

    These mid-weight flours form the sturdy structure for everyday loaves, cookies, and quick breads. Keeping these target weights in mind helps you troubleshoot dense doughs.

    Cake Flour and Whole Wheat

    Customized cake ideas require flour is significantly lighter, weighing roughly 113 to 115 grams per cup. Whole wheat flour contains heavy bran particles, weighing around 120 to 128 grams per cup.

    Low-protein cake flour yields soft textures, while whole wheat adds dense, nutty structure. Never swap them in equal volume without adjusting your overall weights.

    Specialty Gluten-Free and Almond Flours

    Gluten-free 1-to-1 baking blends generally weigh about 140 grams per cup due to heavy starches. Dense nut-based meals like almond flour weigh close to 112 grams per cup when lightly packed.

    Alternative flours absorb liquids at vastly different rates than standard wheat flour. Weighing these specialty blends prevents dry, gummy, or crumbly baked goods.

    Frequently Asked Questions

    1. What is the proper way to measure flour?

    The proper way to measure flour is by using a digital kitchen scale for exact weight. If using cups, fluff the flour, spoon it gently into the dry cup, and level the top off with a knife.

    2. How much is 1 cup of flour?

    One cup of standard all-purpose flour weighs approximately 120 to 125 grams or 4.25 ounces. Volume measurements vary greatly based on how tightly the flour is packed into the cup.

    3. What is the correct method for measuring flour?

    The correct manual method for measuring flour is the spoon-and-level technique. Always fluff the flour first, gently spoon it into your dry cup until overflowing, and sweep the excess off flat.

    4. What is the correct way to measure 1/2 cup flour?

    To measure a half cup of flour correctly, fluff your container first with a fork. Gently spoon the flour into a half-cup dry measuring cup and scrape the top level with a butter knife.

    Flour Power Victory!

    Mastering how to measure flour correctly turns frustrating baking failures into reliable kitchen victories every day. Ditching the direct scoop method for a simple digital scale or the spoon-and-level technique keeps your dough tender, light, and delicious. Swap out your old habits today, grab a butter knife, and watch your favorite homemade treats rise to pure perfection!

  • How to Tell If Eggs Are Good: 5 Easy Kitchen Tests

    How to Tell If Eggs Are Good: 5 Easy Kitchen Tests

    A forgotten carton can quickly become a breakfast mystery. I have paused before cracking an egg and wondered how to tell if eggs are good without wasting food or ruining a recipe. Fortunately, a few checks can help you judge freshness, spot spoilage, and cook with confidence.

    Key Takeaways

    1. Check carton dates and shell condition first.
    2. Use cold water to estimate freshness.
    3. Smell questionable eggs after cracking.
    4. Watery whites often mean age, not spoilage.
    5. Store eggs cold in their original carton.

    How to Tell If Eggs Are Good Step by Step

    The easiest method for how to tell if eggs are good is to check them in a simple order. Start with the carton, inspect the shell, try the water test if needed, then crack a doubtful egg into a separate bowl before adding it to your recipe.

    Check the Carton Date

    Look for a sell-by, best-by, expiration, or pack date. A passed date does not automatically mean spoilage. The USDA says raw shell eggs can generally stay refrigerated for three to five weeks when stored correctly.

    Inspect the Shell

    A good shell should be intact. Avoid eggs with leaking cracks, sticky residue, visible mold, or an unusually slimy surface. These signs may point to contamination or poor storage.

    The FDA recommends buying refrigerated eggs with clean, uncracked shells and keeping them cold.

    Try the Cold Water Test

    Try the Cold Water Test

    Fill a bowl with cold water and gently lower the egg inside. A fresh egg usually sinks and lies flat. An older egg may tilt or stand upright because its air cell grows over time.

    A floating egg is very old, but floating alone does not prove spoilage. Crack it separately and check its smell and appearance. If its storage history is uncertain, discarding it is safer.

    The Water Float Test Explained

    The float test is popular because it is quick and needs only a bowl of water. It estimates age because eggs gradually lose moisture through shell pores while the air pocket inside becomes larger.

    Sinks and Lies Flat

    An egg that sinks and rests flat is usually very fresh. It is excellent for frying, poaching, or scrambling because the yolk tends to stay rounded and the white looks firmer.

    Stands Upright on the Bottom

    An egg that sinks but stands on one end is older. Its larger air pocket makes one side more buoyant, but it may still be suitable for cooking when properly refrigerated.

    These eggs work well for cakes, muffins, cookies, and scrambled eggs, where perfect shape matters less.

    They can also be practical for single serving dessert recipes for one, where only one or two eggs may be needed and appearance is less important than freshness and proper storage.

    Floats to the Surface

    A floating egg has a large air cell and is significantly older. Many kitchen tips call floating proof that an egg is bad, but the float test mainly measures age.

    Crack it into a separate bowl. A rotten smell, unusual color, mold, or uncertain storage is reason to discard it. Throwing away a floating egg is also reasonable if you prefer a cautious approach.

    Other Ways to Check Eggs

    Other Ways to Check Eggs

    Water gives you an age clue, but your nose, ears, and eyes provide useful extra information. Combining several checks is more reliable than trusting one kitchen trick.

    Use the Sniff Test

    Crack the egg onto a clean plate or into a small bowl and smell it before mixing it with other ingredients. A spoiled egg often gives off a strong, unpleasant sulfur-like or rotten odor.

    A good egg should not smell foul. If the odor seems wrong, discard it and wash the bowl, utensils, counter, and your hands with hot, soapy water.

    Try the Shake Test

    Hold the egg near your ear and shake it gently. A fresh egg usually makes little noticeable sound because the white is thicker and the contents move less inside.

    Obvious sloshing can suggest an older egg, but it cannot confirm safety. Use this test only with the shell, date, smell, and storage checks.

    Do the Look Test

    A freshly cracked egg usually has a plump, rounded yolk and thicker white. As it ages, the yolk flattens and the white spreads more widely.

    A watery white alone does not mean spoilage. Discard eggs with unusual pink, greenish, black, or iridescent discoloration, visible mold, or anything clearly abnormal.

    Keep Eggs Fresh for Longer

    Keep Eggs Fresh for Longer

    Good storage reduces guesswork. A few simple refrigerator habits help protect both egg quality and food safety.

    Use a Cold Fridge Shelf

    Keep eggs at 40°F or below on an interior refrigerator shelf rather than the door, where temperatures change more often.

    Refrigerator organization also matters for produce, and knowing how to keep bananas fresh longer can help you store ripe fruit at the right stage without creating unnecessary food waste.

    Return eggs to the refrigerator promptly. Refrigerated eggs should not remain at room temperature for more than two hours.

    Keep the Original Carton

    The carton protects shells, limits moisture loss, and keeps package dates nearby. It can also reduce exposure to strong refrigerator odors.

    Avoid transferring eggs to an uncovered decorative holder if longer storage is your goal.

    Skip Washing Store-Bought Eggs

    Commercial eggs sold in the United States are already washed during processing. Washing them again at home is unnecessary and can encourage water to move through shell pores.

    Focus on clean hands, utensils, refrigeration, and safe cooking. Cook eggs until yolks and whites are firm unless you use pasteurized eggs for raw or lightly cooked recipes.

    Frequently Asked Questions

    1. How to Tell If Eggs Are Good Without Cracking Them?

    Check the carton date, shell condition, and cold-water float test. A sinking egg is generally fresher, while an upright or floating egg is older. Proper refrigeration still matters because these checks cannot guarantee safety.

    2. Can You Eat an Egg That Floats?

    A floating egg is old because its air cell has grown, but floating alone does not prove spoilage. Crack it separately, inspect it, smell it, and discard it if anything seems questionable.

    3. What Does a Bad Egg Smell Like?

    A spoiled egg usually has a strong rotten or sulfur-like odor after cracking. Do not taste a questionable egg. Throw it away and clean any surface, bowl, or utensil it touched.

    4. How Long Do Eggs Last in the Refrigerator?

    Raw shell eggs generally keep three to five weeks in a refrigerator at 40°F or below. For better quality, leave them in their original carton on an interior shelf.

    Crack With Confidence

    Knowing how to tell if eggs are good becomes simple once you stop relying on one trick. Check the date, inspect the shell, use the float test as an age clue, then trust smell and appearance before cooking. With steady refrigeration, clean handling, and sensible judgment, you can waste fewer eggs and feel more confident every time you cook. That routine makes cooking easier, safer, and less wasteful while helping each egg find its use.

  • How to Deodorize Wooden Wooden Spoons For a Fresh Kitchen 

    How to Deodorize Wooden Wooden Spoons For a Fresh Kitchen 

    Grabbing a favorite wooden spoon only to realize yesterday’s garlic stir-fry is lingering inside today’s sweet vanilla custard ruins a great home meal fast. Natural timber kitchen tools drink up strong food aromas, stubborn cooking grease, and deep moisture over time because wood features a soft porous surface. 

    Learning how to deodorize wooden wooden spoons properly restores your trusty kitchen tools, keeps your cooking area hygienic, and prevents savory garlic or onion tastes from crossing over into delicate sweet dishes.

    Key Takeaways

    • Baking soda neutralizes acids: Alkaline baking soda penetrates deep to break down smelly garlic and onion compounds.
    • Match odor to treatment: Use baking soda for sulfur, vinegar for mildew, and lemon for fish.
    • Skip viral boiling hacks: Boiling warps timber, cracks surfaces, and destroys structural wood integrity.
    • Oil seals protective layers: Regular food-grade mineral oil blocks future food odor absorption.
    • Air drying prevents mold: Drying completely prevents hidden dampness and mildew growth inside pores.

    The Secret Life of Timber Utensils

    Ever wonder why your favorite kitchen tool holds onto pungent smells for weeks while your metal whisk stays completely clean? Understanding how to deodorize wooden wooden spoons becomes essential when you realize natural timber behaves just like a firm sponge on your countertop.

    Wood cells contain thousands of tiny natural pores that expand whenever exposed to warm food steam. Pungent garlic sulfur compounds, acidic tomato sauces, and cooking oils slip inside those opened spaces and get trapped the moment your utensil cools down.

    Lingering savory odors become especially noticeable during dessert preparation, where clean, neutral tools matter for delicate flavors. This is worth keeping in mind when learning how to whip cream by hand or preparing other lightly flavored toppings that can easily pick up unwanted kitchen aromas.

    Leaving wet spoons sitting in a dark sink or putting them away while slightly damp creates the ideal home for stale odors. Microscopic moisture stays inside the wood grain, creating a sour, musty smell that basic dish soap simply cannot remove.

    Natural Deodorizing Methods

    Matching the correct natural household ingredient to your specific kitchen smell restores your wooden utensils while protecting the delicate natural grain.

    Baking Soda Paste

    Baking soda works best on strong organic acids like garlic, onion, and chili powder. Because baking soda is alkaline, it easily penetrates deep into wood pores to neutralize trapped odor compounds at a chemical level.

    Mix one tablespoon of baking soda with one teaspoon of warm water inside a small bowl to create a thick paste. Coat the wooden spoon head entirely with your fresh paste and let it sit for ten minutes so the active sodium bicarbonate works into the grain. 

    Scrub the surface gently using a soft sponge, rinse under warm running tap water, and dry the tool immediately with a soft cloth.

    Lemon and Salt

    Lemon and Salt

    Fresh lemon juice contains citric acid that cuts through lingering fish oils, while coarse salt acts as a gentle physical abrasive to lift surface residue. This classic combination removes sticky food debris while leaving behind a clean citrus scent.

    Cut a fresh lemon in half and sprinkle a thick layer of coarse salt or baking soda directly onto the spoon surface. Use the cut lemon half like a scrubbing brush to rub the salt into the wood using firm circular motions for two minutes. Rinse the utensil with warm tap water and wipe away all excess water immediately.

    Vinegar Soak

    Distilled white vinegar breaks down alkaline residues and eliminates stale or mildew-like smells caused by trapped kitchen moisture. The natural acetic acid kills odor-causing bacteria without leaving a permanent harsh vinegar scent behind.

    Mix equal parts white vinegar and warm water inside a tall glass. Submerge the spoon head into the diluted mixture for five minutes maximum so the wood does not absorb excess water. Remove the utensil, rinse it under running warm water, and dry it thoroughly with a fresh towel.

    The Boiling Water Myth Exposed

    Popular social media trends often encourage boiling wooden spoons in hot water to remove deep grease, but this viral method causes permanent damage.

    Why Boiling Warps Timber

    Why Boiling Warps Timber

    Submerging wooden tools in boiling water causes timber fibers to swell rapidly and unevenly. Extreme heat breaks down natural wood cells, causing severe warping and weakening the overall structure of your utensil.

    Once the boiled spoon cools down and dries, the wood contracts quickly, leaving behind deep cracks and rough splinters. These new surface cracks create even larger pockets for food particles and bacteria to hide inside later.

    Safe Deep Disinfecting Steps

    Instead of boiling your tools, disinfect wooden utensils using basic food-grade 3% hydrogen peroxide. Spray hydrogen peroxide directly over the clean wooden surface and let it sit for three minutes to lift impurities safely.

    Rinse the spoon thoroughly under warm running water to remove any residual hydrogen peroxide solution. Towel dry the utensil immediately and let it sit in an upright position until all moisture evaporates completely from the surface.

    Prevention and Care Tips

    Taking proactive maintenance steps seals timber pores, creating a strong protective layer that prevents food odors and dark stains from soaking into your utensils.

    Hand Wash Only

    Never place wooden spoons inside an automatic dishwasher or leave them soaking in a sink filled with soapy water. Dishwasher heat and harsh detergent strip away natural protective oils, causing timber to dry out and split wide open.

    Always wash your wooden tools by hand immediately after cooking using warm water and a mild dish soap. Use a soft sponge to remove surface food bits gently without scratching the smooth natural wood finish.

    Dry Immediately

    Dry Immediately

    Wipe your wooden tools thoroughly with a clean cloth right after washing to remove standing surface moisture. Leaving excess water sitting on raw wood forces the fibers to swell and traps dampness inside the grain.

    Stand your dry utensils upright inside an open utensil crock or rack so air circulates freely around each tool. Proper airflow stops mold spores from settling into the wood while ensuring the interior stays completely dry between uses.

    Condition the Wood

    Rub food-grade mineral oil onto your completely dry spoon once a month to seal raw pores and block future food odors from soaking deep into the wood. Mineral oil is completely food-safe, clear, and will never turn sour over time like standard vegetable oils.

    Keeping wooden utensils clean, neutral-smelling, and properly conditioned is especially helpful when preparing make ahead desserts for a party, since these recipes may sit for hours and delicate flavors should not pick up lingering garlic, onion, or spice aromas from kitchen tools.

    Pour a teaspoon of mineral oil onto the dry wooden spoon and rub it deep into the grain using a clean cloth. Let the protective oil soak into the wood for eight hours, then wipe off any leftover surface oil before cooking.

    Frequently Asked Questions

    1. How to get bad smell out of a wooden spoon?

    Mix one tablespoon of baking soda with one teaspoon of water, rub the paste over the spoon, wait ten minutes, rinse with warm water, and towel dry immediately.

    2. How sanitary are wooden spoons?

    Wooden spoons are very sanitary because natural hardwoods contain natural antibacterial properties that trap and destroy harmful bacteria as the wood dries out completely after washing.

    3. How often should you throw away wooden spoons?

    Replace wooden spoons when they develop deep structural cracks, jagged splinters, severe warping, or persistent foul odors that remain even after applying a deep baking soda paste treatment.

    4. How to freshen up wooden spoons?

    Scrub the wood with a cut lemon half dipped in coarse salt, rinse under warm water, air dry completely, and condition the surface using food-grade mineral oil.

    Bye-Bye Stinky Spoons

    Mastering how to deodorize wooden wooden spoons ensures your favorite cooking tools stay fresh, clean, and completely odor-free for every meal. Simple natural methods like baking soda pastes, quick vinegar soaks, and regular mineral oil conditioning protect your utensils for years. Skip harsh dishwasher cycles or boiling hacks, and enjoy clean timber tools every time you step into the kitchen.

  • How to Whip Cream by Hand: Quick Hacks for Fast Baking

    How to Whip Cream by Hand: Quick Hacks for Fast Baking

    Standing in the kitchen with fresh pie waiting, pulling out a bulky stand mixer for a small splash of topping always feels like too much work. Learning how to whip cream by hand saved my dessert game years ago, turning a tiresome arm workout into a quick two-minute kitchen trick.

    Key Takeaways

    • Cold equipment and high-fat heavy cream double volume in under three minutes.
    • Side-to-side whisking beats circular stirring by incorporating twice the air per stroke.
    • Powdered sugar stabilizes fluffy peaks better than granulated sugar due to added cornstarch.
    • Over-whipped grainy cream can be rescued easily with a splash of unwhipped cold cream.
    • Hand whipping gives total control, preventing accidental butter transformation compared to electric mixers.

    You Should Know How to Whip Cream by Hand

    Skipping the electric mixer is not just nostalgic, it is a fun kitchen power move that gives you absolute texture control. Knowing how to whip cream by hand saves you from annoying dishwashing sessions while preventing accidental over-whipping into dense butter. You get silky, restaurant-quality clouds of sweet cream in under three minutes using simple elbow grease and basic kitchen tools.

    Essential Equipment and Ingredients for Easy Whipping

    Gathering the right tools and cold ingredients ensures your heavy cream expands effortlessly into lofty peaks without tiring your arm.

    High-Fat Heavy Cream

    Always purchase heavy whipping cream or heavy cream containing at least thirty-six percent milkfat. Lower fat dairy like half-and-half lacks the structural fat network required to trap air bubbles securely.

    Powdered Sugar and Vanilla

    Confectioners’ sugar dissolves instantly and contains trace cornstarch that absorbs moisture to stabilize your whipped peaks.

    Just as learning how to measure flour correctly improves consistency in baking, measuring powdered sugar accurately helps keep whipped cream light rather than overly sweet or dense. Pure vanilla extract adds warm, aromatic flavor that elevates plain cream into a dessert highlight.

    Metal Bowl and Balloon Whisk

    Select a large stainless steel bowl because metal retains cold temperatures vastly better than plastic or ceramic. A wide balloon whisk features flexible wire loops that push massive amounts of air through liquid dairy with every stroke.

    Step-by-Step Guide on How to Whip Cream by Hand

    Step-by-Step Guide on How to Whip Cream by Hand

    Following these precise physical movements guarantees light, billowy sweet toppings in roughly three minutes flat.

    Chill the Bowl

    Place your metal mixing bowl and balloon whisk into the freezer for ten to fifteen minutes before starting. Ice-cold metal keeps the milkfat firm, allowing fat globules to build a strong network that traps air rapidly.

    Combine Ingredients

    Pour one cup of very cold heavy cream, one to two tablespoons of powdered sugar, and half a teaspoon of vanilla extract into the chilled bowl. Combining everything right at the start ensures sweet flavors distribute evenly as the liquid expands.

    Tilt the Bowl

    Angle your mixing bowl at approximately forty-five degrees on your countertop so the liquid pools along the lower edge. Tilting creates a deep pool that allows your whisk wires to submerge fully and scoop up maximum volume per sweep.

    Whisk Vigorously

    Drive your wire whisk in a fast back-and-forth sweeping motion across the bottom pool using your forearm and wrist. Side-to-side sweeping forces air straight through the liquid, incorporating twice as much oxygen as standard circular stirring.

    Watch the Peaks

    Observe the liquid carefully as it transforms from frothy bubbles into thick, pillowy clouds that hold soft-to-medium peaks. Stop whisking the moment the cream holds its shape gently on the whisk to avoid churning your topping into solid butter.

    Temperature Science and Fat Mechanics

    Temperature Science and Fat Mechanics

    Understanding how temperature alters dairy fat structures guarantees consistent whipping performance in any kitchen environment.

    Cold Temperature Physics

    Microscopic fat globules in heavy cream must remain solid and firm to form a stable framework around trapped air bubbles. If your kitchen or bowl gets warm, those fat membranes melt and collapse, leaving you with sloshing liquid that refuses to rise.

    Air Incorporation Dynamics

    Whisking rapidly breaks up liquid dairy into micro-bubbles while simultaneously coating those bubbles in solid fat particles. As millions of fat-coated air pockets link together, the mixture doubles in volume and locks into a smooth semi-solid structure.

    Stabilizing Peak Hold

    Powdered sugar acts as a gentle binder because its fine particles blend seamlessly into the moisture without causing grittiness. The tiny fraction of starch present in confectioners’ sugar prevents liquid weeping, keeping your whipped clouds firm for hours in the fridge.

    This extra stability is especially useful when preparing easy no bake desserts with few ingredients, where whipped cream often provides much of the dessert’s structure and texture.

    Troubleshooting Common Hand Whipping Mistakes

    Troubleshooting Common Hand Whipping Mistakes

    Fixing common mistakes saves your ingredients and ensures your final dessert topping looks gorgeous every time.

    Identifying Soft vs. Stiff Peaks

    Soft peaks slump over gently when you lift your whisk, making them ideal for spooning over warm fruit pies or hot cocoa. Stiff peaks hold rigid, upright points that remain firm, which works best for piping decorative borders on frosted layer cakes.

    Fixing Grainy Over-Whipped Cream

    If your cream looks clumpy or curdled, you have whisked past stiff peaks into early stages of butter separation. Instantly pour in one to two tablespoons of unwhipped cold heavy cream and gently fold it in with a spatula to restore silky smoothness.

    Correcting Warm Room Slippage

    When whipping cream in a hot summer kitchen, your bowl can warm up before peaks have time to form fully. Set your mixing bowl inside a larger outer bowl filled with ice cubes to keep the dairy chilled while you finish whisking.

    Frequently Asked Questions

    1. How long does it take to hand whip cream?

    Learning how to whip cream by hand typically takes two to four minutes of vigorous whisking when using chilled equipment. Utilizing a wide balloon whisk and a fast side-to-side motion cuts your prep time down significantly compared to circular stirring.

    2. Can I whip cream with my hand?

    Yes, you can easily whip cream by hand using a standard manual wire whisk or a glass jar. Hand whisking actually gives you superior control over the final texture, preventing you from over-beating your sweet cream into dense butter.

    3. What is the easiest way to whip cream?

    The easiest approach is sweeping ice-cold heavy cream in a pre-chilled metal bowl using a large balloon whisk. Tilting your bowl at a forty-five-degree angle creates a deep pool that speeds up air incorporation dramatically.

    4. Can I whip cream with a fork?

    You can whip cream using a common dinner fork, though it requires eight to ten minutes of rapid forearm effort. A fork’s small tines move far less air per stroke, so using a wire balloon whisk remains vastly faster.

    Whisk Your Way to Sweet Perfection Today

    Ditching bulky electric gadgets for a simple whisk and cold bowl makes dessert preparation faster, cleaner, and far more satisfying. Now that you know how to whip cream by hand effortlessly, chilled tools and smart wrist movements will yield billowy sweet clouds in under three minutes. Grab your balloon whisk, chill your metal bowl, and elevate your favorite pies today!

  • How to Prevent Cookies From Spreading and Bake Them Thick

    How to Prevent Cookies From Spreading and Bake Them Thick

    A tray of cookie dough can look perfect going into the oven and somehow come out looking like one giant pancake. I have learned that how to prevent cookies from spreading is less about complicated baking tricks and more about controlling temperature, ingredient ratios, dough texture, and the baking surface. A few smart adjustments can turn flat cookies into thick, chewy, evenly shaped treats.

    Cookies naturally spread a little as butter and sugar melt, but excessive spreading usually signals that something happened before or during baking. Understanding those small details makes troubleshooting much easier and can save an entire batch before it reaches the oven.

    Key Takeaways

    • Chill soft dough before baking. 
    • Measure flour accurately. 
    • Keep butter cool rather than melted. 
    • Use room-temperature baking sheets. 
    • Line trays with parchment instead of adding grease.

    Why Do Cookies Turn Flat?

    Understanding what happens inside the oven makes every fix easier to remember.

    Butter Melts Too Quickly

    Butter provides flavor and tenderness, but it also controls how fast dough moves across the baking sheet. If the butter is too warm, partially melted, or fully melted when the recipe expects softened butter, it begins flowing before the cookie structure has time to set.

    Properly softened butter should still feel slightly cool. Press it gently with a finger and it should leave an indent without collapsing. Shiny, greasy, extremely soft butter is usually too warm for recipes designed around creamed butter.

    Dough Has Too Much Moisture

    Cookie dough depends on a careful balance between flour, fat, sugar, eggs, and other liquids. Too little flour or too much moisture makes the dough less capable of holding its shape.

    Even seemingly small changes matter. Using a larger egg, pouring flour inaccurately, or substituting ingredients can change the wet-to-dry ratio enough to create noticeably flatter cookies.

    Oven Heat Is Off

    The oven needs to set the outside of the cookie while the fat melts. If the temperature is lower than expected, the dough may have extra time to flow outward before enough structure develops.

    An oven thermometer is useful because built-in oven displays are not always completely accurate. Allow the oven to preheat fully before baking rather than putting cookies inside as soon as the preheat light appears.

    Control Temperature And Dough

    Temperature is often the fastest place to start when cookies spread more than expected.

    Control Temperature And Dough

    Chill The Cookie Dough

    Refrigerating cookie dough gives the butter time to firm up. Firmer fat melts more slowly, giving the dough additional time to set before spreading excessively.

    For many drop-cookie recipes, chilling scooped dough for about 30 minutes is a good starting point. Very soft dough may benefit from one or two hours, while recipes specifically designed for overnight chilling should follow their stated resting time.

    Chilling also allows flour to absorb moisture more completely. This can create dough that is easier to handle and, depending on the recipe, cookies with stronger flavor and a chewier texture.

    Shape Taller Dough Portions

    A simple shaping technique can help create thicker cookies. Instead of flattening dough balls or forming perfectly round spheres, shape them slightly taller than they are wide.

    This gives the cookie more vertical height before the fat starts melting. It will not repair a badly unbalanced recipe, but combined with chilled dough and accurate measurements, it can encourage a thicker center.

    Keep Baking Sheets Cool

    A surprisingly common problem appears after the first batch. The first tray looks wonderful, while the second spreads dramatically even though the same dough was used.

    The culprit may be the baking sheet. Placing chilled dough onto a hot pan begins melting the butter immediately. Let the tray cool completely before loading another batch, or rotate between two baking sheets.

    How To Prevent Cookies From Spreading

    The most reliable method combines good dough preparation with careful measurements and the right baking setup.

    Measure Flour Accurately

    Flour gives cookie dough much of its structure. Too little flour leaves the melting butter and sugar without enough support, causing the cookie to flow outward.

    A digital kitchen scale gives the most consistent results because flour can vary significantly when measured by volume. If a scale is unavailable, spoon flour gently into the measuring cup and level it rather than packing or shaking the flour down.

    If you know the dough was accidentally under-measured and feels unusually wet, adding one tablespoon of flour at a time may help. Avoid automatically adding extra flour to a correctly prepared recipe because too much can make cookies dry or cakey.

    Use Cool Softened Butter

    For recipes that call for softened butter, avoid treating “room temperature” as extremely soft. The ideal butter should bend slightly and accept a gentle fingerprint while still holding its shape.

    If butter becomes too warm while mixing, refrigerate the prepared dough before baking. Never assume that adding extra flour is the first solution because the actual problem may simply be temperature.

    Test Two Cookies First

    Before filling an entire tray, bake two cookies using the planned temperature and baking time. This small test reveals whether the dough needs an adjustment without risking the whole batch.

    If both cookies spread too much, chill the remaining dough for another 20 to 30 minutes. If the problem continues, inspect flour quantity, butter temperature, sugar level, egg size, and oven temperature before making further changes.

    Improve Ingredients And Equipment

    Once temperature is under control, a few ingredient and pan choices can make cookie spread much more predictable.

    Improve Ingredients And Equipment

    Choose Parchment Paper

    Parchment paper provides a reliable nonstick surface without extra fat, helping cookies hold their shape better. Butter or cooking spray can make dough spread more quickly. Silicone baking mats are another good option and may produce slightly thicker cookies, but results depend on the recipe. For consistent everyday baking, parchment paper remains the safest choice.

    Watch The Sugar Ratio

    Sugar influences cookie spread, browning, texture, and moisture. Too much sugar can lead to flatter, crispier cookies. If adjusting a recipe, reducing sugar by 5–10% may help limit spreading, but avoid changing it in tested recipes since it also affects flavor and texture.

    Use Cornstarch Carefully

    Cornstarch can help create softer, thicker cookies by adding structure. About one teaspoon mixed into the dry ingredients may reduce spreading in some recipes. However, if the real issue is melted butter or a hot baking sheet, correcting the temperature is more effective than adding cornstarch.

    Read Your Cookie Clues

    The finished cookie can often tell you exactly where the problem started.

    Read Your Cookie Clues

    Flat And Greasy Cookies

    A cookie that spreads widely and leaves a greasy appearance often points toward warm butter, too much fat, or insufficient flour.

    Start by checking whether the butter was properly softened and whether the flour was accurately measured. Chill the remaining dough before altering the ingredient ratio.

    First Batch Good, Second Batch Flat

    This pattern strongly suggests a hot baking pan. The cookie dough begins warming before it even reaches the oven, giving the butter a head start on melting.

    Transfer the dough back to the refrigerator and wait until the baking sheet feels completely cool.

    Chilled Dough Still Spreads

    If properly chilled dough continues spreading, look beyond refrigeration. Check ingredient measurements, egg size, sugar quantity, oven temperature, baking surface, and any substitutions made to the original recipe. A cold dough cannot completely compensate for an incorrect flour-to-fat ratio.

    Also Read: How to fix dry cookie dough?

    Frequently Asked Questions

    1. Do Cookies Spread More On Parchment Or Silicone?

    Both surfaces control spreading better than heavily greased pans. Silicone mats may produce slightly thicker cookies in some recipes, while parchment provides reliable browning, easy cleanup, and consistent results for most home bakers.

    2. What Can I Add To Cookies To Keep Them From Spreading?

    If the dough genuinely lacks structure, a small amount of flour or about one teaspoon of cornstarch may help. First check temperature and measurements because unnecessarily changing a balanced recipe can produce dry cookies.

    3. How Do You Make Thick Cookies That Don’t Spread?

    Use cool softened butter, accurately measured flour, chilled dough, tall dough portions, room-temperature baking sheets, and a fully preheated oven. Baking two test cookies first also lets you correct problems before baking the entire batch.

    4. Why Is How To Prevent Cookies From Spreading Important?

    Knowing how to prevent cookies from spreading helps you diagnose ingredient, temperature, and equipment problems before they ruin a full tray. It also produces more consistent cookie thickness, texture, shape, and baking time.

    Bye-Bye, Cookie Pancakes!

    Great cookies need some spread, but they should not race across the baking sheet. Once I started treating butter temperature, chilled dough, accurate flour measurements, cool pans, and oven heat as one system, my results became much more predictable. Mastering how to prevent cookies from spreading means you can spot problems early, bake a two-cookie test, make one smart adjustment, and enjoy thicker, chewier cookies instead of mystery puddles.

  • How to Keep Bananas Fresh Longer: Kitchen-Tested Hacks

    How to Keep Bananas Fresh Longer: Kitchen-Tested Hacks

    Kitchen counter displays always look gorgeous with a vibrant bunch of golden fruit until midweek brown spots crash the party. Our home kitchen testing team spent weeks evaluating every storage myth to discover how to keep bananas fresh longer without wasting groceries. You will save money and enjoy perfectly ripe fruit every single morning with these simple countertop adjustments.

    Key Takeaways

    1. Wrap stems tightly with foil to block ethylene gas release.
    2. Separate individual bananas from the cluster to slow ripening.
    3. Hang bunches to prevent bruising and improve airflow.
    4. Move yellow bananas into the fridge crisper drawer.
    5. Keep away from ethylene-sensitive produce like apples and avocados.

    Keeping Bananas Fresh Longer Saves You A Grocery Run

    Nothing breaks a smoothie lover’s heart quite like waking up to a bunch of black mush on the counter. Bananas go from perfectly green to completely overripe in what feels like a single blink. Learning how to keep bananas fresh longer turns your kitchen into a zero-waste paradise while saving your weekly grocery budget from literal fruit decay.

    Understanding the Science Behind Rapid Ripening

    Understanding how fruit biology works is the secret to extending kitchen produce life.

    The Ethylene Gas Trigger

    Banana stems continuously emit ethylene gas, a natural plant hormone that accelerates starch converting into sugar. Containing or slowing down this gas release is the single most effective way to protect your fruit from premature decay.

    Impact of Temperature and Sunlight

    Ambient heat and direct sunlight trigger rapid cellular breakdown inside tropical fruits. Placing your fruit bowl near bright windows or warm appliances like ovens accelerates oxidation, turning firm pulp mushy within 48 hours.

    Air Circulation and Bruising

    Weight pressure from resting on flat surfaces creates internal bruising, which releases localized ethylene spurts. Proper air movement around the entire surface balances moisture levels and keeps the peel firm.

    Why Bananas Ripen So Quickly

    Bananas naturally produce ethylene gas, a plant hormone that speeds up the ripening process. As bananas mature, they release more ethylene, causing nearby bananas in the bunch to ripen faster as well. Warm temperatures, bruising, and poor airflow can accelerate this process even further. 

    Understanding how ethylene works makes it easier to apply simple storage techniques, such as wrapping the stems, separating bananas, and keeping them at the right temperature. These small adjustments help extend freshness, reduce food waste, and give you more time to enjoy perfectly ripe bananas.

    Mastering How to Keep Bananas Fresh Longer on the Counter

    Mastering How to Keep Bananas Fresh Longer on the Counter

    Applying practical produce management techniques on your countertop ensures maximum immediate shelf life.

    Wrap the Stems Tightly

    Cover the stem or crown of your bunch tightly with plastic wrap or aluminum foil to block escaping ethylene gas. According to culinary testing guidelines at The Kitchn, trapping gas right at the source prevents it from circulating down to the pulp and accelerating premature softening.

    Hang the Bunch for Uniform Airflow

    Use a dedicated banana tree or hanging hook to improve ambient air circulation around every individual fruit. Elevating the cluster prevents flat spots and internal tissue bruising caused by resting heavily against hard granite or wood counters.

    Keep Distance from Other Produce

    Place your banana setup at least a few feet away from other ethylene-producing items like apples, avocados, and tomatoes. Isolating your cluster prevents cross-contamination of ripening gases that triggers an uncontrollable chain reaction across your fruit bowl.

    Refrigerating Bananas at Peak Ripeness

    Moving fruit into cold storage requires the right timing to lock in ideal texture and taste.

    Wait for Full Yellow Color

    Do not put green or underripe fruit into the refrigerator, or they will cease ripening entirely. Chilling unripe produce permanently damages cell walls, leaving you with dull, tasteless starch that never softens into sweet pulp.

    Embrace the Cold Environment

    Once your fruit reaches optimal yellow ripeness with light freckling, transfer them straight to the refrigerator crisper drawer. Cold temperatures drastically slow down internal enzymatic breakdown while maintaining firm, delicious pulp structure inside.

    Expect Dark Outer Peels

    The chilly environment turns outer peels dark brown or black due to pigment oxidation, but do not throw them away. The sweet fruit flesh inside remains firm, chilled, and perfectly edible for an extra week or two past normal shelf life.

    Freezing Strategies for Long-Term Storage

    Freezing Strategies for Long-Term Storage

    Preserving overripe fruit in the freezer ensures zero food waste for future baking projects.

    Peel and Slice Before Freezing

    Slice overripe bananas into half-inch coins or peel them completely before placing them into a freezer-safe bag or airtight container. Pre-slicing prevents you from fighting frozen peels later and allows for easy portion measuring.

    These ready-to-use pieces are especially convenient for smoothies, parfaits, and healthy yogurt desserts from around the world, where frozen banana can add natural sweetness and a thicker, creamier texture.

    Ready for Smoothies and Baking

    Frozen banana slices stay vibrant for months and blend into rich, creamy textures for smoothies, healthy nice cream, or classic banana bread recipes.

    When using wooden utensils to mash or mix bananas for sweet recipes, knowing how to deodorize wooden wooden spoons helps prevent lingering savory odors from affecting delicate dessert flavors. Having a stash ready in cold storage makes home baking incredibly fast and convenient.

    Frequently Asked Questions

    1. How do you keep bananas fresh for 2 weeks?

    To master how to keep bananas fresh longer for two weeks, wrap individual stems tightly in foil, hang the cluster on a hook, and move them into the refrigerator as soon as they turn completely yellow.

    2. Do bananas last longer in the fridge or on the counter?

    Bananas last longer on the counter while maturing from green to yellow, but they stay fresh far longer inside the fridge once fully ripe, extending usability for up to seven additional days.

    3. How do you slow down bananas from ripening?

    You can slow down the ripening process by wrapping the crowns tightly with aluminum foil to trap ethylene gas, separating individual fruits, keeping them out of direct sunlight, and providing proper suspension.

    4. Is it better to wrap bananas in foil or plastic?

    Aluminum foil works much better than plastic wrap because it molds firmly around irregular stem shapes, creating a tighter seal that prevents ethylene gas from escaping onto the fruit body.

    Ultimate Freshness Breakthrough So Never Waste Fruit Again

    Mastering how to keep bananas fresh longer comes down to simple science and smart kitchen organization. Wrapping stems, hanging clusters, and using cold refrigeration at peak ripeness completely eliminates premature brown mush. Take control of your countertop produce today, apply these tested storage hacks, and enjoy perfectly sweet, firm fruit every single day of the week!