Mastering dry ingredient measurements saves your baked goods from total ruin. Ditching inaccurate habits is the single fastest way to achieve professional results at home without changing your recipes.
Baking feels like magic until a batch of cookies turns into hard rocks because of a sneaky measurement error. Learning how to measure flour correctly completely transforms your everyday home baking. Diving straight into the bag with a measuring cup packs down the delicate grains, secretly adding up to fifty percent more flour than intended.
Knowing How to Measure Flour Saves Your Bakes
Scooping directly from the bag creates tightly packed mounds of flour that ruin your ratios. Learning how to measure flour correctly keeps your cakes light, your cookies chewy, and your dough soft. Extra dry ingredients turn tender treats into dry bricks fast, so fixing this one quick step keeps your kitchen wins consistent every single time.
Heavy and Dense Textures
Scooping directly from the bag creates tightly packed mounds of flour. Extra weight turns light, airy cakes into dense bricks that fail to rise properly in the oven.
Excess flour alters the balance of moisture in your bowl. Your leavening agents struggle to lift the heavy dough, leaving you with flat and tough baked goods.
Dry and Crumbly Treats
Excess dry ingredients absorb all the wet butter, milk, and eggs in your batter. Dough quickly loses its moisture, causing soft cookie dough to bake into dry, crumbly pucks.
When the liquid ratio drops, gluten becomes tough and rubbery. Taking time to measure accurately keeps the crumb soft, tender, and perfectly moist every time.
Unpleasant Pale Appearance
Over-measuring alters the delicate ratio of sugar and fat required for proper bakes. Your crusts remain pale and doughy instead of developing a rich golden-brown finish.
Proper ratios allow natural sugars to caramelize against the heat of the oven. Accurate weight guarantees that beautiful bakery-style color on every loaf and pastry.
Simple Tools You Need in the Kitchen
Setting up your workspace with proper equipment guarantees success every single time. Investing in basic kitchen tools keeps your measurements accurate and your counters clean.
Digital Kitchen Scale
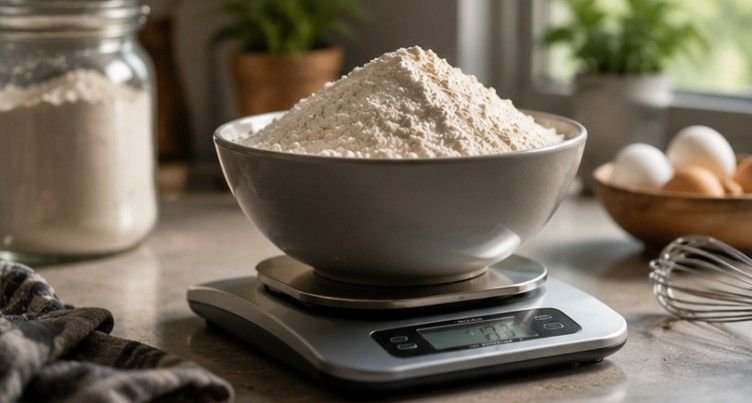
Digital scales provide unmatched precision for every type of baking project. Weighing ingredients in grams eliminates all environmental variables like humidity or settled storage bags. You can check out trusted tools like the Escali Digital Kitchen Scale or the OXO Good Grips Scale to upgrade your setup.
Using a digital scale also cuts down on dirty dishes in your sink. You simply pour ingredients into a single bowl while hitting the zero button between steps.
Nesting Dry Measuring Cups
Flat-topped dry measuring cups allow you to sweep away excess flour easily. Avoid using liquid measuring spouts for dry powders because they lead to uneven fills every time.
Durable stainless steel sets from brands like Simply Organic or Farberware provide exact rims. Sharp, flat edges make it effortless to level off ingredients cleanly.
Metal Spoon and Butter Knife
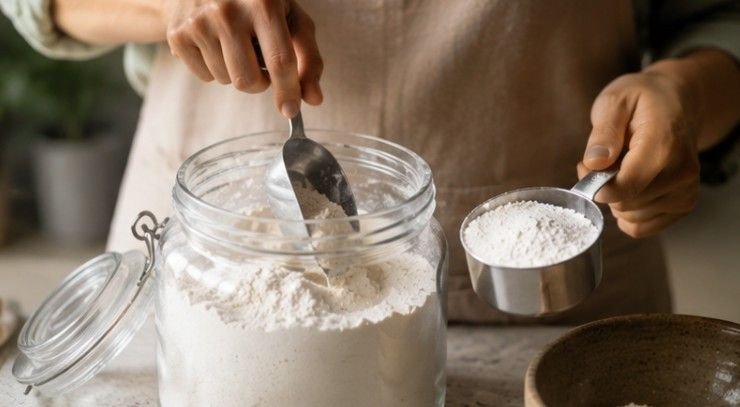
A simple dining spoon gently transfers loose flour into your measuring cup. Filling the cup gradually prevents air pockets from forming without packing the grains down.
The flat, straight back of a standard butter knife easily levels the top rim. Avoid using curved knives so you do not accidentally gouge out the center.
Step-by-Step Guide: How to Measure Flour Correctly
Achieving perfectly weighed ingredients takes only a few extra seconds of effort. Following a consistent routine guarantees your baked treats turn out soft and delicious.
Fluffing Up the Container
Flour naturally settles and compacts while sitting inside your pantry or storage canister. Take a fork or a wire whisk and gently fluff the flour inside the bag to break up dense pockets. This simple aeration step restores light volume back to the dry grains before you start measuring.
Aerating the flour introduces air pockets that prevent heavy clumping in your cup. Skipping this quick step means you will still end up with packed ingredients.
Spooning into the Cup
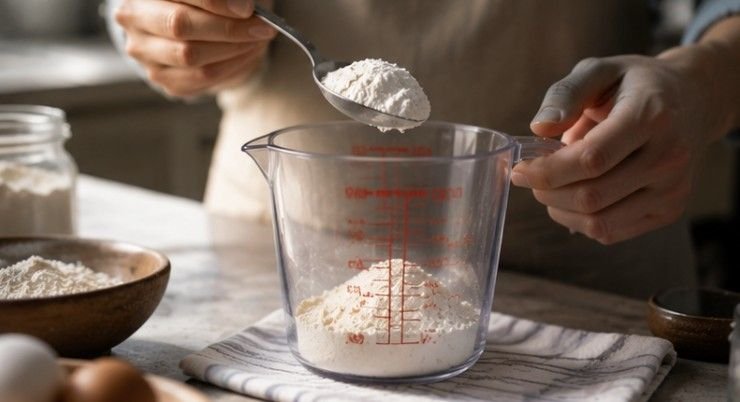
Gently scoop small spoonfuls of the fluffed flour directly into your dry measuring cup. Fill the cup gradually until a rounded mound forms over the top rim. Never shake, tap, or pack the cup while filling, as tapping settles the grains right back down into a dense pack.
Let the flour fall loosely into the measuring container without forcing it down. Shaking the cup settles the powder, defeating the purpose of fluffing it first.
Leveling Across the Rim
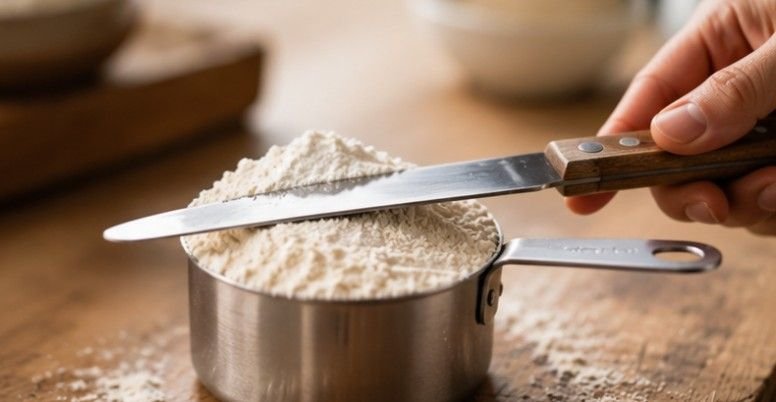
Hold your measuring cup over the flour container or a scrap piece of parchment paper. Take the flat edge of a butter knife or a straight bench scraper and sweep across the top rim in one smooth motion. The knife pushes away the excess mound, leaving a perfectly flat surface.
Sweeping the knife smoothly removes only the excess flour sitting above the cup edge. You are left with an exact volume measurement without any packed weight.
Weighing Ingredients with a Kitchen Scale
Using a scale is the absolute gold standard for accuracy in home baking. Eliminating guesswork saves time and yields identical results every time you bake.
Setting Up the Scale
Place your digital scale on a flat, level kitchen counter away from vibrations. Set your empty mixing bowl directly onto the scale platform before turning the power on. Press the tare or zero button so the digital display reads zero grams.
Zeroing out the weight of the container ensures you only measure the added ingredient. This simple habit keeps your baker percentages spot on every single time.
Pouring the Ingredients
Gently spoon your flour directly into the bowl until the display reaches your target number. If you pour too much, simply scoop a small amount back out with your spoon. This method keeps your workspace clean and prevents messy spills across your counter.
Watching the digital numbers rise allows you to hit exact target amounts effortlessly. You never have to worry about whether your cup was packed too tightly.
Sifting Secrets Every Home Baker Must Know
Understanding recipe phrasing prevents costly measurement mix-ups in delicate batters. Small grammatical differences in an ingredient list completely alter the total weight.
“1 Cup Flour, Sifted” Explained
This phrasing means you must measure out one cup of flour first using the spoon-and-level method. Once measured, pass that flour through a fine-mesh sifter or sifting tool directly into your mixing bowl.
Measuring first ensures you start with the standard base volume required for the recipe. Sifting afterward simply breaks up lumps and incorporates air for lighter batters.
“1 Cup Sifted Flour” Explained
This instruction tells you to sift a generous amount of flour into a clean bowl first. Afterward, gently spoon that airy, sifted flour into your measuring cup and level it off.
Sifting first removes all density, yielding a significantly lighter total weight per cup. Pay close attention to word placement to avoid altering your recipe ratios.
Flour Weights by Specific Variety
Different flours possess unique grain densities and weights per single cup volume. Keeping a handy conversion reference ensures seamless substitutions across various baking recipes.
All-Purpose and Bread Flour
Standard all-purpose flour weighs approximately 120 to 125 grams per cup when fluffed. High-protein bread flour weighs virtually the same, averaging 125 to 130 grams per cup.
These mid-weight flours form the sturdy structure for everyday loaves, cookies, and quick breads. Keeping these target weights in mind helps you troubleshoot dense doughs.
Cake Flour and Whole Wheat
Customized cake ideas require flour is significantly lighter, weighing roughly 113 to 115 grams per cup. Whole wheat flour contains heavy bran particles, weighing around 120 to 128 grams per cup.
Low-protein cake flour yields soft textures, while whole wheat adds dense, nutty structure. Never swap them in equal volume without adjusting your overall weights.
Specialty Gluten-Free and Almond Flours
Gluten-free 1-to-1 baking blends generally weigh about 140 grams per cup due to heavy starches. Dense nut-based meals like almond flour weigh close to 112 grams per cup when lightly packed.
Alternative flours absorb liquids at vastly different rates than standard wheat flour. Weighing these specialty blends prevents dry, gummy, or crumbly baked goods.
Frequently Asked Questions
1. What is the proper way to measure flour?
The proper way to measure flour is by using a digital kitchen scale for exact weight. If using cups, fluff the flour, spoon it gently into the dry cup, and level the top off with a knife.
2. How much is 1 cup of flour?
One cup of standard all-purpose flour weighs approximately 120 to 125 grams or 4.25 ounces. Volume measurements vary greatly based on how tightly the flour is packed into the cup.
3. What is the correct method for measuring flour?
The correct manual method for measuring flour is the spoon-and-level technique. Always fluff the flour first, gently spoon it into your dry cup until overflowing, and sweep the excess off flat.
4. What is the correct way to measure 1/2 cup flour?
To measure a half cup of flour correctly, fluff your container first with a fork. Gently spoon the flour into a half-cup dry measuring cup and scrape the top level with a butter knife.
Flour Power Victory!
Mastering how to measure flour correctly turns frustrating baking failures into reliable kitchen victories every day. Ditching the direct scoop method for a simple digital scale or the spoon-and-level technique keeps your dough tender, light, and delicious. Swap out your old habits today, grab a butter knife, and watch your favorite homemade treats rise to pure perfection!