Blog

  • Easy No Bake Desserts With Few Ingredients That Wow

    Easy No Bake Desserts With Few Ingredients That Wow

    When I want dessert without heating the kitchen or buying a long grocery list, I reach for easy no bake desserts with few ingredients. The best versions use one creamy or crunchy base, one ingredient that helps everything set, and enough chill time to create a polished dessert with very little work.

    I also like their flexibility. Yogurt, cream cheese, chocolate chips, biscuits, peanut butter, coconut, or berries can become dessert without complicated techniques.

    Why Few-Ingredient No-Bake Desserts Work

    Most easy no bake desserts with few ingredients succeed because every ingredient has more than one job. Cream cheese adds richness and structure. Sweetened condensed milk sweetens and thickens. Crushed cookies add flavor and a sturdy base. Chocolate provides sweetness while becoming firmer as it chills.

    Strong flavors also reduce the need for extras. Biscoff cookies, lemon, berries, peanut butter, coconut, and chocolate already have distinctive flavors. That keeps the ingredient list short without making dessert taste unfinished.

    Chilling is another part of the recipe, not simply waiting time. Cheesecake mixtures and chocolate fillings may look soft immediately after mixing. Several hours in the refrigerator can completely change their texture.

    My Three-Part No-Bake Dessert Formula

    My Three-Part No-Bake Dessert Formula

    My favorite framework for easy no bake desserts with few ingredients is simple: base, structure, and flavor. It gives me a useful starting point when I want something sweet without shopping for a specific recipe.

    Choose the Base

    For creamy desserts, I start with thick Greek yogurt, cream cheese, or whipped cream. For firmer treats, crushed cookies, shredded coconut, or nut butter work well.

    The base determines most of the dessert’s texture, so thickness matters. Thin yogurt, for example, will behave very differently from dense Greek yogurt.

    Add Structure

    Next, I choose something that helps the dessert hold together.

    Sweetened condensed milk adds body to cheesecake mixtures. Melted chocolate firms as it cools. Butter binds crushed biscuits into a sliceable crust. Peanut butter can help coconut-based bites stay together.

    This is the step I pay the most attention to when adapting recipes.

    Finish With One Bold Flavor

    Lemon juice adds sharpness. Berries provide freshness. Vanilla softens the flavor of dairy fillings. A small pinch of salt can make chocolate or peanut butter taste more intense.

    Here is my simple worked example: combine cream cheese, sweetened condensed milk, and lemon juice. Three ingredients provide creaminess, sweetness, acidity, and enough body for chilled dessert cups.

    That base + structure + flavor formula makes it much easier to create new combinations without turning a simple dessert into a ten-ingredient project.

    Six Easy No-Bake Desserts Worth Making

    2-Ingredient Yogurt Biscuit Cheesecake

    2-Ingredient Yogurt Biscuit Cheesecake

    This is one of the simplest easy no bake desserts with few ingredients. Stir thick Greek yogurt until smooth, then press Biscoff or crisp tea biscuits into it. Cover the container and refrigerate overnight.

    During chilling, the biscuits absorb moisture and soften into cake-like layers. I prefer thick, full-fat Greek yogurt because it creates a creamier texture.

    This dessert needs almost no active preparation. The refrigerator does most of the work.

    3-Ingredient Lemon Cheesecake Cups

    3-Ingredient Lemon Cheesecake Cups

    Beat softened cream cheese until completely smooth. Add sweetened condensed milk, then mix in fresh lemon juice.

    Spoon the filling directly into dessert glasses and chill until firm. The lemon balances the condensed milk’s sweetness and makes the cheesecake taste lighter.

    I portion the mixture before chilling. It creates cleaner servings and avoids disturbing the finished texture later.

    4-Ingredient Chocolate Tart

    4-Ingredient Chocolate Tart

    Crush chocolate biscuits and combine them with melted butter. Press the crumbs firmly across the bottom of a tart pan.

    Warm heavy cream and pour it over chocolate chips. Allow it to sit briefly, then stir until smooth and glossy. Spread the ganache over the crust and refrigerate until firm.

    Among easy no bake desserts with few ingredients, this is one of my favorite ideas when presentation matters. Four basic ingredients can produce a dessert that looks appropriate for a dinner party.

    5-Ingredient Mini Berry Cheesecake Bites

    5-Ingredient Mini Berry Cheesecake Bites

    Put one vanilla wafer into each mini muffin liner. Whip cream cheese, heavy cream, sugar, and vanilla until light. Spoon or pipe the mixture over each wafer, then finish with a strawberry or raspberry.

    The wafer becomes softer while chilling, while the berry adds acidity and color.

    These bites also solve a portioning problem. If I only want a few servings, I use the same small-batch approach found in single serving dessert recipes for one rather than preparing an entire tray.

    Peanut Butter Coconut Freezer Bites

    Peanut Butter Coconut Freezer Bites

    Combine peanut butter with melted butter, vanilla, sweetener, and unsweetened shredded coconut. Scoop small portions onto parchment paper, then freeze until firm.

    Texture matters here. Too much liquid sweetener can create a mixture that refuses to hold its shape.

    If mine looks loose, I add shredded coconut gradually instead of pouring in more peanut butter.

    Chocolate Coconut No-Bake Cookies

    Chocolate Coconut No-Bake Cookies

    Melt chocolate with butter and peanut or seed butter. Stir in shredded coconut, shape the mixture into small rounds, and freeze until set.

    These easy no bake desserts with few ingredients sit somewhere between cookies and candy.

    For a softer bite, I leave them at room temperature for a few minutes before serving. For a firmer texture, I serve them straight from the refrigerator.

    Smart Swaps That Protect the Texture

    Few-ingredient recipes leave less room for careless substitutions. When only four ingredients are present, removing one can change a quarter of the recipe.

    I therefore replace ingredients by function rather than flavor.

    If I replace cream cheese, I choose something similarly thick instead of regular milk. If chocolate controls how a tart sets, I keep its quantity close to the original amount. Dry, crisp cookies generally work better for crusts than soft cookies.

    Coconut size matters too. Finely shredded coconut usually binds freezer bites more evenly than large flakes.

    When a no-bake mixture seems too soft, I also resist immediately adding more ingredients. More refrigerator time is often the first fix worth trying.

    Keep No-Bake Desserts Safe

    No-bake does not mean every uncooked ingredient is automatically safe. The FDA states that flour is considered a raw food and may contain harmful bacteria such as Salmonella or pathogenic E. coli. It advises against eating raw flour, dough, or batter that has not received an appropriate cooking step.

    That matters when preparing edible cookie dough or similar recipes. I avoid casually adding ordinary raw flour to desserts simply because they will be refrigerated.

    Dairy-based easy no bake desserts with few ingredients also need reliable refrigeration. USDA guidance recommends keeping refrigerators at 40°F or below. Perishable foods should generally not remain unrefrigerated for more than two hours. The limit falls to one hour when temperatures exceed 90°F.

    How I Make Simple Desserts Look Better

    I improve simple desserts with contrast instead of piling on extra ingredients.

    Creamy cheesecake feels more interesting over a crisp biscuit. Rich chocolate works well beside tart berries. Peanut butter benefits from a tiny amount of salt.

    Presentation does just as much work. Small dessert glasses, mini muffin liners, clean tart slices, and evenly shaped freezer bites make inexpensive ingredients feel intentional.

    With easy no bake desserts with few ingredients, better chilling and cleaner serving usually improve the final result more than another topping.

    Frequently Asked Questions

    1. What are the easiest no-bake desserts for beginners?

    Yogurt biscuit cheesecake, lemon cheesecake cups, chocolate tart, and peanut butter coconut bites are beginner-friendly because they require basic mixing and very little equipment.

    2. Can I make easy no bake desserts with few ingredients ahead of time?

    Yes. Many cheesecake, tart, and freezer-style desserts benefit from several hours of chilling, making them convenient make-ahead treats.

    3. What pantry ingredients are best for quick no-bake desserts?

    Chocolate chips, peanut butter, condensed milk, crisp biscuits, shredded coconut, vanilla, and shelf-stable toppings give you plenty of options.

    4. How can I thicken a no-bake dessert that is too soft?

    Chill it longer first. If necessary, increase the ingredient providing structure, such as chocolate, cream cheese, cookie crumbs, or shredded coconut.

    Chill First, Brag Later

    I keep easy no bake desserts with few ingredients in my regular dessert rotation because they solve two problems at once: limited time and unnecessary cleanup. A short ingredient list also makes it easier to create something sweet from ingredients already in the kitchen.

    My next move is always simple. I choose a base, add one ingredient for structure, finish with a bold flavor, and give the dessert enough time to chill.

    That last step is easy to underestimate. I would rather wait another hour for the right texture than add ingredients the dessert never needed.

  • How to Deodorize Wooden Wooden Spoons For a Fresh Kitchen 

    How to Deodorize Wooden Wooden Spoons For a Fresh Kitchen 

    Grabbing a favorite wooden spoon only to realize yesterday’s garlic stir-fry is lingering inside today’s sweet vanilla custard ruins a great home meal fast. Natural timber kitchen tools drink up strong food aromas, stubborn cooking grease, and deep moisture over time because wood features a soft porous surface. 

    Learning how to deodorize wooden wooden spoons properly restores your trusty kitchen tools, keeps your cooking area hygienic, and prevents savory garlic or onion tastes from crossing over into delicate sweet dishes.

    Key Takeaways

    • Baking soda neutralizes acids: Alkaline baking soda penetrates deep to break down smelly garlic and onion compounds.
    • Match odor to treatment: Use baking soda for sulfur, vinegar for mildew, and lemon for fish.
    • Skip viral boiling hacks: Boiling warps timber, cracks surfaces, and destroys structural wood integrity.
    • Oil seals protective layers: Regular food-grade mineral oil blocks future food odor absorption.
    • Air drying prevents mold: Drying completely prevents hidden dampness and mildew growth inside pores.

    The Secret Life of Timber Utensils

    Ever wonder why your favorite kitchen tool holds onto pungent smells for weeks while your metal whisk stays completely clean? Understanding how to deodorize wooden wooden spoons becomes essential when you realize natural timber behaves just like a firm sponge on your countertop.

    Wood cells contain thousands of tiny natural pores that expand whenever exposed to warm food steam. Pungent garlic sulfur compounds, acidic tomato sauces, and cooking oils slip inside those opened spaces and get trapped the moment your utensil cools down.

    Lingering savory odors become especially noticeable during dessert preparation, where clean, neutral tools matter for delicate flavors. This is worth keeping in mind when learning how to whip cream by hand or preparing other lightly flavored toppings that can easily pick up unwanted kitchen aromas.

    Leaving wet spoons sitting in a dark sink or putting them away while slightly damp creates the ideal home for stale odors. Microscopic moisture stays inside the wood grain, creating a sour, musty smell that basic dish soap simply cannot remove.

    Natural Deodorizing Methods

    Matching the correct natural household ingredient to your specific kitchen smell restores your wooden utensils while protecting the delicate natural grain.

    Baking Soda Paste

    Baking soda works best on strong organic acids like garlic, onion, and chili powder. Because baking soda is alkaline, it easily penetrates deep into wood pores to neutralize trapped odor compounds at a chemical level.

    Mix one tablespoon of baking soda with one teaspoon of warm water inside a small bowl to create a thick paste. Coat the wooden spoon head entirely with your fresh paste and let it sit for ten minutes so the active sodium bicarbonate works into the grain. 

    Scrub the surface gently using a soft sponge, rinse under warm running tap water, and dry the tool immediately with a soft cloth.

    Lemon and Salt

    Lemon and Salt

    Fresh lemon juice contains citric acid that cuts through lingering fish oils, while coarse salt acts as a gentle physical abrasive to lift surface residue. This classic combination removes sticky food debris while leaving behind a clean citrus scent.

    Cut a fresh lemon in half and sprinkle a thick layer of coarse salt or baking soda directly onto the spoon surface. Use the cut lemon half like a scrubbing brush to rub the salt into the wood using firm circular motions for two minutes. Rinse the utensil with warm tap water and wipe away all excess water immediately.

    Vinegar Soak

    Distilled white vinegar breaks down alkaline residues and eliminates stale or mildew-like smells caused by trapped kitchen moisture. The natural acetic acid kills odor-causing bacteria without leaving a permanent harsh vinegar scent behind.

    Mix equal parts white vinegar and warm water inside a tall glass. Submerge the spoon head into the diluted mixture for five minutes maximum so the wood does not absorb excess water. Remove the utensil, rinse it under running warm water, and dry it thoroughly with a fresh towel.

    The Boiling Water Myth Exposed

    Popular social media trends often encourage boiling wooden spoons in hot water to remove deep grease, but this viral method causes permanent damage.

    Why Boiling Warps Timber

    Why Boiling Warps Timber

    Submerging wooden tools in boiling water causes timber fibers to swell rapidly and unevenly. Extreme heat breaks down natural wood cells, causing severe warping and weakening the overall structure of your utensil.

    Once the boiled spoon cools down and dries, the wood contracts quickly, leaving behind deep cracks and rough splinters. These new surface cracks create even larger pockets for food particles and bacteria to hide inside later.

    Safe Deep Disinfecting Steps

    Instead of boiling your tools, disinfect wooden utensils using basic food-grade 3% hydrogen peroxide. Spray hydrogen peroxide directly over the clean wooden surface and let it sit for three minutes to lift impurities safely.

    Rinse the spoon thoroughly under warm running water to remove any residual hydrogen peroxide solution. Towel dry the utensil immediately and let it sit in an upright position until all moisture evaporates completely from the surface.

    Prevention and Care Tips

    Taking proactive maintenance steps seals timber pores, creating a strong protective layer that prevents food odors and dark stains from soaking into your utensils.

    Hand Wash Only

    Never place wooden spoons inside an automatic dishwasher or leave them soaking in a sink filled with soapy water. Dishwasher heat and harsh detergent strip away natural protective oils, causing timber to dry out and split wide open.

    Always wash your wooden tools by hand immediately after cooking using warm water and a mild dish soap. Use a soft sponge to remove surface food bits gently without scratching the smooth natural wood finish.

    Dry Immediately

    Dry Immediately

    Wipe your wooden tools thoroughly with a clean cloth right after washing to remove standing surface moisture. Leaving excess water sitting on raw wood forces the fibers to swell and traps dampness inside the grain.

    Stand your dry utensils upright inside an open utensil crock or rack so air circulates freely around each tool. Proper airflow stops mold spores from settling into the wood while ensuring the interior stays completely dry between uses.

    Condition the Wood

    Rub food-grade mineral oil onto your completely dry spoon once a month to seal raw pores and block future food odors from soaking deep into the wood. Mineral oil is completely food-safe, clear, and will never turn sour over time like standard vegetable oils.

    Keeping wooden utensils clean, neutral-smelling, and properly conditioned is especially helpful when preparing make ahead desserts for a party, since these recipes may sit for hours and delicate flavors should not pick up lingering garlic, onion, or spice aromas from kitchen tools.

    Pour a teaspoon of mineral oil onto the dry wooden spoon and rub it deep into the grain using a clean cloth. Let the protective oil soak into the wood for eight hours, then wipe off any leftover surface oil before cooking.

    Frequently Asked Questions

    1. How to get bad smell out of a wooden spoon?

    Mix one tablespoon of baking soda with one teaspoon of water, rub the paste over the spoon, wait ten minutes, rinse with warm water, and towel dry immediately.

    2. How sanitary are wooden spoons?

    Wooden spoons are very sanitary because natural hardwoods contain natural antibacterial properties that trap and destroy harmful bacteria as the wood dries out completely after washing.

    3. How often should you throw away wooden spoons?

    Replace wooden spoons when they develop deep structural cracks, jagged splinters, severe warping, or persistent foul odors that remain even after applying a deep baking soda paste treatment.

    4. How to freshen up wooden spoons?

    Scrub the wood with a cut lemon half dipped in coarse salt, rinse under warm water, air dry completely, and condition the surface using food-grade mineral oil.

    Bye-Bye Stinky Spoons

    Mastering how to deodorize wooden wooden spoons ensures your favorite cooking tools stay fresh, clean, and completely odor-free for every meal. Simple natural methods like baking soda pastes, quick vinegar soaks, and regular mineral oil conditioning protect your utensils for years. Skip harsh dishwasher cycles or boiling hacks, and enjoy clean timber tools every time you step into the kitchen.

  • Homemade Cakes Guests Will Keep Talking About for Every Celebration

    Homemade Cakes Guests Will Keep Talking About for Every Celebration

    Some desserts disappear quietly after the candles are blown out. Others become part of the conversation. Someone asks for the recipe, another wants to know where you ordered it, and that’s when you get to say, “I made it.” There’s something about a homemade cake that leaves a lasting impression because it carries a little more personality than something picked up from a bakery display.

    The best celebration cakes aren’t always the tallest or the most elaborate. They’re the ones that balance great flavor, thoughtful presentation, and the feeling that someone genuinely cared while making them. Whether you’re baking for a birthday, graduation, holiday gathering, or family dinner, a well-made homemade cake can easily become the highlight everyone remembers.

    Why Homemade Celebration Cakes Stand Out

    Why Homemade Celebration Cakes Stand Out

    Homemade celebration cakes have a warmth that professionally made desserts sometimes can’t replicate. Every detail, from the flavor combination to the decoration, reflects the occasion and the people you’re baking for.

    Fresh ingredients make a noticeable difference, too. Real butter, quality vanilla, fresh citrus zest, seasonal fruit, and homemade buttercream create flavors that taste vibrant instead of overly sweet. Even simple cake recipes feel special when they’re made from scratch.

    Presentation matters just as much as taste. A smooth buttercream finish, fresh berries arranged on top, or a glossy chocolate ganache drip can turn an everyday cake into the centerpiece of the dessert table without requiring professional pastry skills.

    Cake Ideas That Suit Every Celebration

    Different occasions call for different flavors, but the goal stays the same: create something guests won’t stop talking about.

    Birthday Celebrations

    Chocolate lovers rarely say no to a Salted Caramel Guinness Chocolate Cake. Rich chocolate sponge paired with salted caramel creates bold flavor without becoming overwhelming. The caramel drip also gives the cake a polished bakery-style appearance that’s surprisingly achievable at home.

    For children’s birthdays or colorful celebrations, vanilla sponge layered with strawberry buttercream and decorated with sprinkles remains a timeless favorite that appeals to almost everyone.

    Baby Showers and Bridal Celebrations

    Lighter flavors often work beautifully for daytime events. A Lemon Blueberry Elderflower Cake combines bright citrus, juicy blueberries, and delicate floral notes that feel elegant without being complicated.

    A Raspberry White Chocolate Velvet Cake is another crowd favorite. The tart raspberry filling balances the sweetness of silky white chocolate ganache, creating a dessert that looks sophisticated while remaining approachable.

    Holiday Gatherings

    Holiday desserts benefit from warm spices and comforting flavors.

    A Toasted Pecan Carrot Cake topped with browned butter cream cheese frosting delivers richness, texture, and just enough crunch from caramelized pecans to make every bite interesting.

    For winter celebrations, adding cinnamon, nutmeg, orange zest, or maple flavors can instantly make a homemade dessert feel festive.

    When time is limited, easy desserts to make with pantry ingredients can also round out the celebration without requiring a special grocery trip. Simple recipes built around flour, sugar, chocolate, oats, or canned fruit can complement a homemade cake while giving guests additional flavors to enjoy.

    Graduations and Milestone Events

    Simple, modern cakes often make the biggest impact. Clean buttercream finishes paired with fresh fruit, chocolate curls, or minimalist piping techniques create an elegant centerpiece without feeling overdecorated.

    Flavor Combinations Guests Always Remember

    Flavor Combinations Guests Always Remember

    Memorable cakes usually surprise people with balanced flavors rather than excessive sweetness.

    Some combinations consistently earn compliments because each ingredient enhances the others.

    • Chocolate and salted caramel
    • Lemon and blueberry
    • Vanilla bean and fresh strawberry
    • Raspberry and white chocolate
    • Pistachio and raspberry
    • Espresso and dark chocolate
    • Coconut and lime
    • Brown butter with toasted pecans

    Using seasonal fruit whenever possible also improves freshness, texture, and overall flavor while making the cake feel more connected to the season.

    Decorating Details That Make Homemade Cakes Look Professional

    Professional-looking cakes often rely on thoughtful finishing touches instead of complicated decorating techniques.

    Pressed edible flowers instantly create a rustic yet elegant appearance. A glossy mirror glaze transforms mousse cakes into dramatic showpieces, while the increasingly popular fault line design adds texture by revealing colorful sprinkles, crushed nuts, or edible gold leaf beneath the outer frosting.

    A lightly frosted naked cake topped with fresh berries and rosemary sprigs also creates a naturally beautiful presentation that’s perfect for celebrations with a relaxed atmosphere.

    Even something as simple as serving your cake on a quality cake stand can elevate the entire dessert table.

    Small Baking Techniques That Make a Big Difference

    Small Baking Techniques That Make a Big Difference

    Beautiful cakes begin long before the decorating stage.

    Using a digital kitchen scale instead of measuring cups improves consistency because baking depends on accurate ingredient ratios. Reverse creaming helps create an incredibly soft crumb by coating the flour with butter before adding wet ingredients, reducing gluten development.

    Brushing each cake layer with a light simple syrup soak keeps the cake moist for days without making it soggy. Chilling layers before trimming and frosting also creates cleaner edges and makes buttercream much easier to spread evenly.

    Paying attention to oven temperature, allowing cakes to cool completely, and using fresh baking powder are small details that often separate a good homemade cake from one that truly impresses.

    Making Every Cake Feel Personal

    People rarely remember a cake because it was flawless. They remember it because it reflected the occasion.

    Adding favorite flavors, meaningful decorations, handwritten cake toppers, or family traditions makes every celebration more memorable. That’s one reason the rise of personalized celebration cakes has inspired more home bakers to create desserts that tell a story instead of simply following trends.

    Sometimes personalization is as simple as decorating with fresh flowers from the garden, incorporating seasonal fruit, or recreating a favorite childhood recipe that everyone recognizes the moment it’s served.

    Those thoughtful details are often what guests remember long after the last slice disappears.

    Why the Most Memorable Cakes Feel Personal

    Why the Most Memorable Cakes Feel Personal

    The cakes people talk about weeks later usually aren’t the tallest, the most expensive, or the most perfectly decorated. They’re the ones that taste homemade in the best possible way, reflect the occasion, and make people feel like the celebration was created just for them. When great flavor meets thoughtful presentation, every slice becomes part of the memory rather than just another dessert on the table.

    A homemade cake doesn’t have to be perfect. It simply has to feel like it was made with care—and that’s what people remember.

    Frequently Asked Questions

    1. What makes a homemade cake taste better than a store-bought cake?

    Homemade cakes typically use fresher ingredients, less processed flavors, and can be customized to suit personal preferences, resulting in a richer and more balanced taste.

    2. How can I make my homemade cake look professionally decorated?

    Focus on smooth buttercream, clean cake layers, fresh fruit, chocolate drips, edible flowers, or simple piping techniques. Good presentation often matters more than complicated decorations.

    3. What’s the secret to keeping homemade cakes moist?

    Measuring ingredients accurately, avoiding overbaking, brushing layers with simple syrup, and storing cakes properly all help maintain moisture and texture.

    4. Which cake flavors are most popular for celebrations?

    Chocolate salted caramel, lemon blueberry, carrot cake, vanilla strawberry, raspberry white chocolate, and espresso chocolate remain among the most popular choices because they appeal to a wide range of guests.

  • Single Serving Dessert Recipes For One: 7 Easy Treats

    Single Serving Dessert Recipes For One: 7 Easy Treats

    Sometimes I want dessert, but I do not want twelve cupcakes staring at me for the next three days. That is exactly when single serving dessert recipes for one earn a permanent place in my kitchen.

    These recipes give me something warm, fresh, and genuinely satisfying without turning a small craving into a full baking project. Most use ordinary pantry ingredients, one mug or ramekin, and less than ten minutes of hands-on work.

    Why Single Serving Desserts Work So Well

    The biggest advantage is not portion control. It is flexibility. I can make chocolate cake tonight and strawberry cake tomorrow without filling my refrigerator with leftovers.

    Small desserts also make experimentation less risky. If you are building confidence in the kitchen, start with these easy dessert recipes for beginners before committing ingredients to a large cake or batch of cookies.

    I also find single serving dessert recipes for one useful when testing sweetness levels. A tiny recipe lets me adjust cocoa, fruit, vanilla, or toppings without wasting a full batch.

    7 Easy Single Serving Dessert Recipes For One

    These desserts use ingredients commonly found in American kitchens. Microwave times are starting points because appliance wattage, mug shape, and ingredient temperature can change cooking speed.

    1. One-Minute Chocolate Mug Cake

    One-Minute Chocolate Mug Cake

    For my simplest chocolate cake, I stir together 4 tablespoons all-purpose flour, 2 tablespoons sugar, 1 tablespoon cocoa powder, ¼ teaspoon baking powder, and a pinch of salt.

    I add 3 tablespoons milk, 1 tablespoon neutral oil, and a splash of vanilla. After mixing until smooth, I microwave it for about 60 seconds.

    The center should look moist rather than dry. A spoonful of chocolate chips makes the middle especially rich.

    2. Oreo Mug Cake for One

    This is one of my favorite single serving dessert recipes for one when I want something playful and fast.

    Mix 4 tablespoons flour, 1½ tablespoons sugar, ¼ teaspoon baking powder, and 3 tablespoons milk in a microwave-safe mug. Fold in two crushed Oreo cookies.

    Microwave for 60 seconds, then check the center. Add another 10 seconds only when needed. Sprinkle another crushed cookie over the top before eating.

    3. Fudgy Protein Brownie

    For a more filling chocolate option, combine ¼ cup chocolate protein powder, 1 tablespoon cocoa powder, ¼ teaspoon baking powder, 1 tablespoon maple syrup, and about ¼ cup Greek yogurt.

    Microwave the mixture for roughly 45 to 60 seconds. I prefer stopping while the center still looks slightly soft because additional cooking can turn protein-based brownies rubbery.

    Add a teaspoon of milk if your protein powder absorbs moisture quickly.

    4. Strawberry Almond Flour Cake

    Strawberry Almond Flour Cake

    Fresh strawberries make this small cake taste much brighter than a standard vanilla mug cake.

    Whisk one egg with 1 tablespoon melted butter, 1 tablespoon honey, and 1 tablespoon milk. Stir in 5 tablespoons almond flour and ¼ teaspoon baking powder. Fold in two or three finely chopped strawberries.

    Microwave until thoroughly cooked. Because this recipe contains egg, USDA guidance recommends cooking egg mixtures to 160°F.

    5. Single-Serve Berry Crisp

    Not every dessert needs cake batter. For a quick fruit crisp, place about ½ cup blueberries, raspberries, or chopped strawberries in a small ramekin.

    Mix 2 tablespoons rolled oats, 1 tablespoon flour, 1 tablespoon brown sugar, a pinch of cinnamon, and 1 tablespoon softened butter. Scatter the mixture over the berries.

    Bake at 375°F for roughly 15 to 20 minutes until the fruit bubbles and the topping browns. This is one of the single serving dessert recipes for one I choose when fresh berries need using quickly.

    6. No-Bake Peanut Butter Cheesecake Cup

    No-Bake Peanut Butter Cheesecake Cup

    For a chilled dessert, beat 2 tablespoons softened cream cheese with 1 tablespoon peanut butter, 1 tablespoon powdered sugar, and a splash of vanilla.

    Crush one graham cracker into the bottom of a small glass. Spoon the cheesecake mixture over it and chill for about 20 minutes.

    A few chocolate chips or sliced banana pieces on top make it feel far more elaborate than the effort required.

    7. Warm Cinnamon Apple Bowl

    Dice one small apple and combine it with 1 teaspoon brown sugar, cinnamon, and 1 teaspoon butter.

    Microwave for about 60 to 90 seconds, stirring once, until the apple softens. Add chopped pecans, granola, or a spoonful of vanilla yogurt.

    Among my single serving dessert recipes for one, this is the option I reach for when I want sweetness without making cake.

    My Formula for Making Almost Any Dessert for One

    I use a simple rule when adapting larger desserts: build around approximately ½ cup of finished dessert instead of blindly dividing a full recipe.

    For mug cakes, my starting formula is about 4 tablespoons flour, 1 to 2 tablespoons sugar, 3 tablespoons liquid, 1 tablespoon fat, and a small amount of leavening. Flavor ingredients come after that basic structure.

    That ratio is not universal, but it gives me a safer starting point than dividing recipes containing three eggs or awkward fractional measurements.

    For crisps, parfaits, puddings, and cheesecakes, I work backward from the serving container. A 6- to 8-ounce ramekin usually encourages a satisfying portion without requiring complicated calculations.

    How to Get Better Microwave Desserts

    Microwave baking looks simple, but a few small choices decide whether the result stays fluffy or becomes rubbery.

    Choose the Right Mug

    Use a microwave-safe mug with enough empty space above the batter. Filling a mug too high encourages overflow as baking powder creates gas and the mixture expands.

    A wider mug also cooks differently from a tall, narrow one. I usually fill the container no more than halfway when testing a new recipe.

    Stop Before It Looks Completely Done

    Overcooking causes more failed mug cakes than undercooking in my experience. The dessert continues holding considerable heat after the microwave stops.

    I begin checking early and add only 5- to 10-second bursts when necessary. Even commercial single-serve baking instructions use short additional intervals when a dessert has not set after its initial microwave time.

    Adjust for Microwave Wattage

    A recipe written for one microwave may behave differently in another. High-powered models cook tiny portions especially fast.

    Treat the listed cooking time as a starting point. If your first single serving dessert recipes for one come out dry, reduce the next cooking cycle by 10 to 15 seconds rather than changing every ingredient.

    Food Safety Matters Even With Tiny Desserts

    A teaspoon of uncooked batter might look harmless, but raw flour is still a raw agricultural product. The FDA explains that processing grain into flour does not necessarily destroy harmful bacteria such as E. coli or Salmonella.

    That means I do not taste raw mug-cake batter before cooking it. I also clean utensils and surfaces that have touched uncooked flour.

    Egg-containing desserts need attention too. USDA guidance recommends cooking dishes containing egg mixtures to at least 160°F.

    This matters with microwave desserts because heating can be uneven. If a recipe contains egg, make sure the center is fully cooked instead of relying only on the outside appearance.

    FAQs About Desserts for One

    1. What are the easiest single serving dessert recipes for one?

    Mug cakes, fruit crisps, cheesecake cups, chocolate brownies, baked fruit, parfaits, and microwave cookies are among the easiest options because they need few ingredients and minimal equipment.

    2. Can I make a single-serving dessert without a microwave?

    Yes. Use a small oven-safe ramekin for baked crisps, brownies, cookies, cobblers, or cakes, adjusting baking time because small portions usually cook faster.

    3. Can I divide a normal cake recipe into one serving?

    Sometimes, but recipes containing several eggs are difficult to scale accurately. A purpose-built small recipe usually produces more predictable texture and rise.

    4. What can I make when I want dessert immediately?

    A mug cake, warm cinnamon apple, yogurt parfait, or no-bake cheesecake cup can satisfy a craving quickly without preparing a full batch.

    One Spoon, Zero Leftovers

    I love single serving dessert recipes for one because dessert becomes a choice rather than a commitment to a whole pan of sweets. A few tablespoons of pantry ingredients can become a warm brownie, berry crisp, cheesecake cup, or chocolate cake before a larger dessert would even finish preheating.

    My best tip is to master one basic mug cake and one fruit dessert first. Once you understand how your microwave and serving dishes behave, experimenting becomes much easier. Pick tonight’s craving, grab one spoon, and make exactly enough.

  • How to Whip Cream by Hand: Quick Hacks for Fast Baking

    How to Whip Cream by Hand: Quick Hacks for Fast Baking

    Standing in the kitchen with fresh pie waiting, pulling out a bulky stand mixer for a small splash of topping always feels like too much work. Learning how to whip cream by hand saved my dessert game years ago, turning a tiresome arm workout into a quick two-minute kitchen trick.

    Key Takeaways

    • Cold equipment and high-fat heavy cream double volume in under three minutes.
    • Side-to-side whisking beats circular stirring by incorporating twice the air per stroke.
    • Powdered sugar stabilizes fluffy peaks better than granulated sugar due to added cornstarch.
    • Over-whipped grainy cream can be rescued easily with a splash of unwhipped cold cream.
    • Hand whipping gives total control, preventing accidental butter transformation compared to electric mixers.

    You Should Know How to Whip Cream by Hand

    Skipping the electric mixer is not just nostalgic, it is a fun kitchen power move that gives you absolute texture control. Knowing how to whip cream by hand saves you from annoying dishwashing sessions while preventing accidental over-whipping into dense butter. You get silky, restaurant-quality clouds of sweet cream in under three minutes using simple elbow grease and basic kitchen tools.

    Essential Equipment and Ingredients for Easy Whipping

    Gathering the right tools and cold ingredients ensures your heavy cream expands effortlessly into lofty peaks without tiring your arm.

    High-Fat Heavy Cream

    Always purchase heavy whipping cream or heavy cream containing at least thirty-six percent milkfat. Lower fat dairy like half-and-half lacks the structural fat network required to trap air bubbles securely.

    Powdered Sugar and Vanilla

    Confectioners’ sugar dissolves instantly and contains trace cornstarch that absorbs moisture to stabilize your whipped peaks.

    Just as learning how to measure flour correctly improves consistency in baking, measuring powdered sugar accurately helps keep whipped cream light rather than overly sweet or dense. Pure vanilla extract adds warm, aromatic flavor that elevates plain cream into a dessert highlight.

    Metal Bowl and Balloon Whisk

    Select a large stainless steel bowl because metal retains cold temperatures vastly better than plastic or ceramic. A wide balloon whisk features flexible wire loops that push massive amounts of air through liquid dairy with every stroke.

    Step-by-Step Guide on How to Whip Cream by Hand

    Step-by-Step Guide on How to Whip Cream by Hand

    Following these precise physical movements guarantees light, billowy sweet toppings in roughly three minutes flat.

    Chill the Bowl

    Place your metal mixing bowl and balloon whisk into the freezer for ten to fifteen minutes before starting. Ice-cold metal keeps the milkfat firm, allowing fat globules to build a strong network that traps air rapidly.

    Combine Ingredients

    Pour one cup of very cold heavy cream, one to two tablespoons of powdered sugar, and half a teaspoon of vanilla extract into the chilled bowl. Combining everything right at the start ensures sweet flavors distribute evenly as the liquid expands.

    Tilt the Bowl

    Angle your mixing bowl at approximately forty-five degrees on your countertop so the liquid pools along the lower edge. Tilting creates a deep pool that allows your whisk wires to submerge fully and scoop up maximum volume per sweep.

    Whisk Vigorously

    Drive your wire whisk in a fast back-and-forth sweeping motion across the bottom pool using your forearm and wrist. Side-to-side sweeping forces air straight through the liquid, incorporating twice as much oxygen as standard circular stirring.

    Watch the Peaks

    Observe the liquid carefully as it transforms from frothy bubbles into thick, pillowy clouds that hold soft-to-medium peaks. Stop whisking the moment the cream holds its shape gently on the whisk to avoid churning your topping into solid butter.

    Temperature Science and Fat Mechanics

    Temperature Science and Fat Mechanics

    Understanding how temperature alters dairy fat structures guarantees consistent whipping performance in any kitchen environment.

    Cold Temperature Physics

    Microscopic fat globules in heavy cream must remain solid and firm to form a stable framework around trapped air bubbles. If your kitchen or bowl gets warm, those fat membranes melt and collapse, leaving you with sloshing liquid that refuses to rise.

    Air Incorporation Dynamics

    Whisking rapidly breaks up liquid dairy into micro-bubbles while simultaneously coating those bubbles in solid fat particles. As millions of fat-coated air pockets link together, the mixture doubles in volume and locks into a smooth semi-solid structure.

    Stabilizing Peak Hold

    Powdered sugar acts as a gentle binder because its fine particles blend seamlessly into the moisture without causing grittiness. The tiny fraction of starch present in confectioners’ sugar prevents liquid weeping, keeping your whipped clouds firm for hours in the fridge.

    This extra stability is especially useful when preparing easy no bake desserts with few ingredients, where whipped cream often provides much of the dessert’s structure and texture.

    Troubleshooting Common Hand Whipping Mistakes

    Troubleshooting Common Hand Whipping Mistakes

    Fixing common mistakes saves your ingredients and ensures your final dessert topping looks gorgeous every time.

    Identifying Soft vs. Stiff Peaks

    Soft peaks slump over gently when you lift your whisk, making them ideal for spooning over warm fruit pies or hot cocoa. Stiff peaks hold rigid, upright points that remain firm, which works best for piping decorative borders on frosted layer cakes.

    Fixing Grainy Over-Whipped Cream

    If your cream looks clumpy or curdled, you have whisked past stiff peaks into early stages of butter separation. Instantly pour in one to two tablespoons of unwhipped cold heavy cream and gently fold it in with a spatula to restore silky smoothness.

    Correcting Warm Room Slippage

    When whipping cream in a hot summer kitchen, your bowl can warm up before peaks have time to form fully. Set your mixing bowl inside a larger outer bowl filled with ice cubes to keep the dairy chilled while you finish whisking.

    Frequently Asked Questions

    1. How long does it take to hand whip cream?

    Learning how to whip cream by hand typically takes two to four minutes of vigorous whisking when using chilled equipment. Utilizing a wide balloon whisk and a fast side-to-side motion cuts your prep time down significantly compared to circular stirring.

    2. Can I whip cream with my hand?

    Yes, you can easily whip cream by hand using a standard manual wire whisk or a glass jar. Hand whisking actually gives you superior control over the final texture, preventing you from over-beating your sweet cream into dense butter.

    3. What is the easiest way to whip cream?

    The easiest approach is sweeping ice-cold heavy cream in a pre-chilled metal bowl using a large balloon whisk. Tilting your bowl at a forty-five-degree angle creates a deep pool that speeds up air incorporation dramatically.

    4. Can I whip cream with a fork?

    You can whip cream using a common dinner fork, though it requires eight to ten minutes of rapid forearm effort. A fork’s small tines move far less air per stroke, so using a wire balloon whisk remains vastly faster.

    Whisk Your Way to Sweet Perfection Today

    Ditching bulky electric gadgets for a simple whisk and cold bowl makes dessert preparation faster, cleaner, and far more satisfying. Now that you know how to whip cream by hand effortlessly, chilled tools and smart wrist movements will yield billowy sweet clouds in under three minutes. Grab your balloon whisk, chill your metal bowl, and elevate your favorite pies today!

  • Aesthetic Birthday Cakes That Turn Every Celebration Into a Beautiful Memory

    Aesthetic Birthday Cakes That Turn Every Celebration Into a Beautiful Memory

    I started noticing that birthday cakes were no longer just desserts sitting quietly on a table. They had become part of the celebration itself, showing up in photos, setting the mood, and often becoming the detail everyone remembered long after the party ended. The cake wasn’t just something to slice. It had its own personality.

    I also found that the most memorable birthday cakes weren’t always the biggest or the most expensive. They were the ones that reflected the person being celebrated. A thoughtful color palette, elegant piping, or a small personalized touch often created more impact than an elaborate design filled with decorations.

    Why Aesthetic Birthday Cakes Are More Than a Trend

    Why Aesthetic Birthday Cakes Are More Than a Trend

    Birthday celebrations have become more personal over the past few years, and cakes have evolved alongside them. Instead of choosing a standard design from a bakery catalog, many people now look for cakes that match the entire atmosphere of the party.

    An aesthetic birthday cake ties together decorations, flowers, table settings, and even outfits. It creates a cohesive look that feels intentional without being overdone. While beautiful presentation matters, the best cakes still balance style with flavors guests genuinely enjoy.

    Choosing a cake that looks stunning but tastes ordinary rarely leaves a lasting impression. The goal is finding a design that feels special while delivering a dessert people will happily come back for.

    Trending Aesthetic Cake Styles Everyone Loves

    There isn’t a single definition of an aesthetic birthday cake. Different styles appeal to different personalities, making it easy to find something that feels unique.

    Minimalist Elegance

    Minimalist cakes continue to dominate celebrations because they prove that simplicity can be striking. Smooth buttercream, soft neutral shades, and clean lettering create a timeless appearance that photographs beautifully.

    Small decorative elements like pearls, tiny bows, or delicate piping add character without overwhelming the overall design.

    Floral and Garden-Inspired Cakes

    Floral and Garden-Inspired Cakes

    Pressed edible flowers and buttercream floral piping create a romantic look that never feels outdated. These cakes work beautifully for spring birthdays, garden parties, brunch celebrations, or anyone who prefers softer designs.

    Pastel shades paired with floral textures give cakes a handcrafted feel while keeping the overall presentation elegant.

    Vintage Designs With Modern Charm

    Vintage-inspired cakes have made an impressive comeback. Detailed Lambeth piping, scalloped borders, and decorative frosting patterns add texture and depth without feeling old-fashioned.

    Many decorators combine these classic techniques with modern color palettes, creating cakes that feel nostalgic while still fitting today’s celebrations. If you’re collecting vintage heart cake ideas, you’ll notice this style blends beautifully with pastel colors, ribbons, cherries, and personalized messages.

    Bold Chrome and Metallic Finishes

    For celebrations that lean toward luxury, chrome and metallic cakes create an entirely different mood. Mirror-like silver finishes, gold leaf details, and subtle shimmer transform a birthday cake into an artistic centerpiece.

    Instead of relying on excessive decorations, these cakes let their finish become the focal point.

    Small Details Create the Biggest Visual Impact

    Beautiful cake designs often come down to thoughtful details rather than complicated decorations.

    Glossy cherries placed on smooth buttercream create a sophisticated contrast that feels modern and playful. Delicate ribbons, edible pearls, butterflies, and handwritten piping add personality without making the cake appear crowded.

    Color also plays an important role. Soft lavender, blush pink, baby blue, sage green, and warm cream continue to be popular because they complement almost any party theme.

    Lighting deserves attention as well. Warm lighting and simple candles allow buttercream textures, floral details, and metallic finishes to stand out naturally during photos instead of competing with bright decorations.

    Choosing the Right Cake for Your Celebration

    Choosing the Right Cake for Your Celebration

    The most beautiful cake isn’t necessarily the trendiest one. It’s the one that fits the occasion.

    Start by considering the overall style of the celebration. A backyard picnic may call for soft floral buttercream, while an elegant evening dinner might suit a monochrome cake with metallic accents.

    Next comes flavor. While appearance attracts attention, flavor creates the lasting memory. Vanilla bean remains a favorite because it pairs well with fresh fruit, buttercream, and chocolate fillings. Rich chocolate truffle offers something indulgent, while lemon elderflower provides a lighter option for spring and summer celebrations.

    Finally, think about personalization. Custom messages, meaningful colors, edible photo prints, or subtle design elements inspired by hobbies and favorite places make a cake feel one of a kind without sacrificing its aesthetic appeal.

    Making Your Cake Feel Personal Without Overdoing It

    Personalized cakes don’t have to be elaborate. Sometimes the smallest additions tell the biggest story.

    A favorite flower, a handwritten message, meaningful colors, or a simple monogram can transform a beautiful cake into something deeply personal. Some celebrations even include edible photo collages arranged in a clean, artistic layout that reflects shared memories without overwhelming the design.

    It’s also worth thinking beyond the cake itself. Matching dessert stands, coordinated table linens, fresh flowers, and carefully chosen serving plates help the cake feel like a natural part of the celebration rather than a separate decoration.

    When every element works together, the cake becomes more than dessert. It becomes part of the experience people remember.

    FAQs: Aesthetic Birthday Cakes That Turn Every Celebration Into a Beautiful Memory

    1. What makes a birthday cake aesthetic?

    An aesthetic birthday cake combines thoughtful colors, clean decoration, balanced textures, and personalized details to create a visually appealing design that matches the celebration.

    2. Which cake style is trending right now?

    Vintage Lambeth cakes, floral buttercream designs, minimalist cakes, chrome finishes, and cherry-inspired decorations remain among today’s most popular styles.

    3. How do I choose the right cake design?

    Start with your party theme, preferred color palette, and favorite flavors. Then add subtle personal touches instead of following every trend.

    4. Can aesthetic birthday cakes still taste great?

    Absolutely. The best cakes balance beautiful presentation with quality ingredients and crowd-pleasing flavors like vanilla bean, chocolate truffle, or lemon elderflower.

    What People Remember Long After the Candles Are Blown Out

    The most memorable birthday cakes aren’t defined by the number of decorations or how closely they follow current trends. They’re remembered because they reflect the person being celebrated. Whether it’s soft floral buttercream, vintage piping, glossy cherries, or a carefully chosen color palette, every detail contributes to a moment people genuinely enjoy. A cake that feels personal naturally becomes part of the memories captured around it.

    Long after the last slice is gone, it’s often those thoughtful details that people continue talking about.

  • Easy Coffee and Dessert Pairings to Try at Home

    Easy Coffee and Dessert Pairings to Try at Home

    I love how the right cup of coffee can make an ordinary dessert feel more special. When I plan dessert and coffee pairing ideas for home, I focus on balance rather than complicated recipes or rare beans. Sweetness, bitterness, acidity, texture, and roast intensity all shape the result. Familiar treats such as brownies, cheesecake, cookies, and fruit tarts can create excellent pairings.

    How Coffee and Dessert Pairing Works

    Match the Intensity

    Delicate desserts suit lighter coffees, while dense chocolate or caramel sweets can handle stronger brews. Match strength so neither side disappears.

    Complement Similar Flavors

    Shared flavor notes create easy matches. Nutty Irish coffee suits pecan desserts, while cocoa or caramel notes support chocolate and toffee.

    Use Contrast for Balance

    Contrast keeps rich desserts from feeling heavy. Bright coffee refreshes after cheesecake, while espresso bitterness balances sweet chocolate.

    Consider Texture and Acidity

    Creamy desserts benefit from acidity that cuts through richness. Crisp biscotti and shortbread pair well with smoother coffee.

    15 Easy Coffee and Dessert Pairings

    15 Easy Coffee and Dessert Pairings

    Chocolate Cake With Espresso

    Espresso matches dense chocolate cake, while its bitterness balances sweetness and reinforces cocoa.

    Cheesecake With Medium Roast

    Medium roast supports creamy cheesecake without masking its tanginess, especially with caramel or nutty notes.

    Brownies With Dark Roast

    Dark roast and fudgy brownies share roasted flavors, while bitterness keeps the combination from becoming overly sweet.

    Apple Pie With Medium Roast

    Apple, cinnamon, and buttery pastry pair naturally with medium roast coffee carrying caramel, toasted nut, or spice notes.

    Lemon Cake With Light Roast

    Bright light roast coffee mirrors lemon cake’s freshness, particularly when the beans offer citrus or floral characteristics.

    Chocolate Chip Cookies With Bold Coffee

    A stronger brew contrasts nicely with buttery cookies and melted chocolate without making the pairing complicated.

    Vanilla Ice Cream With Cold Brew

    Cold brew and vanilla ice cream make an easy match, and concentrated coffee can turn it into a simple float.

    Cold brew and vanilla ice cream make an easy match, and concentrated coffee can turn it into a simple float. If vanilla is unavailable or you want to vary the flavor, choosing a good substitute for vanilla extract in baking can also inspire easy variations for homemade ice cream, cakes, or cookies served with coffee.

    Biscotti With Espresso

    Crisp biscotti softens in espresso, while almond, hazelnut, or chocolate varieties fit naturally with roasted coffee.

    Cinnamon Rolls With Medium Roast

    Medium roast has enough body for buttery dough and icing, while its toasted notes complement cinnamon.

    Fruit Tart With Light Roast

    Fruit tarts need gentle coffee, making light roasts with berry, citrus, or floral notes ideal.

    Caramel Flan With Medium Roast

    Medium roast complements caramel flan while gentle bitterness keeps the sauce from tasting excessively sweet.

    Banana Bread With Nutty Coffee

    Nutty or caramel-toned coffee matches banana bread’s brown sugar, toasted walnut, and ripe fruit flavors.

    Tiramisu With Espresso

    Tiramisu already combines coffee, cocoa, mascarpone, and sweetness, making a small espresso a natural partner.

    Shortbread With Light Roast

    Buttery shortbread benefits from light or light-medium coffee that adds brightness without covering its simple flavor.

    Pecan Pie With Medium Roast

    A nutty medium roast complements toasted pecans and caramelized filling while balancing the pie’s richness.

    Choosing the Best Coffee Roast for Dessert

    Choosing the Best Coffee Roast for Dessert

    Light roasts suit fruit tarts, lemon cakes, berries, and delicate pastries because their acidity keeps fresh flavors noticeable.

    Medium roasts are flexible, working well with cheesecake, cinnamon rolls, banana bread, cookies, and caramel desserts.

    Dark roasts suit brownies, chocolate cake, rich pastries, and intensely sweet desserts because their deeper flavor holds up.

    How to Host a Coffee and Dessert Tasting at Home

    Choose a light, medium, and dark roast and serve three small dessert portions. Taste each coffee first, then take a bite of dessert and sip again to notice how sweetness, acidity, bitterness, and aroma change.

    If you are preparing treats for guests or sending them home with a sweet extra, knowing how to turn homemade desserts into thoughtful gifts can help you package leftover cookies, brownies, or biscotti in a more personal way.

    Keep water nearby to refresh the palate. Offer milk separately because dairy can soften acidity and bitterness and alter the pairing.

    Frequently Asked Questions

    1. What are the easiest dessert and coffee pairing ideas for home?

    Start with espresso and chocolate cake, medium roast and cheesecake, light roast and fruit tart, or cold brew with vanilla ice cream. These combinations rely on simple flavor relationships.

    2. What dessert tastes best with black coffee?

    Brownies, biscotti, chocolate cake, banana bread, and buttery cookies work well because their sweetness balances coffee’s natural bitterness.

    3. Should light or dark roast be served with dessert?

    Choose light roast for fruity sweets, medium roast for many baked desserts, and dark roast for rich chocolate or caramel flavors.

    4. Can decaf coffee be paired with dessert?

    Yes. Decaf is useful for evening desserts, and the same rules for roast level, acidity, intensity, and flavor notes still apply.

    A Sweeter Finish to Your Coffee Ritual

    I have found that enjoyable pairings are rarely complicated. Once I pay attention to intensity, sweetness, acidity, texture, and shared flavors, everyday desserts become easier to match with the right cup.

    When I use dessert and coffee pairing ideas for home, I start with familiar foods and experiment from there. Brownies with dark roast, lemon cake with light roast, or vanilla ice cream with cold brew can turn a simple treat into a tasting experience worth repeating.

  • Filipino Cassava Cake Recipe With Condensed Milk: A Golden, Chewy Classic

    Filipino Cassava Cake Recipe With Condensed Milk: A Golden, Chewy Classic

    The first time I tasted homemade cassava cake, what surprised me wasn’t simply its sweetness. It was the texture: chewy around the edges, soft and custardy inside, with a creamy golden topping that made an already comforting dessert feel special.

    This Filipino cassava cake recipe with condensed milk recreates that experience with ingredients home cooks can find in the US. Frozen grated cassava makes preparation much easier, while coconut milk, evaporated milk, condensed milk, and butter create the rich texture associated with this popular Filipino kakanin.

    What Makes Filipino Cassava Cake So Rich and Chewy?

    Cassava cake, sometimes called cassava bibingka or bibingkang kamoteng kahoy, is a traditional Filipino dessert made from grated cassava. Unlike an American-style cake, it doesn’t depend on wheat flour for structure. The grated root itself creates its characteristically dense, tender, and pleasantly chewy texture.

    Coconut milk supplies richness, while condensed milk adds sweetness and creaminess. Evaporated milk softens the mixture further. A custard topping, baked until golden, adds another layer of flavor and texture.

    Macapuno, shredded coconut, and grated cheese are also popular additions, so there is plenty of room to make the recipe your own. Simple dessert presentation ideas to make treats feel special, such as neat slices, toasted coconut, or an elegant serving plate, can make cassava cake look as inviting as it tastes.

    What Ingredients Do You Need for Cassava Cake?

    For a 9-by-13-inch baking pan, I use about 2 pounds (900 grams) of fresh or thawed frozen grated cassava, one 14-ounce can sweetened condensed milk, one 13.5-ounce can coconut milk, one 12-ounce can evaporated milk, two large beaten eggs, 1/4 cup melted unsalted butter, and up to 1/2 cup white sugar.

    Because condensed milk is already quite sweet, I recommend adjusting the added sugar to your preference.

    For the custard topping, reserve 1/2 cup condensed milk and combine it with 1/2 cup coconut milk and one large egg yolk. About 1/2 cup grated cheddar cheese is optional but creates a delicious sweet-and-salty finish.

    Should You Use Fresh or Frozen Grated Cassava?

    Should You Use Fresh or Frozen Grated Cassava?

    Frozen grated cassava is my preferred option for US home kitchens. You can often find it in Filipino or Asian supermarkets, usually in the freezer section. It saves considerable time because there’s no peeling or grating required.

    Thaw frozen cassava completely, then gently drain obvious excess liquid using a fine-mesh strainer. Don’t squeeze it completely dry. Some moisture helps maintain the tender texture.

    Fresh cassava works too, but it must be peeled and prepared correctly. Cassava should never be eaten raw, and it must be thoroughly cooked before serving.

    How to Make Filipino Cassava Cake Step by Step

    Making Filipino cassava cake with condensed milk isn’t difficult, but moisture levels and baking time matter. I recommend watching the texture of the cake rather than relying entirely on the clock.

    Prepare the Cassava Batter

    Preheat your oven to 350°F (175°C) and grease a 9-by-13-inch baking pan with butter.

    Combine the grated cassava, coconut milk, evaporated milk, condensed milk, beaten eggs, melted butter, and sugar in a large bowl. Remember to reserve the condensed milk needed for your topping.

    Stir by hand until everything is evenly incorporated. There’s no need for an electric mixer.

    Pour the batter into your prepared baking pan and smooth the surface.

    Bake Until the Cassava Base Sets

    Bake for approximately 45 to 55 minutes.

    Instead of depending solely on a toothpick test, look at the cake itself. The edges should appear firm and the center should be set rather than watery. A little softness or slight jiggle is normal because cassava cake isn’t supposed to have the dry crumb of a conventional flour cake.

    Add the Creamy Custard Topping

    While the base bakes, whisk together the reserved condensed milk, coconut milk, and egg yolk until smooth.

    Carefully remove the pan from the oven and spread the custard mixture across the surface. If you’re making cheesy cassava cake, sprinkle grated cheddar evenly over the custard.

    Return the pan to the oven and bake for another 15 to 20 minutes.

    For a deeper caramelized finish, turn on the broiler for about one to two minutes. Watch continuously because the sugar-rich topping can burn very quickly under a US oven broiler.

    Why Is My Cassava Cake Watery or Rubbery?

    Why Is My Cassava Cake Watery or Rubbery?

    Excess moisture is one of the most common reasons cassava cake remains watery. Frozen grated cassava varies between brands, so drain obvious excess liquid before mixing your batter.

    Underbaking can cause a wet center as well. If the edges are set but the middle still looks liquid, give the cake additional baking time.

    A rubbery texture can develop when the ingredient ratio is incorrect or the cake is overbaked. Cassava cake should certainly be chewy, but it shouldn’t be tough.

    Pan size matters, too. A smaller pan produces a thicker cake and usually requires more time than a standard 9-by-13-inch pan.

    How Do You Get Perfectly Clean Cassava Cake Slices?

    Cooling is more important than it might seem. Freshly baked cassava cake remains very soft because its starches are still hot.

    I let the cake cool completely at room temperature before cutting. For especially neat squares, refrigerate the cooled cake for approximately one hour. Chilling allows the structure to firm up and makes slicing much easier.

    Use a clean, sharp knife and wipe the blade between cuts if you’re preparing slices for a party or dessert platter.

    What Are the Best Cassava Cake Variations?

    Cassava cake with macapuno is one of the best-known variations. Macapuno adds soft coconut strands and extra sweetness to the already coconut-rich dessert.

    Cheesy cassava cake is another favorite. Sharp or mild cheddar provides a savory contrast to the condensed milk custard.

    If you prefer less-sweet desserts, reduce or omit the additional white sugar before reducing the condensed milk. Condensed milk affects both sweetness and texture, so dramatically changing its quantity can alter the final consistency.

    How Do You Store and Reheat Cassava Cake?

    Once the cake has completely cooled, place leftovers in an airtight container and refrigerate them. I recommend eating refrigerated cassava cake within three to four days for the best texture and flavor.

    You can eat it chilled, bring it to room temperature, or gently warm individual portions in the microwave. I prefer it slightly warm because the coconut and condensed milk flavors become particularly noticeable.

    This also makes an excellent make-ahead Filipino dessert for potlucks, birthdays, holiday gatherings, and family celebrations.

    What Goes Well With Cassava Cake?

    What Goes Well With Cassava Cake?

    I usually serve cassava cake in small squares with hot coffee or tea because the slightly bitter drink balances the dessert’s creamy sweetness.

    For a larger Filipino dessert spread, pair it with leche flan, maja blanca, biko, ube desserts, or traditional bibingka. These desserts provide different textures while complementing cassava cake’s coconut-rich flavor.

    Frequently Asked Questions (FAQs)

    1. Do I need to drain frozen cassava before making cassava cake?

    Yes, if there is substantial excess liquid after thawing. Gently drain it, but don’t squeeze the grated cassava completely dry.

    2. Can I substitute cassava flour for grated cassava?

    I don’t recommend it. Cassava flour and grated cassava behave differently, and flour won’t create the traditional fibrous, chewy consistency this dessert needs.

    3. Can I prepare cassava cake the day before serving?

    Yes. This Filipino cassava cake recipe with condensed milk works particularly well as a make-ahead dessert. Cool it completely, refrigerate it overnight, and bring it closer to room temperature or gently reheat it before serving.

    4. Is traditional Filipino cassava cake gluten-free?

    The basic recipe doesn’t require wheat flour, so its core ingredients are naturally gluten-free. If you need a strictly gluten-free dessert, check every packaged ingredient for gluten-containing additives and cross-contact warnings.

    The Golden Top Is Worth the Wait

    What I love most about homemade cassava cake is how simple ingredients create such distinctive layers of texture. The chewy cassava base, coconut milk, creamy condensed milk, and caramelized custard work together without requiring complicated baking techniques.

    Frozen grated cassava makes the dessert especially approachable for home cooks in the US. My biggest advice is not to rush it: control excess moisture, watch for visual signs of doneness, keep an eye on the topping while broiling, and let the finished cake cool before slicing. 

    Add macapuno or cheddar if you want another layer of flavor, then pour yourself some coffee and enjoy a Filipino classic that deserves far more attention on American dessert tables.

  • How to Create a Beautiful Dessert Table at Home

    How to Create a Beautiful Dessert Table at Home

    A dessert table can turn a simple gathering into something festive, polished, and memorable. I love this setup because it does not require professional rentals or a huge decorating budget. 

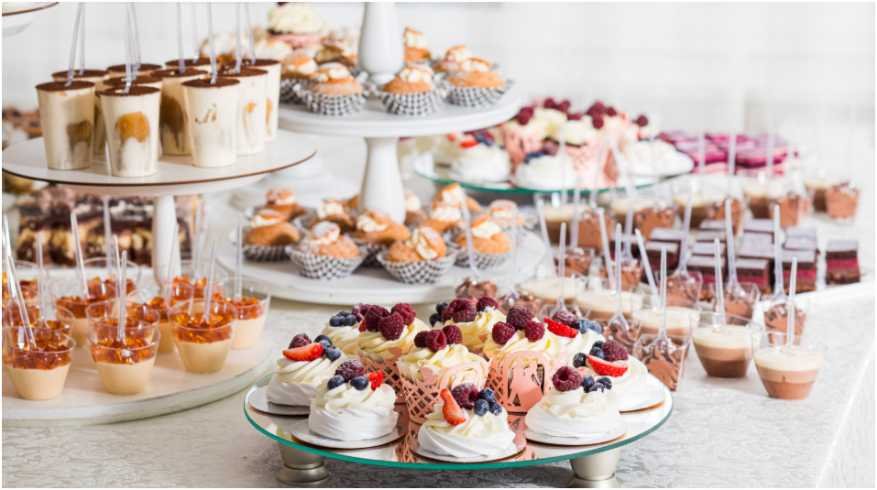
    Once I learned how to create a beautiful dessert table at home, I realized the biggest difference comes from smart arrangement, not excess. A clear color palette, one focal dessert, varied heights, and a carefully chosen mix of treats can make even a small table look beautifully styled.

    Start With a Theme and Color Palette

    Choose the mood before buying desserts or decorations. A birthday may suit bright colors, while a shower or dinner party may look better with softer shades.

    Stick to two or three main colors. Repeat them through the tablecloth, napkins, flowers, cake details, backdrop, and serving pieces. Limiting the palette keeps the display cohesive instead of crowded.

    Pick the Right Location

    Choose a dining table, kitchen island, sideboard, or console where guests can approach easily without blocking a walkway.

    A clean wall behind the table gives you room for a backdrop. Natural light helps photos, but keep chocolate, buttercream, whipped cream, and chilled desserts away from direct sun or heat.

    Create a Simple Backdrop

    A backdrop gives the display a finished look. Fabric, paper fans, streamers, greenery, balloons, framed art, or a removable garland can all work.

    If the sweets are colorful, use a quieter background. If the desserts are simple, let the backdrop add visual interest.

    Choose One Hero Dessert

    Choose One Hero Dessert

    Every attractive dessert table needs a focal point. A cake is the easiest choice, but a cupcake tower, pie, trifle bowl, stacked cookies, or floral arrangement can work too.

    Place it near the center for balance or slightly off-center for a relaxed look. It should be the first thing guests notice.

    Add Height for a Professional Look

    Desserts arranged at one level can look flat. Use cake stands, tiered trays, wooden boards, sturdy boxes hidden under fabric, or upside-down bowls beneath platters.

    Keep taller pieces toward the back, medium-height dishes in the middle, and low trays near the front. Make sure everything remains easy to reach.

    Arrange Everything From Back to Front

    Start with the backdrop and tallest decorations. Add the main cake next. Position tiered stands and medium-height sweets around it, then place cookies, brownies, bars, candies, and other low treats toward the front.

    Keep plates, forks, napkins, and serving utensils at one side or both ends. Leave some empty space so the table feels abundant without appearing overloaded.

    Choose Desserts With Variety

    You do not need ten kinds of sweets. One main dessert with two or three supporting choices is usually enough.

    If you are making the treats yourself, starting with easy dessert recipes for beginners can keep preparation manageable while still giving the table plenty of variety. Simple brownies, cookies, bars, and chilled desserts are especially useful because they can be prepared without advanced decorating or baking techniques.

    Mix shapes and textures. Combine a frosted cake with cupcakes, cookies, brownies, fruit, or candies. Mini portions work especially well because guests can sample several treats without creating too much waste.

    Plan the Right Amount of Food

    Plan the Right Amount of Food

    If cake follows a full meal, fewer extra sweets may be needed. If the table is the main dessert course, offer enough small portions for guests to try more than one item.

    Prepare a little extra of popular treats, but do not use unnecessary food just to fill space. Risers, trays, flowers, and intentional gaps can create fullness without waste.

    Make It Beautiful on a Budget

    Shop your home before buying décor. White plates, glass bowls, wooden boards, jars, baskets, cake stands, and neutral platters can work together when the colors are consistent.

    Use boxes beneath a tablecloth for hidden height. Reuse candles, ribbon, greenery, or small vases. Homemade cookies and brownies can balance the cost of a purchased centerpiece cake.

    If cookies are part of the display, learning how to prevent cookies from spreading can help them keep a neater shape and more consistent appearance. Uniform cookies are easier to stack, arrange on trays, and style alongside cakes, brownies, and other desserts without making the table look uneven.

    Style a Small Dessert Table

    If space is limited, build upward instead of outward. One cake stand, a tiered tray, and two low platters can create a complete display on a narrow console.

    Choose smaller serving pieces and avoid oversized decorations. Repeating the same colors across napkins, flowers, labels, and desserts will make everything feel connected.

    Avoid Common Dessert Table Mistakes

    Do not place everything at the same height or use too many unrelated colors. Avoid crowding the table, hiding desserts behind decorations, or leaving store packaging in view.

    Keep delicate sweets away from heat, provide serving utensils, and label allergens when needed. A beautiful display should be practical as well as attractive.

    Follow an Easy Setup Timeline

    Follow an Easy Setup Timeline

    Several days before the gathering, choose the theme, colors, menu, backdrop, and serving pieces. Prepare make-ahead treats the day before.

    On the event day, build the backdrop and risers first. Add serving dishes and shelf-stable desserts. Put refrigerated or delicate items out closer to serving time, then finish with flowers, greenery, candles, or small accents.

    Frequently Asked Questions

    1. How to create a beautiful dessert table at home on a budget?

    Use dishes you already own, limit the color palette, create height with hidden boxes, and make simple desserts yourself. Spend only on one high-impact feature such as the cake, flowers, or backdrop.

    2. What should be the centerpiece?

    A decorated cake is traditional, but a cupcake tower, pie, trifle, floral display, or tiered dessert stand can also create a strong focal point.

    3. How many types of desserts should I serve?

    Three to five choices are usually enough. One centerpiece dessert plus several smaller treats creates variety without making preparation difficult.

    4. How can I make the table look expensive?

    Use coordinated colors, clean serving pieces, varied heights, intentional spacing, and one strong focal point. Removing packaging and unnecessary clutter instantly makes inexpensive desserts look more polished.

    A Sweet Ending Worth Remembering

    I think the best dessert tables feel welcoming rather than perfect. When I focus on a theme, varied heights, practical serving details, and a few carefully chosen sweets, decorating becomes easier. 

    Thoughtful spacing and creative presentation matter more than buying lots of decorations. With simple planning, an ordinary table can become one of the most memorable parts of the celebration.

  • Vintage Heart Cake Ideas That Feel Classic, Romantic, and Completely Timeless

    Vintage Heart Cake Ideas That Feel Classic, Romantic, and Completely Timeless

    I started noticing vintage heart cakes popping up everywhere, from birthday parties to engagement celebrations, and they always managed to steal the spotlight. While dessert trends come and go, these cakes seemed to bring back something familiar with their delicate piping, pastel colors, and charming handwritten messages.

    The more I saw them, the more I realized they weren’t just another social media trend. Their nostalgic design, elegant details, and handmade feel make them memorable in a way that modern minimalist cakes often don’t. That’s exactly why vintage heart cakes continue to win people over.

    Why Vintage Heart Cakes Are Everywhere Again

    Why Vintage Heart Cakes Are Everywhere Again

    Vintage-inspired desserts have made a huge comeback, but heart-shaped cakes have become one of the most requested designs for a reason. They blend old-school decorating techniques with modern color palettes, creating cakes that feel romantic without looking outdated.

    The signature look comes from classic Lambeth piping, decorative buttercream borders, delicate ruffles, and intricate shell details. Combined with soft colors and personalized messages, these elements transform a simple cake into the centerpiece of any celebration.

    Unlike trendy cakes that often rely on bold colors or unusual textures, vintage heart cakes focus on craftsmanship. Every piped border and tiny decorative detail adds character, making each cake feel one of a kind.

    Vintage Heart Cake Ideas for Every Celebration

    One of the best things about vintage heart cakes is how easily they can match different occasions. A few thoughtful design choices completely change the overall look.

    Soft Pastel Elegance

    Pastel shades remain the most popular choice because they naturally complement vintage decorating styles. Light pink, baby blue, lavender, pale peach, and creamy ivory create a soft, romantic appearance that works beautifully for birthdays, baby showers, bridal showers, and anniversaries.

    An all-white monochrome cake also deserves attention. White buttercream with matching white piping creates a timeless design that feels clean, elegant, and effortlessly classic.

    Bold Romantic Designs

    Bold Romantic Designs

    For a stronger statement, pair a blush pink base with cherry red piping. The contrast adds personality while keeping the vintage aesthetic intact.

    Deep burgundy, dusty rose, or even black piping on a white cake creates a dramatic style that’s especially popular for milestone birthdays and evening celebrations.

    Floral-Inspired Vintage Cakes

    Buttercream flowers add texture without overwhelming the cake. Small roses, daisies, or delicate blossoms tucked between piped borders give the design a handmade touch.

    Keeping the flowers in similar color tones helps maintain the classic vintage appearance rather than making the cake look overly busy.

    Cherry-Topped Retro Cakes

    Sometimes the smallest detail becomes the most memorable. A single glossy cherry placed in the center instantly gives the cake a retro feel.

    Combined with scalloped buttercream borders and elegant script writing, this simple topper creates one of the most recognizable vintage heart cake styles seen today.

    Wedding and Engagement Cakes

    Vintage heart cakes aren’t limited to birthdays. Couples increasingly choose them for engagement parties, rehearsal dinners, intimate weddings, and anniversary celebrations.

    Simple messages like “Forever,” “Just Married,” or an important date written in elegant cursive make the design feel personal while keeping the decoration beautifully understated.

    The Details That Create the Vintage Look

    The Details That Create the Vintage Look

    The beauty of these cakes comes from carefully layered decorations rather than elaborate fondant sculptures.

    The Lambeth piping method remains the defining feature. Multiple overlapping buttercream borders create depth and texture that immediately catch the eye. While intricate, the design still feels soft thanks to its rounded shapes.

    Shell borders are another classic choice. Their curved pattern frames the cake without overpowering the overall design, making them perfect for both beginners and professional decorators.

    Ruffled edges add movement and elegance. These ribbon-like buttercream waves soften the outline of the heart shape and give the cake a delicate finish.

    Tiny sugar pearls placed along the piped borders introduce subtle sparkle without distracting from the overall design. Personalized script messages such as “Love,” “Sweetheart,” or a meaningful date complete the nostalgic feel.

    Choosing Colors, Flavors, and Decorations

    The decoration may capture attention first, but flavor leaves the lasting impression.

    Vanilla bean, strawberry, raspberry, chocolate fudge, lemon, and almond remain some of the most popular choices because they pair beautifully with buttercream frosting.

    When choosing colors, think about the event rather than following trends. Soft pastels suit spring celebrations, while richer shades complement evening parties or romantic occasions.

    Adding satin bows, edible lace details, vintage-inspired cake toppers, or subtle metallic accents can elevate the design without making it look crowded. The goal is balance. Every decoration should complement the piping instead of competing with it.

    Tips Before Ordering or Decorating Your Cake

    Tips Before Ordering or Decorating Your Cake

    If you’re ordering from a bakery, bring several inspiration photos to show the piping style, colors, and lettering you prefer. Since vintage cakes rely heavily on buttercream craftsmanship, clear references help decorators understand the exact look you’re after.

    If you’re making one at home, start with simple shell borders before attempting detailed Lambeth piping. A turntable, quality piping tips, and chilled buttercream make decorating much easier.

    Most importantly, avoid overloading the cake with decorations. Vintage designs stand out because every detail has room to shine.

    FAQs: Vintage Heart Cake Ideas That Feel Classic, Romantic, and Completely Timeless

    1. What makes a cake look vintage?

    Classic Lambeth piping, shell borders, pastel colors, ruffled buttercream, sugar pearls, and handwritten script are the defining features of a vintage cake.

    2. Which colors work best for vintage heart cakes?

    Soft pink, white, lavender, baby blue, ivory, pale peach, and cherry red remain the most popular choices because they highlight the decorative piping beautifully.

    3. Are vintage heart cakes only for birthdays?

    No. They’re also popular for weddings, anniversaries, bridal showers, baby showers, Valentine’s Day, and engagement celebrations.

    4. Can beginners decorate a vintage heart cake?

    Yes. Starting with simple shell borders and basic piping techniques allows beginners to achieve a beautiful vintage-inspired look before moving on to more detailed Lambeth designs.

    Why Timeless Designs Always Find Their Way Back

    Some cake trends disappear after a season, but vintage heart cakes continue to return because they celebrate craftsmanship, nostalgia, and thoughtful details instead of chasing what’s new. Their delicate piping, romantic colors, and personalized touches create a cake that feels meaningful long after the celebration ends.

    Sometimes, the sweetest designs are the ones that remind us why classics never truly go out of style.