Blog

  • What’s Driving the Rise of Personalized Celebration Cakes Today?

    What’s Driving the Rise of Personalized Celebration Cakes Today?

    There was a time when choosing a celebration cake was one of the easiest parts of planning an event. You’d pick a flavor, decide on the size, add a simple message, and call it done. Today, that approach feels almost outdated. Whether it’s a birthday, graduation, baby shower, or anniversary, people want a cake that feels like it belongs to the person being celebrated—not just the occasion.

    That’s a big reason behind the rise of personalized celebration cakes. They’re no longer just desserts sitting at the end of the table. They’re conversation starters, photo backdrops, and often the first thing guests notice when they walk into a room. More importantly, they’re a way to tell a story through design, flavor, and thoughtful details that make every celebration feel a little more meaningful.

    Why Personalized Cakes Have Become So Popular

    Why Personalized Cakes Have Become So Popular

    A custom cake isn’t simply about adding someone’s name or favorite color anymore. It’s about creating something that reflects personality, memories, and even inside jokes. As celebrations become more experience-focused, people are looking for details that feel unique rather than generic.

    Some of the biggest reasons behind this shift include:

    • People value experiences over ordinary gifts.
    • Celebrations have become more personalized than ever.
    • Families want meaningful traditions instead of one-size-fits-all events.
    • Guests appreciate thoughtful details that make occasions memorable.
    • A customized cake often becomes the centerpiece of the entire celebration.

    Instead of asking, “What cake should we order?”, people now ask questions like:

    • What design best represents the guest of honor?
    • Which flavors match everyone’s preferences?
    • Should the cake include hobbies, travel memories, or favorite movies?
    • Can it reflect a milestone in a creative way?

    That change in mindset has transformed cakes from a finishing touch into one of the most anticipated parts of any event.

    It’s About Telling a Story

    One of the biggest differences between traditional and personalized cakes is the story they tell.

    Today’s custom cakes often include details such as:

    • Favorite sports teams
    • Career achievements
    • Pet illustrations
    • Travel destinations
    • Gaming themes
    • Family traditions
    • Handwritten messages
    • Meaningful dates

    Rather than decorating a cake just because it looks attractive, decorators are designing cakes that immediately remind people who or what they’re celebrating.

    That emotional connection often matters far more than the size or complexity of the design.

    Social Media Has Changed Expectations

    There’s no denying that social media has reshaped the way people think about celebration cakes. Platforms filled with creative cake videos and eye-catching designs have raised expectations for what a special occasion should look like.

    People don’t just want a delicious cake anymore—they want one that photographs beautifully and becomes part of the celebration’s memories.

    Cakes Designed to Be Shared

    Several design trends have exploded because they perform well in short-form videos and photo galleries.

    Popular examples include:

    • Burn-away cakes that reveal a hidden message
    • Vintage Lambeth piping
    • Textured buttercream finishes
    • Hand-painted artwork
    • Bold monochromatic color palettes
    • Floral arrangements using edible decorations
    • Floating cake toppers
    • Metallic accents and edible gold leaf

    These designs create a visual moment that guests naturally want to photograph before anyone takes the first slice.

    Social Sharing Has Changed Buying Decisions

    Instead of choosing a design from a printed bakery catalog, many people now arrive with inspiration saved from social media.

    This has changed customer expectations in several ways:

    • They expect highly customized designs.
    • They want colors that match the event décor.
    • They look for cakes that stand out in photos.
    • They often request designs inspired by viral trends while adding their own personal twist.

    For bakeries, this means every order becomes less about copying a design and more about adapting inspiration into something original.

    The Biggest Personalized Cake Trends Right Now

    The Biggest Personalized Cake Trends Right Now

    Personalized cakes continue to evolve because people want something that feels fresh without losing the sentimental value behind the celebration. While trends come and go, the best custom cakes combine creativity with personal meaning.

    Some of the most popular trends include:

    • Vintage Lambeth piping with ornate borders and pastel colors.
    • Minimalist buttercream cakes featuring clean lines and subtle textures.
    • Hand-painted designs inspired by artwork, landscapes, or meaningful memories.
    • Burn-away cakes that reveal a hidden message or image.
    • Bold monochromatic color palettes for a modern look.
    • Edible photo prints that celebrate family memories or milestones.
    • Personalized acrylic or wooden toppers with names, dates, or meaningful quotes.
    • Mini celebration cakes and cupcakes that provide individual portions while maintaining a cohesive theme.

    Although these trends are popular, the most memorable cakes are rarely the ones that simply copy what’s trending. They’re the ones designed around the person being celebrated.

    How to Choose a Cake That Feels Personal

    It’s easy to get caught up in elaborate designs, but a great personalized cake starts with understanding the celebration itself.

    Before placing an order, think about:

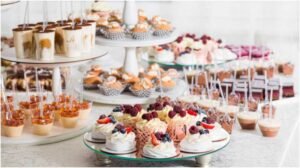
    Planning the rest of the dessert table in advance can make the celebration easier to manage too. Adding make ahead desserts for a party alongside the personalized cake gives guests more variety while reducing last-minute preparation on the day of the event.

    • The personality of the guest of honor.
    • The purpose of the celebration.
    • The number of guests.
    • Favorite flavors instead of default choices.
    • Dietary preferences or allergies.
    • Your overall event theme and color palette.
    • Your budget without compromising quality.

    Instead of focusing only on appearance, ask yourself what details would make someone immediately recognize that the cake was created specifically for them.

    If you’re still gathering inspiration, exploring unique homemade cake ideas for every celebrations can help you discover creative themes and thoughtful design elements before deciding whether to bake your own cake or work with a professional baker.

    Balance Style With Flavor

    One mistake many people make is prioritizing appearance over taste.

    A memorable cake should offer:

    • Attractive presentation.
    • Balanced flavor combinations.
    • Moist, fresh layers.
    • Quality ingredients.
    • Appropriate serving size.
    • A design that complements rather than overwhelms the celebration.

    The best cakes leave guests talking about both how beautiful they looked and how good they tasted.

    Frequently Asked Questions

    1. Why are personalized celebration cakes becoming more popular?

    People want celebrations that feel unique and meaningful. Personalized cakes reflect individual personalities, milestones, favorite hobbies, and family traditions while creating memorable experiences that guests are more likely to remember.

    2. Are personalized cakes more expensive than regular cakes?

    Usually, yes. The final cost depends on factors like custom decorations, design complexity, premium ingredients, specialty flavors, and the time required to create detailed handcrafted elements.

    3. What are the most popular personalized cake trends right now?

    Some of today’s biggest trends include vintage Lambeth piping, burn-away cakes, edible photo printing, minimalist buttercream finishes, hand-painted designs, custom acrylic toppers, and individually decorated mini cakes or cupcakes.

    4. How far in advance should I order a personalized celebration cake?

    Most bakeries recommend placing an order at least two to four weeks before the event. For weddings, large celebrations, or highly detailed custom designs, booking even earlier helps ensure availability and gives decorators enough time to perfect every detail.

    Why the Best Celebrations Always Feel Personal

    The growing popularity of personalized cakes isn’t simply about following the latest decorating trend. It reflects a broader shift in how people celebrate life’s biggest moments. Instead of choosing decorations that look the same as everyone else’s, hosts are investing in details that tell a personal story.

    Whether it’s a favorite flavor, a meaningful design, or a custom message that only close friends and family understand, those thoughtful touches turn an ordinary cake into something unforgettable. As technology, baking techniques, and creative ideas continue to evolve, personalization will remain at the heart of modern celebrations because people remember experiences that feel authentic.

    At the end of the day, the best celebration cake isn’t necessarily the biggest or the most elaborate—it’s the one that genuinely reflects the person standing behind the candles.

  • How to Prevent Cookies From Spreading and Bake Them Thick

    How to Prevent Cookies From Spreading and Bake Them Thick

    A tray of cookie dough can look perfect going into the oven and somehow come out looking like one giant pancake. I have learned that how to prevent cookies from spreading is less about complicated baking tricks and more about controlling temperature, ingredient ratios, dough texture, and the baking surface. A few smart adjustments can turn flat cookies into thick, chewy, evenly shaped treats.

    Cookies naturally spread a little as butter and sugar melt, but excessive spreading usually signals that something happened before or during baking. Understanding those small details makes troubleshooting much easier and can save an entire batch before it reaches the oven.

    Key Takeaways

    • Chill soft dough before baking. 
    • Measure flour accurately. 
    • Keep butter cool rather than melted. 
    • Use room-temperature baking sheets. 
    • Line trays with parchment instead of adding grease.

    Why Do Cookies Turn Flat?

    Understanding what happens inside the oven makes every fix easier to remember.

    Butter Melts Too Quickly

    Butter provides flavor and tenderness, but it also controls how fast dough moves across the baking sheet. If the butter is too warm, partially melted, or fully melted when the recipe expects softened butter, it begins flowing before the cookie structure has time to set.

    Properly softened butter should still feel slightly cool. Press it gently with a finger and it should leave an indent without collapsing. Shiny, greasy, extremely soft butter is usually too warm for recipes designed around creamed butter.

    Dough Has Too Much Moisture

    Cookie dough depends on a careful balance between flour, fat, sugar, eggs, and other liquids. Too little flour or too much moisture makes the dough less capable of holding its shape.

    Even seemingly small changes matter. Using a larger egg, pouring flour inaccurately, or substituting ingredients can change the wet-to-dry ratio enough to create noticeably flatter cookies.

    Oven Heat Is Off

    The oven needs to set the outside of the cookie while the fat melts. If the temperature is lower than expected, the dough may have extra time to flow outward before enough structure develops.

    An oven thermometer is useful because built-in oven displays are not always completely accurate. Allow the oven to preheat fully before baking rather than putting cookies inside as soon as the preheat light appears.

    Control Temperature And Dough

    Temperature is often the fastest place to start when cookies spread more than expected.

    Control Temperature And Dough

    Chill The Cookie Dough

    Refrigerating cookie dough gives the butter time to firm up. Firmer fat melts more slowly, giving the dough additional time to set before spreading excessively.

    For many drop-cookie recipes, chilling scooped dough for about 30 minutes is a good starting point. Very soft dough may benefit from one or two hours, while recipes specifically designed for overnight chilling should follow their stated resting time.

    Chilling also allows flour to absorb moisture more completely. This can create dough that is easier to handle and, depending on the recipe, cookies with stronger flavor and a chewier texture.

    Shape Taller Dough Portions

    A simple shaping technique can help create thicker cookies. Instead of flattening dough balls or forming perfectly round spheres, shape them slightly taller than they are wide.

    This gives the cookie more vertical height before the fat starts melting. It will not repair a badly unbalanced recipe, but combined with chilled dough and accurate measurements, it can encourage a thicker center.

    Keep Baking Sheets Cool

    A surprisingly common problem appears after the first batch. The first tray looks wonderful, while the second spreads dramatically even though the same dough was used.

    The culprit may be the baking sheet. Placing chilled dough onto a hot pan begins melting the butter immediately. Let the tray cool completely before loading another batch, or rotate between two baking sheets.

    How To Prevent Cookies From Spreading

    The most reliable method combines good dough preparation with careful measurements and the right baking setup.

    Measure Flour Accurately

    Flour gives cookie dough much of its structure. Too little flour leaves the melting butter and sugar without enough support, causing the cookie to flow outward.

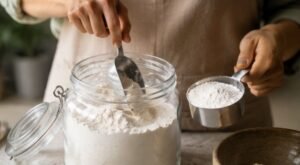
    A digital kitchen scale gives the most consistent results because flour can vary significantly when measured by volume. If a scale is unavailable, spoon flour gently into the measuring cup and level it rather than packing or shaking the flour down.

    If you know the dough was accidentally under-measured and feels unusually wet, adding one tablespoon of flour at a time may help. Avoid automatically adding extra flour to a correctly prepared recipe because too much can make cookies dry or cakey.

    Use Cool Softened Butter

    For recipes that call for softened butter, avoid treating “room temperature” as extremely soft. The ideal butter should bend slightly and accept a gentle fingerprint while still holding its shape.

    If butter becomes too warm while mixing, refrigerate the prepared dough before baking. Never assume that adding extra flour is the first solution because the actual problem may simply be temperature.

    Test Two Cookies First

    Before filling an entire tray, bake two cookies using the planned temperature and baking time. This small test reveals whether the dough needs an adjustment without risking the whole batch.

    If both cookies spread too much, chill the remaining dough for another 20 to 30 minutes. If the problem continues, inspect flour quantity, butter temperature, sugar level, egg size, and oven temperature before making further changes.

    Improve Ingredients And Equipment

    Once temperature is under control, a few ingredient and pan choices can make cookie spread much more predictable.

    Improve Ingredients And Equipment

    Choose Parchment Paper

    Parchment paper provides a reliable nonstick surface without extra fat, helping cookies hold their shape better. Butter or cooking spray can make dough spread more quickly. Silicone baking mats are another good option and may produce slightly thicker cookies, but results depend on the recipe. For consistent everyday baking, parchment paper remains the safest choice.

    Watch The Sugar Ratio

    Sugar influences cookie spread, browning, texture, and moisture. Too much sugar can lead to flatter, crispier cookies. If adjusting a recipe, reducing sugar by 5–10% may help limit spreading, but avoid changing it in tested recipes since it also affects flavor and texture.

    Use Cornstarch Carefully

    Cornstarch can help create softer, thicker cookies by adding structure. About one teaspoon mixed into the dry ingredients may reduce spreading in some recipes. However, if the real issue is melted butter or a hot baking sheet, correcting the temperature is more effective than adding cornstarch.

    Read Your Cookie Clues

    The finished cookie can often tell you exactly where the problem started.

    Read Your Cookie Clues

    Flat And Greasy Cookies

    A cookie that spreads widely and leaves a greasy appearance often points toward warm butter, too much fat, or insufficient flour.

    Start by checking whether the butter was properly softened and whether the flour was accurately measured. Chill the remaining dough before altering the ingredient ratio.

    First Batch Good, Second Batch Flat

    This pattern strongly suggests a hot baking pan. The cookie dough begins warming before it even reaches the oven, giving the butter a head start on melting.

    Transfer the dough back to the refrigerator and wait until the baking sheet feels completely cool.

    Chilled Dough Still Spreads

    If properly chilled dough continues spreading, look beyond refrigeration. Check ingredient measurements, egg size, sugar quantity, oven temperature, baking surface, and any substitutions made to the original recipe. A cold dough cannot completely compensate for an incorrect flour-to-fat ratio.

    Also Read: How to fix dry cookie dough?

    Frequently Asked Questions

    1. Do Cookies Spread More On Parchment Or Silicone?

    Both surfaces control spreading better than heavily greased pans. Silicone mats may produce slightly thicker cookies in some recipes, while parchment provides reliable browning, easy cleanup, and consistent results for most home bakers.

    2. What Can I Add To Cookies To Keep Them From Spreading?

    If the dough genuinely lacks structure, a small amount of flour or about one teaspoon of cornstarch may help. First check temperature and measurements because unnecessarily changing a balanced recipe can produce dry cookies.

    3. How Do You Make Thick Cookies That Don’t Spread?

    Use cool softened butter, accurately measured flour, chilled dough, tall dough portions, room-temperature baking sheets, and a fully preheated oven. Baking two test cookies first also lets you correct problems before baking the entire batch.

    4. Why Is How To Prevent Cookies From Spreading Important?

    Knowing how to prevent cookies from spreading helps you diagnose ingredient, temperature, and equipment problems before they ruin a full tray. It also produces more consistent cookie thickness, texture, shape, and baking time.

    Bye-Bye, Cookie Pancakes!

    Great cookies need some spread, but they should not race across the baking sheet. Once I started treating butter temperature, chilled dough, accurate flour measurements, cool pans, and oven heat as one system, my results became much more predictable. Mastering how to prevent cookies from spreading means you can spot problems early, bake a two-cookie test, make one smart adjustment, and enjoy thicker, chewier cookies instead of mystery puddles.

  • From Elegant to Fun: Unique Homemade Cake Ideas for Every Celebration

    From Elegant to Fun: Unique Homemade Cake Ideas for Every Celebration

    Some of the most memorable celebrations aren’t defined by expensive decorations or elaborate party venues. They’re remembered because of the little things that feel personal. A homemade cake often becomes one of those moments. It reflects the time, care, and thought someone puts into making another person feel special, whether it’s a child’s birthday, a milestone anniversary, or a graduation party. Even if the frosting isn’t perfectly smooth, that handmade touch is usually what guests remember long after the last slice is gone.

    Finding unique homemade cake ideas for special occasions doesn’t mean you need professional baking skills or a kitchen full of fancy equipment. The best cakes combine flavors people genuinely enjoy with designs that match the mood of the celebration. Some occasions call for understated elegance, while others are the perfect excuse to embrace bold colors, playful decorations, and creative surprises. The key is choosing a cake that feels just as memorable as the event itself.

    What Makes a Homemade Cake Stand Out?

    What Makes a Homemade Cake Stand Out?

    A homemade cake carries something that bakery cakes often can’t replicate—personality. Every choice, from the flavor to the finishing touches, tells a story about the person being celebrated.

    Instead of following trends without thought, start by asking a few simple questions. Is the event formal or relaxed? Will children be the center of attention, or are you hosting an intimate dinner with close friends? Matching the cake to the atmosphere creates a more cohesive celebration and makes every detail feel intentional.

    Texture also plays a bigger role than many people realize. Soft sponge layers paired with silky buttercream, fresh fruit, crunchy nuts, or smooth chocolate ganache create contrast that makes every bite more enjoyable. These combinations often leave a stronger impression than elaborate decorations alone.

    Elegant Homemade Cake Ideas for Meaningful Celebrations

    Some occasions deserve a little sophistication. Weddings, engagement parties, retirement dinners, milestone birthdays, and anniversaries often call for cakes with timeless appeal rather than flashy decorations.

    Fresh Floral Buttercream Cakes

    Buttercream remains one of the easiest frostings to work with at home while offering endless decorating possibilities. Fresh edible flowers such as pansies, chamomile, violas, or roses can instantly elevate a simple cake into something worthy of a centerpiece.

    Keep the color palette soft with shades like ivory, sage green, dusty pink, or lavender. These subtle combinations photograph beautifully and suit almost any elegant gathering.

    Rustic Naked Cakes

    Naked cakes continue to be popular because they celebrate simplicity rather than perfection. Instead of covering every inch with frosting, thin layers allow the sponge to peek through, creating a relaxed, handcrafted appearance.

    Fresh berries, figs, citrus slices, rosemary sprigs, or lightly dusted powdered sugar complete the look without overwhelming it. This style works especially well for outdoor celebrations and seasonal gatherings.

    Fruit-Topped Layer Cakes

    Fresh fruit naturally adds color without relying on artificial decorations. Strawberries, raspberries, blueberries, peaches, cherries, and figs not only brighten the presentation but also balance sweeter frostings with a refreshing finish.

    Pairing seasonal fruit with vanilla bean cake, lemon sponge, or almond cake creates combinations that feel light enough for spring and summer celebrations while still looking elegant on the dessert table.

    Fun Homemade Cake Ideas That Bring Energy to the Party

    Fun Homemade Cake Ideas That Bring Energy to the Party

    Not every celebration needs to be refined. Birthday parties, family reunions, graduation celebrations, and holiday gatherings often feel more memorable when the cake reflects the excitement in the room.

    Rainbow Surprise Cakes

    A rainbow cake looks fairly simple from the outside, but the colorful layers hidden inside create a fun surprise once the first slice is served.

    You can also add colorful sprinkles between layers or decorate with bright buttercream swirls to make every serving feel festive. It’s a design that instantly brings smiles, especially when younger guests gather around the table.

    Candy and Cookie Celebration Cakes

    Adding favorite candies, chocolate bars, cookies, pretzels, or popcorn creates texture as well as visual appeal.

    Rather than carefully placing every decoration, let them cascade naturally across the top or around one side of the cake for a playful finish.

    This approach also makes decorating less intimidating because imperfections become part of the overall design.

    Drip Cakes with Personality

    Chocolate ganache drip cakes continue to be a favorite because they’re both impressive and surprisingly achievable at home.

    Dark chocolate, white chocolate, or colorful candy melts can create dramatic drips along the edges before finishing the cake with macarons, cookies, fresh berries, or miniature chocolates. The result feels modern without requiring advanced piping skills.

    Small Details That Make a Big Difference

    A beautiful cake often comes down to thoughtful finishing touches rather than complicated techniques. Paying attention to a few simple details can completely change the final presentation.

    • Choose a consistent color palette instead of using every available decoration.
    • Mix smooth frosting with textured elements like toasted coconut, chopped pistachios, or crushed cookies.
    • Use fresh fruit, edible flowers, or herbs to add natural color.
    • Display the cake on a decorative stand that complements the overall table setting.
    • Add a simple cake topper for personalization without overcrowding the design.

    As decorating styles continue to evolve, many people also find inspiration by exploring modern birthday cake trends everyone is loving, then adapting those ideas with their own favorite flavors, family traditions, and personal creative touches. This approach helps every homemade cake feel current while still reflecting the person it’s made for.

    Choosing the Right Cake for Every Celebration

    Choosing the Right Cake for Every Celebration

    The best homemade cakes don’t just look good—they fit the occasion. Matching flavors, decorations, and presentation to the event helps create a more memorable experience for everyone.

    Not every gathering needs a full-size layer cake. For intimate birthdays, date nights, or small family celebrations, easy small batch dessert recipes can provide the same homemade charm with fewer leftovers and less preparation. Smaller portions also make it easier to experiment with different flavors or offer several desserts instead of relying on one large centerpiece.

    • Birthdays: Bright colors, fun themes, rainbow layers, or chocolate drip cakes.
    • Anniversaries: Elegant vanilla bean, red velvet, or lemon cakes with fresh flowers and textured buttercream.
    • Baby Showers: Soft pastel cakes with simple piping, fresh berries, or subtle fondant accents.
    • Graduations: School colors, personalized cake toppers, or favorite flavor combinations that celebrate the graduate.
    • Holiday Gatherings: Seasonal ingredients like pumpkin, apple, cranberry, peppermint, or gingerbread add a festive touch.

    No matter the celebration, choosing quality ingredients and taking time with the finishing details often matters more than attempting an overly complicated design.

    Frequently Asked Questions

    1. What is the easiest homemade cake to decorate?

    A buttercream-frosted layer cake is one of the easiest options because it allows for simple yet beautiful finishes with fresh fruit or edible flowers.

    2. How far in advance can I bake a celebration cake?

    Cake layers can usually be baked two to three days ahead if wrapped well and stored properly before decorating.

    3. What makes a homemade cake look professional?

    Smooth frosting, balanced colors, neat edges, and thoughtful garnishes like berries or edible flowers create a polished appearance.

    4. How do I choose the right cake flavor?

    Consider the season, the occasion, and your guests’ preferences. Light citrus flavors work well in warmer months, while chocolate and spice cakes are ideal for cooler celebrations.

  • Modern Birthday Cake Trends Everyone Is Loving Beyond Classic Designs

    Modern Birthday Cake Trends Everyone Is Loving Beyond Classic Designs

    There was a time when birthday cakes followed a familiar formula. A round cake, colorful frosting, a few candles, and a simple message across the top were enough to mark the occasion. While those classics still have their place, celebrations have changed. People now see birthday cakes as part of the overall experience rather than just the dessert served after dinner.

    That shift has opened the door to more creativity than ever before. The modern birthday cake trends everyone is loving reflect personal style, thoughtful details, and memorable presentation. Whether the celebration is for a child, a milestone birthday, or an intimate gathering with close friends, today’s cakes are designed to tell a story while delivering flavors that people actually want to eat.

    Why Birthday Cakes Are Getting a Modern Makeover

    Why Birthday Cakes Are Getting a Modern Makeover

    Birthday cakes have become one of the most photographed parts of any celebration. Social media has certainly influenced this change, but it’s also about creating something meaningful. Instead of choosing a design from a catalog, people are looking for cakes that reflect hobbies, favorite colors, personalities, and even family traditions.

    At the same time, many bakeries are moving away from overly thick fondant and elaborate decorations that sacrifice flavor. Today’s birthday cake designs often balance visual appeal with handcrafted details, textured buttercream, and carefully selected flavor combinations that guests genuinely enjoy.

    Modern Birthday Cake Trends Everyone Is Loving

    Minimalist Cakes That Let Texture Do the Talking

    Minimalism continues to shape modern birthday cake ideas, but it doesn’t mean plain. Smooth buttercream finishes, soft neutral colors, and subtle textured patterns create an elegant look without overwhelming the cake.

    Instead of adding dozens of decorative elements, many bakers focus on one standout detail, such as edible gold leaf, delicate piping, or fresh flowers. The result feels polished, contemporary, and timeless enough to suit almost any celebration.

    Vintage Piping Is Making a Stylish Return

    Sometimes the newest trend comes from the past. Vintage Lambeth piping has made an impressive comeback, bringing ornate borders, intricate scrollwork, and decorative ruffles back into the spotlight.

    Rather than feeling outdated, these handcrafted details add personality and charm. Modern versions often pair classic piping with fresh color palettes, making the design feel nostalgic without looking old-fashioned.

    Korean-Inspired Minimalism Continues to Influence Cake Design

    One of the strongest influences on contemporary birthday cake inspiration comes from Korean cake decorating styles. These cakes rely on sharp buttercream edges, monochromatic color palettes, and intentionally simple decorations.

    Rather than filling every inch with detail, the design creates impact through balance and precision. A single flower, a handwritten message, or a textured finish often becomes the focal point.

    Interactive Cakes Create Memorable Moments

    Birthday cakes are becoming part of the entertainment. Interactive designs, including burn-away cakes that reveal hidden messages or surprise artwork, add an unexpected element before the first slice is served.

    While these designs require skilled craftsmanship, they create lasting memories because guests become part of the experience instead of simply watching the cake being cut.

    Personalized Details Matter More Than Ever

    Personalization has moved beyond simply writing someone’s name on top of the cake. Today’s custom birthday cakes often incorporate favorite hobbies, travel memories, pets, sports, or meaningful colors into the overall design.

    Many families also browse custom celebration cake ideas before meeting with a bakery so they can combine trending styles with details that make the cake feel completely personal instead of following a standard template.

    Choosing a Trend That Still Feels Right Years Later

    Choosing a Trend That Still Feels Right Years Later

    It’s easy to fall in love with the latest birthday cake designs, but the best choice usually balances current trends with personal preferences.

    Before placing an order, consider:

    • Choose flavors that guests will genuinely enjoy instead of focusing only on appearance.
    • Match the cake design to the personality of the birthday guest rather than following every trend.
    • Think about how the cake will fit the party’s overall color palette and decorations.
    • Consider guest count, serving size, and how the cake will be displayed throughout the event.

    The most successful cakes don’t simply follow fashion. They reflect the people being celebrated.

    Flavor Is Becoming Just as Important as Design

    Beautiful cakes still need to taste exceptional. Many modern bakeries are pairing eye-catching designs with thoughtfully curated flavor combinations that move beyond traditional vanilla and chocolate.

    Fresh berries, citrus curds, pistachio, espresso, salted caramel, brown butter, and seasonal fruit fillings have become increasingly popular because they add depth without overpowering the cake.

    For smaller celebrations or dessert tables, easy no bake desserts with few ingredients can complement a statement birthday cake without adding hours of extra preparation. Simple chilled treats also give guests more flavor choices while keeping the overall dessert spread practical and visually appealing.

    Textured buttercream also allows decorators to achieve elegant finishes while preserving a softer, more enjoyable eating experience compared to thick layers of fondant.

    As a result, today’s luxury birthday cakes are judged just as much by flavor pairing and quality ingredients as they are by appearance.

    Frequently Asked Questions

    1. What birthday cake style is most popular right now?

    Minimalist buttercream cakes, vintage Lambeth piping, heart-shaped cakes, and personalized designs are among the most popular styles because they combine timeless appeal with modern aesthetics.

    2. Are fondant cakes still in style?

    Yes, but many people now prefer buttercream finishes or use fondant only for small decorative accents. This creates a more natural appearance while improving flavor and texture.

    3. How far in advance should I order a custom birthday cake?

    For detailed custom designs, placing an order two to four weeks ahead is usually recommended. Highly specialized or large celebration cakes may require even more notice.

    4. How do I choose the right birthday cake design?

    Start with the birthday person’s personality, favorite colors, hobbies, and the overall party theme. A personalized design often feels more meaningful than simply choosing the latest trend.

    Why the Best Birthday Cakes Always Feel Personal

    Trends will continue to evolve, and next year will almost certainly introduce new decorating techniques, colors, and presentation styles. Yet the cakes people remember most rarely become memorable because they followed every trend perfectly.

    They stand out because they capture a personality, celebrate an important milestone, or bring together thoughtful details that make the moment feel unique. Whether it’s elegant piping, textured buttercream, or a playful interactive surprise, the strongest designs combine creativity with genuine meaning.

    The best birthday cake isn’t simply the one everyone is talking about. It’s the one people still remember long after the candles have been blown out.

  • How to Keep Bananas Fresh Longer: Kitchen-Tested Hacks

    How to Keep Bananas Fresh Longer: Kitchen-Tested Hacks

    Kitchen counter displays always look gorgeous with a vibrant bunch of golden fruit until midweek brown spots crash the party. Our home kitchen testing team spent weeks evaluating every storage myth to discover how to keep bananas fresh longer without wasting groceries. You will save money and enjoy perfectly ripe fruit every single morning with these simple countertop adjustments.

    Key Takeaways

    1. Wrap stems tightly with foil to block ethylene gas release.
    2. Separate individual bananas from the cluster to slow ripening.
    3. Hang bunches to prevent bruising and improve airflow.
    4. Move yellow bananas into the fridge crisper drawer.
    5. Keep away from ethylene-sensitive produce like apples and avocados.

    Keeping Bananas Fresh Longer Saves You A Grocery Run

    Nothing breaks a smoothie lover’s heart quite like waking up to a bunch of black mush on the counter. Bananas go from perfectly green to completely overripe in what feels like a single blink. Learning how to keep bananas fresh longer turns your kitchen into a zero-waste paradise while saving your weekly grocery budget from literal fruit decay.

    Understanding the Science Behind Rapid Ripening

    Understanding how fruit biology works is the secret to extending kitchen produce life.

    The Ethylene Gas Trigger

    Banana stems continuously emit ethylene gas, a natural plant hormone that accelerates starch converting into sugar. Containing or slowing down this gas release is the single most effective way to protect your fruit from premature decay.

    Impact of Temperature and Sunlight

    Ambient heat and direct sunlight trigger rapid cellular breakdown inside tropical fruits. Placing your fruit bowl near bright windows or warm appliances like ovens accelerates oxidation, turning firm pulp mushy within 48 hours.

    Air Circulation and Bruising

    Weight pressure from resting on flat surfaces creates internal bruising, which releases localized ethylene spurts. Proper air movement around the entire surface balances moisture levels and keeps the peel firm.

    Why Bananas Ripen So Quickly

    Bananas naturally produce ethylene gas, a plant hormone that speeds up the ripening process. As bananas mature, they release more ethylene, causing nearby bananas in the bunch to ripen faster as well. Warm temperatures, bruising, and poor airflow can accelerate this process even further. 

    Understanding how ethylene works makes it easier to apply simple storage techniques, such as wrapping the stems, separating bananas, and keeping them at the right temperature. These small adjustments help extend freshness, reduce food waste, and give you more time to enjoy perfectly ripe bananas.

    Mastering How to Keep Bananas Fresh Longer on the Counter

    Mastering How to Keep Bananas Fresh Longer on the Counter

    Applying practical produce management techniques on your countertop ensures maximum immediate shelf life.

    Wrap the Stems Tightly

    Cover the stem or crown of your bunch tightly with plastic wrap or aluminum foil to block escaping ethylene gas. According to culinary testing guidelines at The Kitchn, trapping gas right at the source prevents it from circulating down to the pulp and accelerating premature softening.

    Hang the Bunch for Uniform Airflow

    Use a dedicated banana tree or hanging hook to improve ambient air circulation around every individual fruit. Elevating the cluster prevents flat spots and internal tissue bruising caused by resting heavily against hard granite or wood counters.

    Keep Distance from Other Produce

    Place your banana setup at least a few feet away from other ethylene-producing items like apples, avocados, and tomatoes. Isolating your cluster prevents cross-contamination of ripening gases that triggers an uncontrollable chain reaction across your fruit bowl.

    Refrigerating Bananas at Peak Ripeness

    Moving fruit into cold storage requires the right timing to lock in ideal texture and taste.

    Wait for Full Yellow Color

    Do not put green or underripe fruit into the refrigerator, or they will cease ripening entirely. Chilling unripe produce permanently damages cell walls, leaving you with dull, tasteless starch that never softens into sweet pulp.

    Embrace the Cold Environment

    Once your fruit reaches optimal yellow ripeness with light freckling, transfer them straight to the refrigerator crisper drawer. Cold temperatures drastically slow down internal enzymatic breakdown while maintaining firm, delicious pulp structure inside.

    Expect Dark Outer Peels

    The chilly environment turns outer peels dark brown or black due to pigment oxidation, but do not throw them away. The sweet fruit flesh inside remains firm, chilled, and perfectly edible for an extra week or two past normal shelf life.

    Freezing Strategies for Long-Term Storage

    Freezing Strategies for Long-Term Storage

    Preserving overripe fruit in the freezer ensures zero food waste for future baking projects.

    Peel and Slice Before Freezing

    Slice overripe bananas into half-inch coins or peel them completely before placing them into a freezer-safe bag or airtight container. Pre-slicing prevents you from fighting frozen peels later and allows for easy portion measuring.

    These ready-to-use pieces are especially convenient for smoothies, parfaits, and healthy yogurt desserts from around the world, where frozen banana can add natural sweetness and a thicker, creamier texture.

    Ready for Smoothies and Baking

    Frozen banana slices stay vibrant for months and blend into rich, creamy textures for smoothies, healthy nice cream, or classic banana bread recipes.

    When using wooden utensils to mash or mix bananas for sweet recipes, knowing how to deodorize wooden wooden spoons helps prevent lingering savory odors from affecting delicate dessert flavors. Having a stash ready in cold storage makes home baking incredibly fast and convenient.

    Frequently Asked Questions

    1. How do you keep bananas fresh for 2 weeks?

    To master how to keep bananas fresh longer for two weeks, wrap individual stems tightly in foil, hang the cluster on a hook, and move them into the refrigerator as soon as they turn completely yellow.

    2. Do bananas last longer in the fridge or on the counter?

    Bananas last longer on the counter while maturing from green to yellow, but they stay fresh far longer inside the fridge once fully ripe, extending usability for up to seven additional days.

    3. How do you slow down bananas from ripening?

    You can slow down the ripening process by wrapping the crowns tightly with aluminum foil to trap ethylene gas, separating individual fruits, keeping them out of direct sunlight, and providing proper suspension.

    4. Is it better to wrap bananas in foil or plastic?

    Aluminum foil works much better than plastic wrap because it molds firmly around irregular stem shapes, creating a tighter seal that prevents ethylene gas from escaping onto the fruit body.

    Ultimate Freshness Breakthrough So Never Waste Fruit Again

    Mastering how to keep bananas fresh longer comes down to simple science and smart kitchen organization. Wrapping stems, hanging clusters, and using cold refrigeration at peak ripeness completely eliminates premature brown mush. Take control of your countertop produce today, apply these tested storage hacks, and enjoy perfectly sweet, firm fruit every single day of the week!

  • Easy Dessert Recipes for Beginners: 9 Foolproof Treats

    Easy Dessert Recipes for Beginners: 9 Foolproof Treats

    I used to assume homemade desserts required cake pans, mixers, perfect measurements, and a suspicious amount of patience. They do not. Some of my favorite easy dessert recipes for beginners need five ingredients or fewer and barely enough time to make a mess.

    The trick is choosing desserts with forgiving textures and simple methods. Chilling, blending, layering, and microwaving leave far less room for disaster than complicated pastry work.

    These recipes are the ones I would choose when learning to make desserts from scratch.

    What Makes a Dessert Beginner-Friendly?

    I consider easy dessert recipes for beginners successful when the method is simple enough to remember after reading it once.

    The best starter desserts usually use familiar ingredients such as bananas, chocolate, peanut butter, berries, oats, cream, and graham crackers. They also provide visible clues when they are ready.

    That matters because beginners often struggle more with judging doneness than measuring ingredients.

    I also favor recipes with short active preparation. A dessert may need several hours in the refrigerator, but that does not mean it requires several hours of work.

    Easy No-Bake Dessert Recipes

    No-bake sweets are some of the safest starting points because oven temperature and baking time are removed from the equation.

    3-Ingredient Chocolate Oatmeal Cake

    3-Ingredient Chocolate Oatmeal Cake

    This is one of my favorite easy dessert recipes for beginners because the basic method feels almost impossible to ruin.

    Warm milk, pour it over chopped dark chocolate, and stir until smooth. Add rolled oats and mix well. Press the mixture into a lined container and refrigerate until firm.

    The important beginner clue is texture. The mixture should hold together when pressed before chilling. If it looks very loose, add another spoonful of oats.

    Allow it to chill until clean slices can hold their shape.

    Strawberry Icebox Cake

    Strawberry Icebox Cake

    An icebox cake teaches an important dessert lesson: time can do the work that baking usually does.

    Layer graham crackers with whipped cream and sliced strawberries. Repeat until your dish is full, then refrigerate it for several hours or overnight.

    Moisture from the cream and berries softens the crackers. They eventually take on a tender, cake-like texture.

    For a smaller household, this is also a useful place to explore easy small batch dessert recipes rather than preparing a full casserole-sized dessert.

    Easy Berry Fruit Mousse

    Easy Berry Fruit Mousse

    Fruit mousse looks elegant but requires very little technical skill.

    I blend frozen berries with lemon juice and a small amount of honey or maple syrup. Then I gently fold the fruit mixture into whipped cream.

    The word “fold” matters. Stirring aggressively knocks air from the cream and gives the mousse a heavier texture.

    Use a spatula and turn the mixture over itself until the color becomes even.

    Easy Microwave Desserts for Beginners

    Microwave desserts work well when I want something sweet without making a full batch.

    They are also useful for practicing ingredient ratios because mistakes affect only one serving.

    Peanut Butter Banana Mug Cake

    Peanut Butter Banana Mug Cake

    Mash one medium banana until nearly smooth. Add about three tablespoons of peanut butter and one tablespoon of maple syrup.

    Mix everything inside a microwave-safe mug.

    Microwave for roughly 60 to 90 seconds, depending on microwave power. The center should look set rather than wet.

    Allow the cake to rest for one minute because microwave desserts continue cooking slightly from retained heat.

    Fudgy Nutella Mug Cake

    Fudgy Nutella Mug Cake

    Combine four tablespoons of self-rising flour, three tablespoons of Nutella, and three tablespoons of milk.

    Stir until no dry pockets remain.

    Microwave for about one minute. I prefer stopping when the middle still looks slightly soft because overcooking quickly turns mug cakes rubbery.

    One safety point matters here. The FDA classifies flour as a raw food and advises against eating uncooked flour, dough, or batter. Flour-based mug cakes should therefore be cooked fully rather than tasted while raw.

    Easy Fruit Desserts With Minimal Prep

    Fruit-based sweets are excellent easy dessert recipes for beginners because natural sweetness does much of the flavor work.

    They also provide room for experimentation without requiring precise baking chemistry.

    Chocolate Peanut Butter Dates

    Chocolate Peanut Butter Dates

    Split Medjool dates lengthwise and remove the pits.

    Fill each date with peanut butter, press in a few chopped peanuts, then dip or drizzle the dates with melted dark chocolate.

    Place them in the freezer for around ten minutes.

    The result tastes rich and candy-like, yet the entire recipe requires only assembly.

    Banana Chocolate Nice Cream

    Slice ripe bananas and freeze them until solid.

    Blend the frozen banana pieces with cocoa powder. At first, the mixture may look crumbly. Keep blending.

    The bananas eventually become creamy enough to resemble soft-serve ice cream.

    I learned not to add much liquid at the beginning. Too much milk changes the texture from ice cream into a smoothie.

    Simple Beginner Desserts With Basic Pantry Ingredients

    Some of the best beginner recipes do not need a formal recipe at all.

    They rely on combinations that are easy to adjust by taste.

    Chocolate-Dipped Strawberries

    Chocolate-Dipped Strawberries

    Dry strawberries completely before dipping them into melted chocolate.

    This tiny step makes a noticeable difference. Water can prevent chocolate from coating fruit cleanly.

    Dip each strawberry, place it on parchment paper, and chill until the coating sets.

    You can add crushed cookies or chopped nuts before the chocolate hardens.

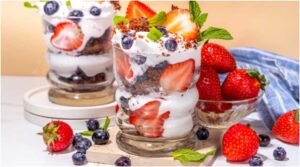
    Yogurt Berry Parfait

    Layer Greek yogurt, berries, crushed graham crackers, and a small drizzle of honey.

    Repeat the layers until your glass is full.

    This is one of the quickest easy dessert recipes for beginners because nothing needs cooking or chilling before serving.

    For a more dessert-like texture, I use vanilla yogurt and let the assembled parfait sit for ten minutes. The crumbs soften slightly and absorb berry juices.

    My Three-Check Dessert Test

    Before trying a new beginner recipe, I use three checks.

    First, I look at active preparation time. Under 15 minutes is ideal while building confidence.

    Second, I count techniques rather than ingredients. A seven-ingredient recipe that only requires mixing can be easier than a four-ingredient recipe involving caramelizing sugar.

    Third, I ask whether the recipe has a visible success clue.

    “Bake for 12 minutes” is less helpful to a beginner than “remove when the edges are set and the center is slightly soft.”

    That distinction has helped me avoid more dessert failures than simply choosing shorter ingredient lists.

    Beginner Dessert Mistakes Worth Avoiding

    The most common problem I see with easy dessert recipes for beginners is rushing the final step.

    Icebox cakes need time to soften. Frozen desserts need ingredients to freeze completely. Chocolate coatings need dry fruit. Mug cakes need enough cooking time to remove raw batter.

    Measurement also matters more in flour-based desserts than in fruit-based treats.

    Avoid scooping packed flour directly from a container when accuracy matters. Spoon flour into the measuring cup and level the top.

    Storage deserves attention too. Cream-based and other perishable desserts should return to the refrigerator promptly. USDA guidance says perishable food generally should not remain at room temperature longer than two hours, and most cooked leftovers should be used within three to four refrigerated days.

    Frequently Asked Questions

    1. What are the easiest desserts to make with no baking experience?

    Icebox cakes, fruit parfaits, chocolate-covered fruit, mousse, and no-bake oatmeal cakes are among the simplest choices because they rely on mixing, layering, or chilling.

    2. What are good easy dessert recipes for beginners without an oven?

    Try strawberry icebox cake, berry mousse, chocolate dates, banana nice cream, yogurt parfaits, or chilled chocolate oatmeal cake.

    3. What dessert can I make in five minutes?

    A yogurt parfait, chocolate-stuffed dates, or a peanut butter banana mug cake can usually be prepared in about five minutes before chilling or cooking.

    4. What baking tools should a beginner buy first?

    I would start with measuring cups, measuring spoons, mixing bowls, a silicone spatula, parchment paper, one baking sheet, and an eight-inch baking pan.

    Sweet Success Without the Kitchen Drama

    I do not think learning dessert should begin with laminated pastry, seven-layer cakes, or recipes that require three thermometers.

    I would start with one of these easy dessert recipes for beginners, learn what the finished texture should look like, then repeat it once before moving to something harder.

    My first choice would be the strawberry icebox cake for a crowd or the peanut butter banana mug cake for one person.

    Master a few forgiving desserts first. Confidence usually arrives much faster than complicated baking skills.

  • Custom Celebration Cake Ideas That Go Beyond Basic Birthday Designs

    Custom Celebration Cake Ideas That Go Beyond Basic Birthday Designs

    There was a time when a celebration cake only needed colorful frosting and a cheerful message to make an impression. Today, expectations have changed. Cakes have become part of the experience, setting the tone for the event before anyone takes the first bite. Whether it’s a milestone birthday, anniversary, graduation, or engagement, people want something that feels personal instead of something picked from a display catalog.

    That’s exactly why custom celebration cake ideas continue to gain attention. A thoughtfully designed cake doesn’t just match the party theme—it reflects a personality, a favorite hobby, a shared memory, or even a sense of humor. The best designs strike a balance between creativity and craftsmanship, making the cake feel like an extension of the celebration rather than just another dessert.

    Why Custom Cakes Leave a Lasting Impression

    Why Custom Cakes Leave a Lasting Impression

    Custom cakes have become more than decorative centerpieces. They tell stories in ways that generic designs simply can’t.

    A cake inspired by someone’s favorite travel destination, profession, or lifelong passion instantly feels more meaningful than a traditional layered cake with standard decorations. These personalized celebration cakes create conversations, memorable photos, and moments guests remember long after the event ends.

    Modern cake artists also pay close attention to details that weren’t always part of cake design, including flavor pairings, texture, color harmony, and even how the cake photographs under different lighting. The result is a centerpiece that looks beautiful while delivering the quality people expect from a handcrafted dessert.

    Custom Celebration Cake Ideas Worth Exploring

    Design Around the Person, Not Just the Occasion

    One of the biggest shifts in cake design is focusing less on the event itself and more on the individual being celebrated.

    Instead of simply choosing balloons or candles for a birthday cake, many people now incorporate hobbies, careers, favorite books, sports, music, or travel memories into the overall concept. Small personalized elements often create a stronger emotional connection than elaborate decorations alone.

    Fault Line Cakes with Unexpected Texture

    Fault line cakes remain popular because they add depth without overwhelming the overall design.

    Rather than covering every inch with decorations, a section of the cake appears intentionally “cracked” open to reveal colorful sprinkles, edible gold, sugar crystals, fresh fruit, or textured buttercream underneath. The contrast between the smooth exterior and detailed interior creates an eye-catching effect that feels contemporary without becoming overly dramatic.

    Painterly Buttercream Designs

    Buttercream is no longer limited to traditional swirls and piped flowers.

    Many decorators now use palette knives to build thick layers of frosting that resemble painted canvases. Floral strokes, abstract landscapes, and textured finishes create cakes that feel handcrafted and artistic. Since every stroke is applied individually, no two cakes ever look exactly alike.

    This approach works especially well for weddings, anniversaries, bridal showers, and elegant birthday celebrations where subtle details matter more than bold decorations.

    Gravity-Defying Cake Structures

    For people who want something unforgettable, gravity-defying cakes offer a dramatic centerpiece.

    Hidden support systems create the illusion that bottles are pouring into cakes, teapots float above dessert tables, or decorative elements balance impossibly in midair. These architectural designs combine engineering with baking expertise, transforming dessert into edible art.

    Although visually impressive, the best versions never compromise flavor or stability, making them just as enjoyable to serve as they are to admire.

    Graphic Cartoon Cakes

    Cartoon-inspired cakes have become one of the most recognizable trends over the past few years.

    Bold black outlines, pastel colors, and flat shading techniques make three-dimensional cakes appear like comic book illustrations. They’re playful, nostalgic, and instantly recognizable in photographs, making them especially popular for younger celebrations and creative-themed parties.

    Minimalist Cakes with Luxury Details

    Not every celebration calls for vibrant colors or oversized decorations.

    Minimalist cakes rely on clean lines, smooth buttercream finishes, monochromatic color palettes, and carefully chosen accents like edible pearls, metallic details, or fresh flowers. The simplicity allows craftsmanship to take center stage while creating a timeless look that complements almost any event décor.

    For a more romantic and nostalgic variation, vintage heart cake ideas bring together piped borders, soft color palettes, delicate lettering, and retro-inspired details. These designs work especially well for anniversaries, engagements, bridal celebrations, and milestone birthdays where the cake needs to feel both personal and visually distinctive.

    Small Details That Make a Big Difference

    Small Details That Make a Big Difference

    Beautiful decoration is only part of what makes a memorable custom cake. Several smaller choices often have an even greater impact.

    • Choose flavors that complement each other rather than relying on appearance alone. Pairings like vanilla bean with raspberry filling or chocolate sponge with salted caramel create a better overall experience.
    • Think about serving size before choosing elaborate designs. A cake should comfortably serve guests without sacrificing structural integrity.
    • Consider how the cake fits into the overall event styling, including floral arrangements, table settings, and lighting.
    • Balance decorative elements with practical features like clean slicing, stable layers, and moisture retention for longer celebrations.

    Before You Place a Custom Cake Order

    Working with a bakery becomes much easier when you have a clear vision before your consultation.

    Bring inspiration photos, discuss your preferred color palette, mention any dietary requirements, and share details about the venue. It’s also helpful to explain which design elements matter most, whether that’s hand-painted buttercream, textured frosting, edible flowers, or sculptural decorations.

    If you’re browsing aesthetic birthday cakes for inspiration, save examples that reflect the overall mood rather than expecting an exact copy. That gives decorators creative freedom while still delivering a cake that feels personal and unique.

    Leaving enough production time is equally important. More intricate designs often require several days of planning, sculpting, and decorating, especially when handcrafted details or specialty finishes are involved.

    Frequently Asked Questions: 

    1. What makes a custom celebration cake different from a regular bakery cake?

    A custom celebration cake is designed specifically for an individual or event. It often includes personalized colors, themes, flavors, handcrafted decorations, and unique design elements that aren’t available in standard display cakes.

    2. Are custom cakes only suitable for birthdays?

    Not at all. They’re commonly created for weddings, anniversaries, graduations, retirement parties, baby showers, engagement celebrations, corporate events, and many other milestones.

    3. How far in advance should I order a custom cake?

    For detailed designs, placing your order two to four weeks ahead is generally recommended. Larger or highly intricate cakes may require even more notice, particularly during busy celebration seasons.

    4. Can a highly decorative cake still taste good?

    Absolutely. Skilled cake artists balance presentation with quality ingredients, thoughtful flavor combinations, and proper cake construction so the finished product looks impressive while remaining enjoyable to eat.

    The Cakes People Remember Long After the Party Ends

    The most memorable cakes aren’t always the tallest or the most extravagant. They’re the ones that capture a story, reflect someone’s personality, and become part of the celebration itself. As cake decorating continues to evolve, creativity now extends beyond frosting and fondant into texture, structure, color, and artistic expression. Whether it’s a painterly buttercream finish, a gravity-defying centerpiece, or a clean minimalist design, thoughtful customization transforms an ordinary dessert into something guests genuinely remember.

    Long after the candles are blown out and the last slice is served, it’s often that personal touch that people talk about the most.

  • Easy Small Batch Dessert Recipes for Quick Sweet Cravings

    Easy Small Batch Dessert Recipes for Quick Sweet Cravings

    Sometimes I want dessert, but I do not want 24 cookies staring at me from the kitchen counter for three days. That is when I turn to easy small batch dessert recipes. They give me enough for one evening, two people, or a few carefully planned servings without turning a simple craving into a full baking project.

    After making small portions of cookies, brownies, cakes, and chilled desserts, I have found one rule matters most: small-batch baking rewards precision. A tablespoon too much flour can change six cookies far more than it changes a batch of three dozen.

    These recipes keep the ingredient lists short, the cleanup manageable, and the results satisfying.

    Why Small-Batch Desserts Work So Well

    I originally liked small-batch baking because it prevented leftovers. I kept using it because it also made baking faster.

    Most easy small batch dessert recipes use one bowl, a ramekin, a mug, or a small baking tray. There is usually no need to drag out a stand mixer or fill several pans.

    Less Waste, Less Cleanup, Better Portion Control

    Small recipes also give me room to experiment. I can add espresso powder to brownies or change the chocolate in cookies without risking a large batch.

    There is another practical advantage. Small portions cool quickly, so cookies and brownies can move from oven to plate much faster.

    My favorite approach is to choose dessert based on three things: how much time I have, how much washing up I will tolerate, and whether I want something baked or chilled. That simple system is more useful than collecting dozens of nearly identical recipes.

    Fudgy Sea Salt Ramekin Brownies for Two

    Fudgy Sea Salt Ramekin Brownies for Two

    When I want intense chocolate flavor, ramekin brownies are usually my first choice. This version makes two individual servings with chewy edges and a soft center.

    Ingredients

    I use 4 tablespoons softened unsalted butter, ½ cup granulated sugar, one beaten egg, and 1 teaspoon vanilla extract. For the dry ingredients, I use ¼ cup all-purpose flour and ⅓ cup unsweetened cocoa powder.

    A pinch of flaky sea salt finishes the brownies. Powdered sugar is optional.

    How I Make Them

    I heat the oven to 350°F and lightly grease two standard ramekins.

    First, I mix the butter and sugar until smooth. Then I add the beaten egg and vanilla. In another small bowl, I combine the flour and cocoa before gently stirring them into the wet mixture.

    I stop mixing as soon as the dry streaks disappear. Overmixing can encourage gluten development and make a small brownie noticeably tougher.

    I divide the batter between the ramekins and bake for about 18 to 20 minutes. I look for set edges and a slightly soft center rather than waiting for the middle to become completely firm.

    After five minutes of cooling, I add flaky sea salt.

    The contrast between salt and cocoa makes this one of my favorite easy small batch dessert recipes when I want something richer than a cookie.

    Small Batch Chocolate Chip Cookies

    Small Batch Chocolate Chip Cookies

    Small-batch chocolate chip cookies dominate search results for a reason. They are familiar, quick, and easy to scale.

    For six cookies, I use roughly 3 tablespoons melted butter, 6 tablespoons brown sugar, one egg yolk, vanilla, ½ cup flour, ¼ teaspoon baking soda, and about ⅓ cup chocolate chips.

    I bake them at 325°F for roughly 10 to 12 minutes.

    How to Keep Six Cookies Soft and Chewy

    The biggest mistake I see with tiny cookie batches is overbaking.

    A small cookie continues cooking on the hot tray after leaving the oven. I remove mine when the edges look set but the centers still appear slightly soft.

    Using an egg yolk rather than a whole egg also makes sense in a small recipe. It adds richness and moisture without introducing too much liquid.

    Several established baking sites, including Dessert for Two, Baking Mischief, Celebrating Sweets, and Live Well Bake Often, use similarly compact methods for small-batch cookies.

    Four-Ingredient Flourless Chocolate Mug Cake

    Four-Ingredient Flourless Chocolate Mug Cake

    When the oven feels like too much commitment, I make a mug cake.

    Mash one ripe banana until almost smooth. Mix in 2 tablespoons almond butter and 2 tablespoons cocoa powder. I sometimes add a teaspoon of chocolate chips for extra texture.

    Transfer the mixture to a lightly greased mug and microwave it for about one minute.

    This is one of the most useful easy small batch dessert recipes for nights when I want dessert immediately. There is no flour to measure and almost nothing to wash.

    Microwave power varies, so I check the center before adding more time. Ten extra seconds can make a noticeable difference in such a small dessert.

    No-Bake Mini Protein Cheesecake Cups

    No-Bake Mini Protein Cheesecake Cups

    Not every small dessert needs an oven.

    For two small cheesecake cups, I blend 1 cup cottage cheese with ¼ cup cream cheese, 1 tablespoon maple syrup, and 1 teaspoon vanilla. I blend longer than I think necessary because the texture improves dramatically when the cottage cheese becomes completely smooth.

    I spoon the filling over crushed graham crackers and chill the cups for about 30 minutes.

    Fresh berries, shaved chocolate, or a little lemon zest work well on top.

    This recipe gives me a chilled option when brownies or cookies feel too heavy.

    How I Choose the Right Small-Batch Dessert

    Rather than choosing randomly, I use a simple craving-to-method system. This is the small-batch framework that has saved me the most time.

    Choose by Time

    If I have five minutes, I make a mug cake.

    If I have 20 to 30 minutes, I choose cookies or ramekin brownies.

    If I can wait while dessert chills, I make cheesecake cups.

    This approach removes the most frustrating part of baking: starting a recipe before realizing it takes longer than expected.

    Choose by Craving

    For deep chocolate flavor, I choose brownies.

    For crisp edges and chewy centers, cookies win.

    For something soft and almost pudding-like, I choose a mug cake.

    For a cool, creamy dessert, I choose cheesecake cups.

    That makes easy small batch dessert recipes more useful than simply shrinking full-size recipes. Each method solves a different craving.

    Small-Batch Baking Tips I Actually Use

    Small recipes leave less room for measuring mistakes. I level flour carefully instead of scooping it tightly into the measuring cup.

    I also use the smallest practical bowl. A large bowl spreads tiny quantities of butter and sugar across too much surface area, which makes proper mixing harder.

    Room-temperature ingredients help when making brownies and cookies. Cold ingredients can make butter mixtures uneven.

    For oven recipes, I start checking slightly early. Small portions can move from perfectly baked to dry very quickly.

    One more trick has made a surprising difference: I write the expected yield beside the recipe before I begin. If a six-cookie recipe suddenly produces nine portions, I know my sizing changed and the baking time may need adjustment.

    That simple yield check is especially valuable when testing easy small batch dessert recipes in different pans or ramekins.

    Frequently Asked Questions

    1. What are the easiest small batch desserts for two?

    Brownies in ramekins, six-cookie batches, mug cakes, and mini cheesecake cups are among the easiest options because they require little equipment.

    2. Can I divide a regular dessert recipe in half?

    Sometimes, but eggs and leavening can make scaling difficult. Purpose-built small-batch recipes usually give more consistent results.

    3. What are easy small batch dessert recipes without an oven?

    Mug cakes and chilled cheesecake cups are practical choices. No-bake pudding, mousse, and refrigerator desserts also work well.

    4. Can I freeze small-batch cookie dough?

    Yes. Portion the dough first, freeze the individual pieces, and bake only the number you want later.

    Sweet Tooth Handled, Leftovers Avoided

    I no longer think dessert needs to mean a full cake, three dozen cookies, or a refrigerator packed with leftovers. Easy small batch dessert recipes give me the part I actually want: something freshly made, properly portioned, and ready without turning the kitchen upside down.

    If you want the fastest starting point, make the mug cake. If chocolate is non-negotiable, choose the ramekin brownies. For classic comfort, bake six cookies.

    Pick one craving, make just enough, and call dessert handled.

  • Greek Orange Cake Recipe With Phyllo Dough That Drinks Up Every Drop of Syrup

    Greek Orange Cake Recipe With Phyllo Dough That Drinks Up Every Drop of Syrup

    The first time I made this Greek orange cake recipe with phyllo dough, I expected crisp layers similar to baklava. Instead, the phyllo disappeared into the batter, absorbed a fragrant orange syrup, and turned into one of the most unusual cakes I had ever tasted. The result was soft, citrusy, lightly custard-like, and incredibly moist without feeling heavy.

    Known as Portokalopita, this traditional Greek dessert proves that phyllo can do far more than create flaky pastry layers. By drying, crumbling, and folding it into a yogurt-based orange batter, you create a cake with a tender texture that soaks up syrup beautifully. 

    I’ll walk you through the exact method, including how to prevent gummy phyllo, avoid a soggy center, and build a bright orange flavor that tastes even better the next day.

    What Is Portokalopita?

    Portokalopita is a traditional Greek orange phyllo cake soaked in citrus syrup. Its name combines the Greek words for orange and pie, although Americans may find its texture closer to a moist pudding cake than a conventional pie.

    Instead of using flour as the main structural ingredient, the recipe relies on dried phyllo pastry. The brittle pieces absorb the batter while baking and then soak up the orange syrup without becoming as dense as a traditional flour cake.

    Greek yogurt provides creaminess and a subtle tang, while orange juice, orange zest, vanilla, and cinnamon create a bright Mediterranean flavor. The combination produces a tender dessert that remains moist for several days.

    Portokalopita Recipe Overview

    Preparation takes about 30 minutes when using the quick oven-drying method for the phyllo. The cake needs approximately 50 to 60 minutes in the oven, followed by at least one to two hours of resting time.

    This recipe makes about 12 slices and fits a standard 9-by-13-inch baking pan. I consider the difficulty level easy, although the phyllo must be dried thoroughly to prevent gummy sections.

    Ingredients for Greek Orange Phyllo Cake

    Ingredients for Greek Orange Phyllo Cake

    For the orange syrup, you will need 1½ cups water, 1½ cups granulated sugar, ½ cup freshly squeezed orange juice, one cinnamon stick, and several strips of peel from one orange.

    For the cake, use one 16-ounce package of thawed phyllo dough, four large eggs, ¾ cup granulated sugar, one cup vegetable oil or mild olive oil, one cup plain Greek yogurt, ½ cup fresh orange juice, the zest of two large oranges, one teaspoon vanilla extract, one teaspoon baking powder, one teaspoon baking soda, and ¼ teaspoon salt.

    I prefer full-fat or 2% Greek yogurt because it produces a richer texture. Freshly squeezed juice and freshly grated zest also deliver a cleaner, stronger orange flavor than bottled juice or artificial extract.

    Why Must Phyllo Dough Be Dried First?

    Drying the phyllo is the most important step in this recipe. Soft phyllo sheets contain enough moisture to stick together when they enter the batter. That can create heavy, gummy clumps instead of the light and irregular texture Portokalopita should have.

    Preheat the oven to 200°F. Tear or cut the thawed phyllo sheets into loose strips and spread them across two large baking sheets. Dry them for 10 to 15 minutes, turning or separating them when necessary, until they feel brittle.

    Let the pastry cool before crushing it into small flakes. Do not grind it into powder. Pieces between roughly one and two inches provide enough structure while still absorbing the orange batter evenly.

    How to Make the Orange Syrup

    Combine the water, sugar, orange juice, orange peel, and cinnamon stick in a medium saucepan. Bring the mixture to a boil, reduce the heat, and simmer it gently for about 10 minutes.

    Remove the saucepan from the heat and let the syrup cool completely. Cooling matters because the temperature contrast between cooled syrup and hot cake helps the cake absorb the liquid gradually without immediately becoming waterlogged.

    Remove the cinnamon stick and orange peel before pouring the syrup over the finished cake.

    How to Make Portokalopita Batter

    Increase the oven temperature to 350°F and grease a 9-by-13-inch baking dish.

    In a large mixing bowl, whisk the eggs and ¾ cup sugar for three to four minutes. The mixture should look pale, frothy, and slightly thickened. This step incorporates air and helps keep the finished cake from feeling overly heavy.

    Whisk in the Greek yogurt, orange zest, vanilla, baking powder, baking soda, and salt. Slowly add the oil and orange juice, mixing until the batter looks smooth and evenly combined.

    How to Add Phyllo Without Creating Clumps

    How to Add Phyllo Without Creating Clumps

    Add the dried phyllo one handful at a time. Fold each handful into the batter before adding the next.

    Do not dump all the pastry into the bowl at once. The dry pieces can stick together before they become evenly coated, producing dense pockets inside the cake.

    Continue folding gently until the phyllo is distributed throughout the batter. Pour the mixture into the prepared baking pan and spread it into an even layer.

    How Long Should Portokalopita Bake?

    Bake the cake for approximately 50 to 60 minutes. The surface should become deeply golden, and the center should appear set rather than wet or jiggly.

    Insert a toothpick into the center. It should come out clean or with a few moist crumbs attached. If the top browns too quickly before the center sets, loosely cover the pan with aluminum foil during the final part of baking.

    Because oven temperatures vary, begin checking the cake around the 45-minute mark.

    How to Soak Portokalopita Without Making It Soggy

    Remove the cake from the oven and immediately pierce the surface in several places with a clean skewer or toothpick. These small openings allow the syrup to move more evenly through the cake.

    Slowly ladle the cooled syrup over the hot cake. Pause between additions so the liquid can absorb instead of pooling heavily on top.

    Let the Portokalopita rest at room temperature for at least one to two hours before slicing. Cutting too early can release unabsorbed syrup and make the center seem wetter than it actually is.

    Why Does Portokalopita Taste Better the Next Day?

    I think this cake tastes even better after an overnight rest. The orange syrup spreads more evenly through the phyllo, while the cinnamon, vanilla, yogurt, and citrus flavors become more balanced.

    That makes Portokalopita an excellent make-ahead dessert for Thanksgiving, Christmas, Easter, summer gatherings, or Greek-inspired dinner parties. Prepare it the day before, refrigerate it after it cools, and bring it closer to room temperature before serving.

    How to Serve and Store Greek Orange Cake

    How to Serve and Store Greek Orange Cake

    Serve Portokalopita at room temperature on its own or with a modest scoop of vanilla ice cream. Plain Greek yogurt also provides a tangy contrast to the sweet orange syrup.

    Store leftovers in an airtight container or cover the baking dish tightly and refrigerate it. The cake remains moist because of the syrup and generally keeps well for several days.

    Avoid reheating it aggressively. A refrigerated slice usually needs only 20 to 30 minutes at room temperature to regain its soft texture and vibrant orange flavor.

    Frequently Asked Questions (FAQs)

    1. Can I use frozen phyllo dough for Portokalopita?

    Yes. Frozen phyllo works well and is widely available in US grocery stores. Thaw it according to the package instructions before separating and drying the sheets.

    2. Why did my Greek orange phyllo cake become gummy?

    The phyllo may not have been completely dry, or it may have been added to the batter too quickly. Fold it in gradually to keep the pieces separated.

    3. Can I use olive oil instead of vegetable oil?

    Yes. Choose a mild or light olive oil unless you want a strong, peppery olive flavor in the finished dessert.

    4. Can I prepare Greek orange cake recipe with phyllo dough ahead of time?

    Yes. Preparing it one day ahead gives the syrup more time to distribute and allows the citrus flavor to deepen.

    The Secret Is Patience, Not Pastry Skill

    What I enjoy most about this Greek orange cake recipe with phyllo dough is how it transforms an ordinary package of phyllo into something completely unexpected. The pastry disappears into the orange batter, yet it creates the tender structure that allows the cake to hold so much syrup.

    Dry the sheets until brittle, fold them in gradually, pour cooled syrup over the hot cake, and give the dessert enough time to rest. Those simple details produce a moist, fragrant Portokalopita that tastes authentic, looks inviting, and is surprisingly easy to recreate in an American kitchen. If you are thinking about how to create a cafe-style dessert experience, serve each slice neatly with a small garnish, a good cup of coffee, and simple tableware that lets the cake stand out.

  • Indian Milk Sweets Without Condensed Milk: Traditional and Easy Favorites

    Indian Milk Sweets Without Condensed Milk: Traditional and Easy Favorites

    Whenever I make mithai at home, I find that some of the best recipes start with surprisingly basic dairy ingredients. Whole milk, milk powder, paneer, sugar, and ghee can create everything from soft peda to caramelized milk cake without depending on a can of sweetened condensed milk.

    Traditional Indian milk sweets without condensed milk generally follow one of two approaches. You can slowly reduce full-fat milk until concentrated milk solids develop, or use milk powder with milk, sugar, and ghee for a faster alternative. 

    Both methods can produce rich homemade desserts that work beautifully for Diwali, Holi, family celebrations, dinner parties, or simply an after-dinner treat.

    What Indian Sweets Can You Make Without Condensed Milk?

    Many classic Indian sweets existed long before condensed milk became a popular shortcut. Traditional cooks achieved richness by simmering milk until much of its water evaporated, creating concentrated milk solids known as khoya or mawa.

    For American home cooks who may not find fresh khoya easily at a local supermarket, whole milk and full-fat milk powder offer practical alternatives. Paneer can also create the soft, slightly grainy consistency required for certain desserts.

    The right method depends on whether you want traditional slow-cooked flavor or a quicker weeknight-friendly recipe.

    Which Traditional Indian Milk Sweets Use Reduced Whole Milk?

    Palkova or Therattipal

    Palkova, also known as paal kova or therattipal, is a classic South Indian milk sweet built around simplicity. Full-fat milk cooks slowly with sugar until it becomes thick, grainy, and almost fudge-like.

    The technique requires patience because rushing milk over high heat can scorch the solids. I prefer a heavy-bottomed pan and steady heat, stirring more frequently as the mixture thickens.

    The result has an intensely milky flavor without needing complicated ingredients.

    Indian Milk Cake

    Indian Milk Cake

    Indian milk cake is especially interesting because of its grainy texture and caramelized appearance. Whole milk is reduced considerably before a small amount of lemon juice or another acidic ingredient lightly curdles it.

    Sugar and ghee are then incorporated as the mixture thickens. Slow cooling helps create the recognizable two-toned interior.

    It takes longer than an instant milk powder sweet, but the deep dairy and caramel notes make the extra effort worthwhile.

    Rabdi

    Rabdi, sometimes spelled rabri, is a creamy North Indian dessert made by slowly reducing full-fat milk.

    As the milk simmers, layers of cream form on its surface. Instead of discarding them, I collect and return these layers to the reduced milk to create the characteristic lachha texture. Sugar, cardamom, saffron, pistachios, and almonds add sweetness and aroma.

    Rabdi tastes excellent chilled and can also accompany jalebi, malpua, or gulab jamun.

    Traditional Kalakand

    Kalakand stands apart because its ideal texture is moist and distinctly grainy rather than smooth and firm.

    A traditional approach combines fresh paneer or chena with milk that has been substantially reduced. Sugar sweetens the mixture while gentle cooking brings everything together.

    Avoid cooking it completely dry. A little retained moisture gives good kalakand its soft, delicate texture.

    Basundi

    Basundi

    Basundi also starts with slowly simmered whole milk, but its finished consistency is generally smoother and more pourable than rabdi.

    Cardamom, saffron, sugar, almonds, and pistachios complement the concentrated milk flavor. I especially like serving basundi chilled, although it can also be enjoyed warm.

    Which Quick Indian Sweets Can You Make With Milk Powder?

    Milk Powder Burfi

    Milk powder burfi is one of the easiest places to start if you are new to homemade mithai.

    Milk powder, liquid milk, sugar, and ghee cook together until the mixture thickens and starts leaving the sides of the pan. It is then transferred to a greased or parchment-lined pan, allowed to set, and cut into squares or diamonds.

    Cardamom provides classic flavor, while pistachios, almonds, or saffron make it more festive.

    Instant Milk Peda

    Instant peda offers another convenient way to use milk powder. Instead of reducing whole milk for hours, milk powder provides concentrated dairy solids from the beginning.

    I cook it gently with milk, sugar, and a little ghee until it forms a soft mixture suitable for shaping. Once it cools enough to handle, it can be shaped into small discs and finished with cardamom, saffron, or chopped nuts.

    Watch the cooking time carefully. Overcooked peda can quickly become dry and crumbly.

    Milk Rolls

    Milk rolls provide a fun alternative to conventional burfi. Simple versions use milk, milk powder, and sugar cooked until thick enough to shape.

    After cooling, the mixture can be formed into cylinders and decorated with finely chopped pistachios. The presentation looks impressive even though the ingredient list remains remarkably simple.

    Paneer Malai Ladoo

    Fresh paneer is another useful option when you want a quick dairy-based sweet. Finely crumbled paneer can be gently cooked with sugar and milk powder until the mixture holds its shape.

    Once cooled, I roll it into small ladoos and garnish them with nuts.

    What Can Replace Condensed Milk in Indian Sweets?

    There is no single perfect substitute because condensed milk provides dairy solids, sweetness, and moisture simultaneously.

    Whole milk is my first choice when authentic flavor matters. Slowly reducing it naturally concentrates the dairy solids and creates the foundation for khoya-style desserts.

    Milk powder is better when time matters. It works particularly well for burfi, peda, and milk rolls. Khoya or mawa provides exceptional richness for traditional mithai, while paneer or chena creates the soft, grainy structure needed for kalakand and related sweets.

    Evaporated milk can also shorten the reduction process for US home cooks. However, unlike sweetened condensed milk, evaporated milk does not contain added sugar, so the recipe needs separate sweetening.

    These options make Indian milk sweets without condensed milk practical even when you are working with ingredients from a typical American grocery store.

    Can You Make Chilled Indian Milk Desserts Without Condensed Milk?

    Absolutely. Malai kulfi traditionally gets its dense creaminess from reduced whole milk rather than condensed milk. Cardamom, saffron, pistachios, and almonds can provide the familiar aromatic flavor.

    Phirni offers another option. Ground rice naturally thickens milk into a smooth pudding that tastes especially good after chilling.

    Doodh pak similarly combines milk and rice with sugar, cardamom, saffron, and nuts. These desserts are excellent choices when you want something creamy rather than a firm mithai.

    How Do You Prevent Homemade Milk Sweets From Becoming Dry?

    Heat control is crucial. I use a heavy-bottomed saucepan and avoid aggressively boiling milk just to save time. High heat can scorch milk solids before enough liquid evaporates.

    Remember that burfi and peda continue firming as they cool. Removing them from the stove while they remain slightly soft can prevent a dry or crumbly final texture.

    For kalakand, preserving some moisture is even more important because its softness is part of its signature character.

    How Should You Store Homemade Indian Milk Sweets?

    How Should You Store Homemade Indian Milk Sweets?

    Dairy-heavy sweets generally benefit from refrigeration, especially in a warm kitchen. I let them cool before placing them in an airtight container.

    Moist desserts such as kalakand, rabdi, basundi, and phirni should be refrigerated promptly. Firmer sweets such as burfi and peda may tolerate brief periods at room temperature, but refrigeration is the safer choice for longer storage.

    For the best texture, let refrigerated burfi or peda sit at room temperature briefly before serving.

    Frequently Asked Questions About Indian Milk Sweets

    1. What are the easiest Indian milk sweets without condensed milk?

    Milk powder burfi, instant peda, milk rolls, and paneer malai ladoo are excellent beginner choices because they avoid lengthy milk reduction.

    2. Is milk powder the same as condensed milk?

    No. Milk powder is dehydrated milk with most moisture removed, while sweetened condensed milk is concentrated liquid milk containing a substantial amount of added sugar.

    3. Can I make khoya at home from regular milk?

    Yes. Traditional khoya is made by slowly simmering full-fat milk until most of its moisture evaporates and concentrated milk solids remain.

    4. Which milk works best for traditional Indian sweets?

    Whole milk is usually the best choice because its higher fat content produces richer flavor and better texture. For US shoppers, standard whole milk is generally preferable to reduced-fat or skim milk for these recipes.

    Skip the Can and Make Mithai the Traditional Way

    I think homemade milk sweets become much more interesting once you understand that condensed milk is only a shortcut, not a requirement. Slowly reduced whole milk gives palkova, rabdi, milk cake, and basundi their characteristic richness, while milk powder makes burfi, peda, and milk rolls much faster.

    If you are starting out, I recommend trying milk powder burfi before progressing to slower recipes such as palkova or milk cake. Once you understand how milk changes as it reduces, making Indian milk sweets without condensed milk becomes much easier—and far more rewarding. 

    These sweets are also a great choice when learning how to create a beautiful dessert table, because their different colors, shapes, and textures make the display feel varied and inviting.